Showing posts with label easy. Show all posts

Thursday, June 20, 2013

Little Chef: Sopapillas

While, these aren't the genuine article when it comes to Sopapillas, this is a similar idea, great to do with a three year old, and very delicious. Not all kitchen adventures have to be complicated.
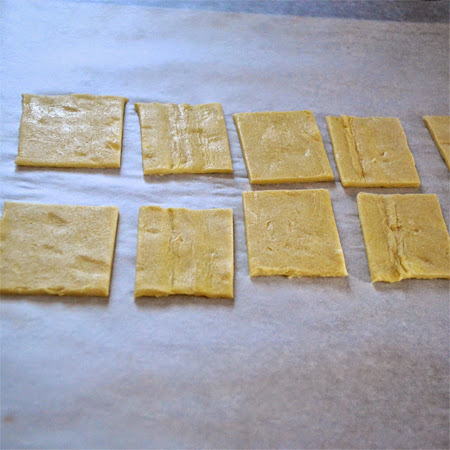
Thaw some frozen puff pastry (such as Pepperidge Farms). Cut into squares and bake according to package directions.
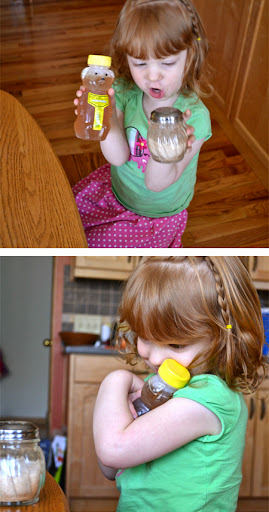
Get the cinnamon sugar and honey ready. Feel free to hug the honey bear.
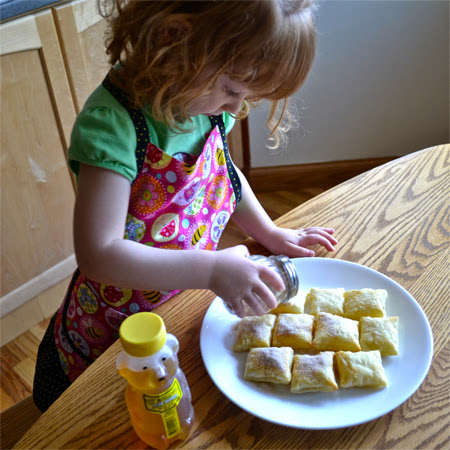
Sprinkle with cinnamon sugar right out of the oven.
Drizzle with honey.  Even Buddy got in on the action.
Enjoy!

Have a Happy Day!

~MJ

Wednesday, March 13, 2013

A Better Burp Cloth

I know a lot of pregnant ladies lately, so I foresee a lot of gift giving in my future. One of my mother's classic baby gifts is a receiving blanket and a set of burp cloths. They aren't your average burp cloths though. A unique shape makes them, in my opinion, a better burp cloth. So, I thought I'd share.
A good friend just had her third baby a few weeks ago, so I decided to put some together. You can never have enough burp cloths, right? I usually just use flannel, but because I liked terry cloth so much with my babies, I decided to use flannel on the front and terry cloth on the back.
And because I had a lot of terry cloth, I thought I'd put together a couple of wash cloths as well. I haven't actually given these to my friend yet and I don't know if she reads my blog, so they might not end up being much of a surprise. Oh well.

Interested in making some burp cloths yourself?  Here's the pattern:

Better Burp Cloth Tutorial

Here's what you'll need:

Burp cloth pattern (Note: I couldn't fit the pattern on my 8.5 X 11 paper, so you'll need to double up the fabric and add .25" before the fold when cutting.)
1/2-1 yard Flannel (depends on how many you'd like to make)
1/2-1 yard Terry Cloth
Thread, Pins, Scissors

Here's how I made them:
1. Cut out pattern in flannel and terry cloth. 
2. Pin flannel and terry cloth together (right sides together). Sew a .25" seam around the edge. Make sure to leave an opening for turning.
3. Turn right side out and iron.
4. Add some decorative stitching about and inch in from the edge and you're done. My machine isn't fancy, so I just used one of my stretch stitches around the edge.
Do you think my friend's baby will enjoy spitting up on these beauties? I hope so.
Have a Happy Day!

~MJ


Tuesday, October 9, 2012

Sweet Halloween Treat: Ghosts in the Graveyard

Wow, two recipe posts in two days! My sister-in-law made the cutest Halloween treat for our Sunday family get-together, so I had to share.  We were celebrating my nephew's birthday and it was so fun to have a sweet treat.  She got the idea courtesy of Kraft and mustered her creativity. I do believe that the substitution of Milano cookies was pure genius.  Didn't she do a great job?
Buddy checking it out.
My mother took one look at the dessert and called me over to take photos for the blog. (Thanks, Mom!) It is such a fun idea for a seasonal dessert.  Plus, it's easy and delicious.
I'm pretty sure my nephew was happy about it, too:
He was hamming it up during the birthday song.
Here's the link to the Kraft Ghosts in the Graveyard recipe.

Have a Happy Day!

~MJ

Monday, September 24, 2012

Tangled Weave Pumpkin Basket

Inspiration struck over the weekend. I've been slowly adding to my Autumn decor, but I haven't wanted to actually start full on decorating for Fall. Well, apparently I'm really gearing up, because I had an idea for an Autumn project that just couldn't wait. I put my daughter's halloween costume on hold (yet again) in favor of creating a pumpkin basket to add to my decor.
I wanted the actual shape of a pumpkin, so I bought a small pie pumpkin for my form. I cut it in half and pulled out the pulp and seeds (mmm roasted pumpkin seeds. I'll post about that tomorrow).
Then I took over the majority of the dining room table for the entire weekend and went to work. I covered my work surface in wax paper and I wrapped each half of the pumpkin in plastic wrap. Then I began wrapping each half in yarn, smoothing Elmer's glue over the yarn as I worked. When I was done with that, I actually mixed some glue with a little water in a bowl and, using a brush, smoothed on a little more glue here and there, where I thought the basket might need a little more strength.
It took quite a while for it to dry. Even with a little help from my blow dryer, it took this the afternoon and over night for it to dry. Once the yarn was stiff, I pulled the plastic wrap from the pumpkins and peeled it carefully away from the yarn. There was some dried glue here and there that required some clean up, but all in all, it worked really well.
Plus, I think it turned out pretty cute. I'm thinking of adding a couple of leaves to the top of it, but haven't found what I like yet. I think this will be a fun addition to my mantel decor for Fall.

Have a Happy Day!

~MJ

Sharing On:

Wednesday, September 19, 2012

Kaleidoscope DIY

We were at the toy store last week picking out a present for a friend. Buddy and Jellybean were fascinated by some kaleidoscopes that we saw there. They were pretty neat. I asked Buddy if he wanted to try and make one at home and he was all for it.
After a quick online search, I found this tutorial from Skip To My Lou. It was pretty simple and I had most of the supplies already. I won't post tutorial pictures here, so check out Skip to My Lou for instructions.
A couple of tips: make sure that all of the objects you put in your kaleidoscope are translucent and that you don't over fill it. You want some movement. It took some trial and error to get the proportions right and some switching out of objects to get it to work correctly. I had a lot of clear beads, but not a lot of color, so I ended up punching out a ton of tissue circles with my hole puncher. It worked great for adding some translucent color.

My kids are a little too little to help with assembly, but I wanted them involved. So, I devised an art project to create a cover for the kaleidoscopes.
I've been collecting lids from jars as we finished them. I thought they'd work well for some stamping with paint. Unfortunately, Buddy refused to paint and this is what Jellybean decided to do instead:
So, I ended up making the covers myself. After the covers dried, I wrapped them around the kaleidoscopes.
Buddy's preschool class is talking about the sense of sight today, so Buddy decided to bring his kaleidoscope to school to show his class.
While we were taking photos this morning, Buddy saw something in the sky and got really excited.
He made me take a picture:
It's an "X" of course!
Jellybean was pretty excited about that, too. ;)

Have a Happy Day!

~MJ

Sharing On:

Tuesday, August 21, 2012

BLT Pasta

Tomato, Bacon, Spinach Pasta
I decided to search my Pinterest recipe board for a new recipe to make with my fresh garden tomatoes. I found one that I thought would be fun to try: BLT Pasta. It sounded delicious and it turns out that it was delicious.
Tomato, Bacon, Spinach Pasta
BLT Pasta
Adapted from Some The Wiser

Ingredients
5 strips bacon, diced
1 cup grape tomatoes, halved

3 San Marzano or other plum type tomatoes, diced
1 teaspoon sugar
3/4 cup leeks, thinly sliced
1/2 cup dry white wine, or white grape juice
3/4 cup chicken broth
2 teaspoons red wine vinegar
1/2 teaspoon red pepper flakes
7 oz dry rotini pasta
2 cups fresh baby spinach leaves
1/4 teasppon dry thyme

For Garlic Toast Bread Crumbs:

2 cloves of garlic, finely minced
2 cups French bread, cubed
2 tablespoons olive oil
salt


Directions
Cook pasta according to package directions. Drain and set aside.

Whisk together minced garlic and olive oil.  In a large bowl, combine bread crumbs, oil, and garlic.  Stir, making sure bread is thoroughly coated with oil.  Toast coated bread crumbs in a large skillet over medium heat until golden, stirring often.  Season with salt and set aside.

Saute the bacon in a large skillet over medium heat.  Cook until crisp, then set aside on paper towel.   Reserve 2 tablespoons bacon drippings, and drain off remaining oil.

Caramelize the tomatoes and sugar in the bacon drippings in large skillet or sauce pan, over medium heat.  Cook until tomatoes begin to brown, 3 to 5 minutes.  Add the leeks and cook for an additional 3 to 5 minutes, or until leeks soften and plum tomatoes begin to break down.

Deglaze with wine and allow sauce to simmer until the wine is nearly evaporated and sauce is thick.  Add the broth, vinegar, and pepper flakes.  Simmer until reduced by 1/3, approximately 5 minutes.

Add the spinach, thyme, and bacon to the sauce, then add the cooked pasta.  Toss lightly until pasta is well coated with sauce.  Season with salt as needed.  Top each serving with garlic toast bread crumbs.

Makes 4 servings.

Tomato, Bacon, Spinach Pasta
Have a Happy Day!

~MJ

Sharing on:


Tuesday, August 7, 2012

Indoor Fun: Animal Color Bath

I've mentioned before that we just made it through a couple of weeks where we were basically house bound. Between illness and the heat outside, we didn't have much choice but to hang out indoors. With two toddlers, that gets old fast.  I scrambled to find some activities that were easy to do (I was sick after all) and that would keep the kids' attention for a fair amount of time. One activity that turned out to be a favorite was the Animal Color Bath.
I found the Color Bath Dropz at the grocery store. You can add one or more color tablets to change the color of the water. We experimented with the tablets and found that it was a fun learning experience. It's really fun to see how the water can change from red to orange by the addition of a yellow tablet or yellow to green by adding a blue tablet, etc.  The kids loved playing in the water.
They also loved washing their farm animals. I gave them each a wash cloth and a towel to dry the animals on.  It's absolutely amazing how something so simple can be so engaging.  They spent a good 45 minutes washing their animals and playing in the water. 45 minutes of peace, ahhh.

Have a Happy Day!

~MJ

Sharing at:
The Philosopher's WifePhotobucket

Tuesday, July 31, 2012

Foam Printing

I've always been fascinated by block printing. So, I was really inspired when I saw this idea (from Pinterest, of course) for foam printing. Jellybean and I decided to experiment with this new medium.  Buddy did not participate as he has little to no interest in paint. It's a tad too messy for his taste.
We went to town on a stack of foam plates from the dollar store.  I used water based acrylic paint and Jellybean used finger paints.  We found that neither were thick/tacky enough for a perfect result, but they worked in a pinch. A printmaking ink like one from Speedball would work better. We both used a sharpened pencil to draw with. After a little experimentation, I found it a little easier to work with a letter opener that I had on hand.
I'm finding that Jellybean has a real artistic flare.  She felt that her print needed...something more...
Now that's a piece of art worthy of the refrigerator! Beautiful!

Our experiment was a really good jumping off point. I plan to explore this art form a little more once I have my hands on a higher quality ink.  I'll have to see where that goes.  

Have a Happy Day!

~MJ

This post is partying here:

Tip Junkie handmade projectsToday's Creative BlogLessons Learnt JournalPhotobucketArtsy Play Wednesday with Capri +3