Showing posts with label craft. Show all posts

Wednesday, June 12, 2013

Simple Craft: Father's Day Mouse Pad

D and I already decided on a big gift for Father's Day, but I always like to give him something small and crafty from the kids as well. Here's what I did last year. This year, I noticed the lack of mouse pad on D's computer desk. So, I thought I'd buy a cheap pad to fill the need. Then, I thought, why not decorate said mouse pad by tracing all of our hands? So, I did. And since he doesn't really read this blog, I figured I'd blog about it too. Awesome.
I started by tracing everyone's hands. I'm sure D thought it was mighty strange my stalking him for several days nagging him to let me trace his hand. By the way, it is next to impossible tracing a 7 week old's hand. Just in case you were wondering. If you must do it, definitely wait until they are very asleep and even then, trace as quickly as possible.
I cut out the hand tracings and then traced those with some fabric pens. I got an extra large pad, so there was plenty of room.
I think it will look nice when he is using it. Plus, it's always a nice reminder of how small those hands were once. Simple and useful, that makes a good gift in my book. I hope he likes it.

Have a Happy Day!

~MJ

Tuesday, June 4, 2013

Wanting to say Thank You!

After bringing our new baby boy home, I couldn't believe the generosity of our neighbors. Several of them brought us dinners. I didn't have to lift a finger or go grocery shopping for a week and a half after Teddy Bear was born.  Then, two weeks later, a friend and neighbor showed up at the door with two take and bake pizzas. She saved the day!  We are fairly new to the neighborhood, so I was pretty blown away. I couldn't be more humbled and grateful for the kind people that live in this neighborhood. We even had neighbors drop by with surprise gifts, nothing big, but so very nice and useful.
I'm certain that I haven't adequately thanked all those that have helped us in the last 6 weeks, but I did put together some simple thank you treats for those that brought us dinners. It was such a simple thing that I thought I'd share.
All you need is some ink, stamps, paper and treats to share:
Stamped paper.
Homemade pencil eraser heart stamp.
I love gummy frogs! I hope my neighbors did, too.
Have a Happy Day!

~MJ

Monday, January 14, 2013

Pocket Pal: Sweetie the Cat (and Tutorial)

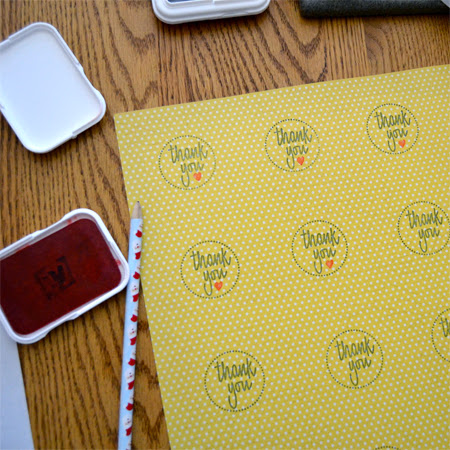
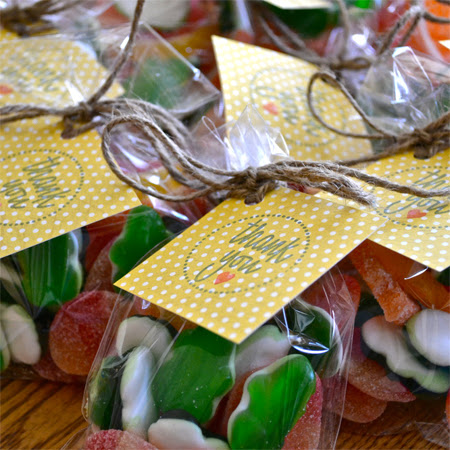
We have been stuck indoors a ton over the last week. If it wasn't the super cold temperatures and terrible air quality, it was a massive snow storm that decided to roll through. Physically, I've been feeling exhausted, but mentally and creatively, I've been going absolutely stir crazy.  I completed four of my pins on Pinterest in the last couple of days (more on that tomorrow) and yesterday, during nap time, I decided to make something fun for Jellybean as well.
Jellybean is going through a HUGE kitty cat stage. Half the day, she wants to play "kitties" which involves a lot of crawling around and meowing. ("You be the mommy kitty and I'll be the baby kitty.") I thought with some of my creative energy, I'd go with her current interest and make a little stuffed cat.
I asked her if she wanted a big cat or a little cat. She indicated that she wanted something small. So, I sketched out a little cat softie and got to work. I can't tell you what satisfaction there is in sketching an idea out and then actually creating something from that idea.
I was in such a hurry to get this done, I didn't take a lot of process shots, so I'll give you a brief explanation of how this came together and I'll trust you to take it from there if you are so inclined.
First, I did the above sketch and then cut the sketch out and cut apart the pieces.
Next, I increased the head, body, arm, and leg about a 1/4" and used that to create my pattern.
With pattern in hand, I grabbed some scrap fabric and cut out 2 head and dress pieces and 4 arm and leg pieces.
This is where it gets fuzzy. I started pinning and sewing and basically forgot my camera existed.
So it went from beginning to pin the pieces together to complete before I knew it.
Here are the instructions for the missing pictures, bear with me. I hope it makes sense:
-Pin the head and body pieces together (right sides together, pictured above).
-Pin the arm pieces together and then the leg pieces (right sides together). Sew arm and leg pieces leaving the top of all pieces open for turning and stuffing.
-Sew a single seam across the head and body pieces and then pin together the head/body pieces (right sides together). Sew the head/body, but leave spaces for the arms and legs to be attached.
-Turn all pieces right side out. Stuff legs and arms with batting.
-Attach arms to body and then stuff the head and body.
-Attach legs to body.

I started out sewing by hand and then decided that I would rather use my machine. This doll is small enough that either method would work. I actually forgot to leave the bottom of the body open when sewing and had to rip the seam. (that's always my favorite.)

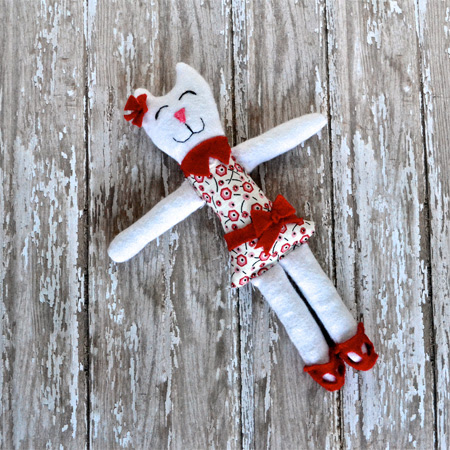
Finally, I added a few details to the doll. I pulled out some felt for the collar, bows and shoes. Then I used some floss to embroider the face.
I think she turned out sweet. Jellybean must have thought so too. She named her "Sweetie".
Well that burned some of my creative energy. I'll be interested to see what my fingers get itching to do next.

Have a Happy Day!

~MJ

Sharing on:


Wednesday, December 19, 2012

Pine Cone Bird Feeders

I visited a local art market a couple of weeks ago. While I was there, I happened to see someone selling bird feeders. On closer inspection, I realized that they were just pine cones coated in peanut butter and bird seed.  I don't know how much they were charging for those, but you know they made them basically for free.
Making these bird feeders is a fun activity to do with the kids and it's nice for the birds as well. Last year, I made a different type of bird feeder (there are lots of recipes out there), but thought that this would be an easier project for the kids. All you need is pine cones, peanut butter, bird seed and twine.

The kids and I went to the park to gather pine cones. We gathered them in a plastic sack and then cleaned them when we got home. I knew there would be bugs, but I didn't know how many and how crawly it would make me feel. I put the pine cones in the sink and first cleaned them with dish detergent. I then drained the sink and discovered that there were still a bunch more bugs. (mostly springtails) So, I filled the sink with warm water again and added vinegar to the mix. I let the pine cones soak for a bit then drained the sink and sprayed the pine cones off thoroughly. After all of that, I let the pine cones dry in the sink. While the birds probably wouldn't mind some bugs, I certainly didn't want them in my house and kitchen. yuck.
Note: Buddy is wearing a "Super Buy" sticker from the grocery store. He and Jellybean think that Super Buy is the best super hero ever. 
After cleaning the pine cones, I just smeared the peanut butter on them and let the kids go crazy with the bird seed.
Jellybean was the best helper. Buddy was done after one. Jellybean helped me finish the rest.
I don't know if it was the moisture in the peanut butter or what, but after a day or so, the pine cones began to open up, which actually made them more attractive. Here's one that started to open up:
Most of them are more dramatic than that, but I had already wrapped them up to give as gifts to neighbors, so I don't have any pictures.

How's that for a ridiculously easy project to do with the kids? I hope the birds appreciate our efforts with all of the snow we've been getting.

Have a Happy Day!

~MJ

Sharing on:

Monday, December 10, 2012

Marshmallow Painting

The cold weather has us mostly indoors again and I've been trying to find some activities to do with the kids. I haven't been terribly crafty in that area lately.  A quick search on Pinterest (it saves the day once again) and I found this cute idea for edible painting.
Buddy doesn't love painting, so I wasn't sure how it would go over. It went amazingly well (his pre-school teacher will be impressed). Both kids spent a lot of time painting their marshmallows and really enjoyed themselves. For the paint, I mixed milk and food coloring. The "paint" was really thin, of course, but that didn't bother these artists.
I love how both Buddy and Jellybean really experimented with the colors. Once the marshmallows were completed, I placed them on a clean plate to dry and let the kids spend more time mixing the paint on their plates and then on some paper towels. That added another 15 minutes or so of creative play as well. The only disappointment was that they couldn't eat the marshmallows right away. I thought they might be a little less messy if they had a chance to dry.
When the marshmallows were ready, I put in a movie and let them eat their creations. It was just one of those afternoons...

Have a Happy Day!

~MJ

Thursday, December 6, 2012

Another Holiday Wreath

You may be wondering if I spent any time with my children this week. I'm pretty sure that's who I spent the majority of my time with, though to look at this blog this week, you may not know it.

I've just been in the mood to make things lately and have felt the need to take pictures and share (of course). So, here's the last project of the week. A really simple holiday wreath; completed during nap time yesterday. I had a grape vine wreath that has been sitting around since last year just beckoning to me. I also had a bag of holiday "doo-dads"(pine cones, small shiny balls and cinnamon sticks) that has been sitting around. I purchased it on sale last year as well. So, I sat down with my trusty glue gun and went to work.
This sweet little wreath has found its home on my mantel. As an added bonus, the cinnamon sticks still have some scent left. Weird how a quick project like this can lend such a sense of accomplishment. It's the little things I suppose.

Have a Happy Day!

~MJ

Sharing on:

Wednesday, October 31, 2012

Halloween Craft: Salt Dough Ghosts

For my birthday, last month, my awesome sister gave me all the ingredients to make some salt dough. With it she printed out this great idea from Family Fun for salt dough ghosts. I thought it would be a fun craft to do with my children on the day before Halloween.

It was a fun craft, unfortunately, I was the only one into actually making the ghosts.  Buddy decided that he wasn't interested in salt dough and Jellybean decided to work on her own projects. This included smashing two of my already created ghosts... Anyway, I had fun, Jellybean kept busy and I like my little "ghosties."

Here they are being created:
Jellybean working on her own project with some Halloween cookie cutters:
And then the ghosts after their short stint in the microwave, cooled and faces added:
While alive, two of these ghosts were sumo wrestlers. Can't you tell?
I don't know how these will hold up, but they will be adorable in my Halloween mantel next year if they are still in one piece. I love the additional craft idea my sister gave me for some spooky paper bag trees. Would be so cute with the ghosts in a Halloween table display.

If you are looking for a ridiculously easy Halloween craft today, this might be the ticket.

Have a Happy Day!

~MJ


Sharing on: 


Monday, September 24, 2012

Tangled Weave Pumpkin Basket

Inspiration struck over the weekend. I've been slowly adding to my Autumn decor, but I haven't wanted to actually start full on decorating for Fall. Well, apparently I'm really gearing up, because I had an idea for an Autumn project that just couldn't wait. I put my daughter's halloween costume on hold (yet again) in favor of creating a pumpkin basket to add to my decor.
I wanted the actual shape of a pumpkin, so I bought a small pie pumpkin for my form. I cut it in half and pulled out the pulp and seeds (mmm roasted pumpkin seeds. I'll post about that tomorrow).
Then I took over the majority of the dining room table for the entire weekend and went to work. I covered my work surface in wax paper and I wrapped each half of the pumpkin in plastic wrap. Then I began wrapping each half in yarn, smoothing Elmer's glue over the yarn as I worked. When I was done with that, I actually mixed some glue with a little water in a bowl and, using a brush, smoothed on a little more glue here and there, where I thought the basket might need a little more strength.
It took quite a while for it to dry. Even with a little help from my blow dryer, it took this the afternoon and over night for it to dry. Once the yarn was stiff, I pulled the plastic wrap from the pumpkins and peeled it carefully away from the yarn. There was some dried glue here and there that required some clean up, but all in all, it worked really well.
Plus, I think it turned out pretty cute. I'm thinking of adding a couple of leaves to the top of it, but haven't found what I like yet. I think this will be a fun addition to my mantel decor for Fall.

Have a Happy Day!

~MJ

Sharing On:

Wednesday, September 19, 2012

Kaleidoscope DIY

We were at the toy store last week picking out a present for a friend. Buddy and Jellybean were fascinated by some kaleidoscopes that we saw there. They were pretty neat. I asked Buddy if he wanted to try and make one at home and he was all for it.
After a quick online search, I found this tutorial from Skip To My Lou. It was pretty simple and I had most of the supplies already. I won't post tutorial pictures here, so check out Skip to My Lou for instructions.
A couple of tips: make sure that all of the objects you put in your kaleidoscope are translucent and that you don't over fill it. You want some movement. It took some trial and error to get the proportions right and some switching out of objects to get it to work correctly. I had a lot of clear beads, but not a lot of color, so I ended up punching out a ton of tissue circles with my hole puncher. It worked great for adding some translucent color.

My kids are a little too little to help with assembly, but I wanted them involved. So, I devised an art project to create a cover for the kaleidoscopes.
I've been collecting lids from jars as we finished them. I thought they'd work well for some stamping with paint. Unfortunately, Buddy refused to paint and this is what Jellybean decided to do instead:
So, I ended up making the covers myself. After the covers dried, I wrapped them around the kaleidoscopes.
Buddy's preschool class is talking about the sense of sight today, so Buddy decided to bring his kaleidoscope to school to show his class.
While we were taking photos this morning, Buddy saw something in the sky and got really excited.
He made me take a picture:
It's an "X" of course!
Jellybean was pretty excited about that, too. ;)

Have a Happy Day!

~MJ

Sharing On:

Thursday, August 16, 2012

We're Forever Blowing Bubbles

We love blowing bubbles at our house.  Who doesn't love blowing hundreds of bubbles and watching them burst around you or fly away across the neighborhood.  I've often wondered what my neighbors think when they see the results of our bubble blowing extravaganzas as the bubbles drift across their yards. The kids get such a kick out of chasing and popping the bubbles, too.
Up until now, my very favorite bubble solution was the kind from Gymboree. Their bubble blower is the absolute best as well. The only problem? When we ran out of our one and only bottle, I didn't have time to run out to the store, nor did I want to spend more money. As it turns out, I had everything I needed to make fantastic bubbles right in my kitchen and it was really easy, too.

Here's the recipe I went with:

Fantastic Bubble Solution
via Hellobee

Supplies:
Water
Liquid Dish Soap
Light Corn Syrup
Bottle or Container to store Bubble Solution
Straws
Tape

To make the bubble solution, you will need:
2 1/2 cups hot water
1/2 cup light corn syrup
1/2 cup liquid dish soap

Directions:
Add 1/2 cup light corn syrup to the hot water and whisk well until it is dissolved.  Slowly add the 1/2 cup liquid dish soap, and whisk well.
Pour the bubble solution into individual bottles or a container with a lid.  Let the solution rest for a few hours before using it for the best results.  (Though we used it immediately with pretty good results as well)

I didn't fuss with making anything pretty, but this bubble solution and makeshift blowers still did a fabulous job. The solution works awesome with my Gymboree blower as well. Yay!

Have a Happy Day!

~MJ

Sharing at:
PhotobucketI Heart Nap Time

Tuesday, July 31, 2012

Foam Printing

I've always been fascinated by block printing. So, I was really inspired when I saw this idea (from Pinterest, of course) for foam printing. Jellybean and I decided to experiment with this new medium.  Buddy did not participate as he has little to no interest in paint. It's a tad too messy for his taste.
We went to town on a stack of foam plates from the dollar store.  I used water based acrylic paint and Jellybean used finger paints.  We found that neither were thick/tacky enough for a perfect result, but they worked in a pinch. A printmaking ink like one from Speedball would work better. We both used a sharpened pencil to draw with. After a little experimentation, I found it a little easier to work with a letter opener that I had on hand.
I'm finding that Jellybean has a real artistic flare.  She felt that her print needed...something more...
Now that's a piece of art worthy of the refrigerator! Beautiful!

Our experiment was a really good jumping off point. I plan to explore this art form a little more once I have my hands on a higher quality ink.  I'll have to see where that goes.  

Have a Happy Day!

~MJ

This post is partying here:

Tip Junkie handmade projectsToday's Creative BlogLessons Learnt JournalPhotobucketArtsy Play Wednesday with Capri +3