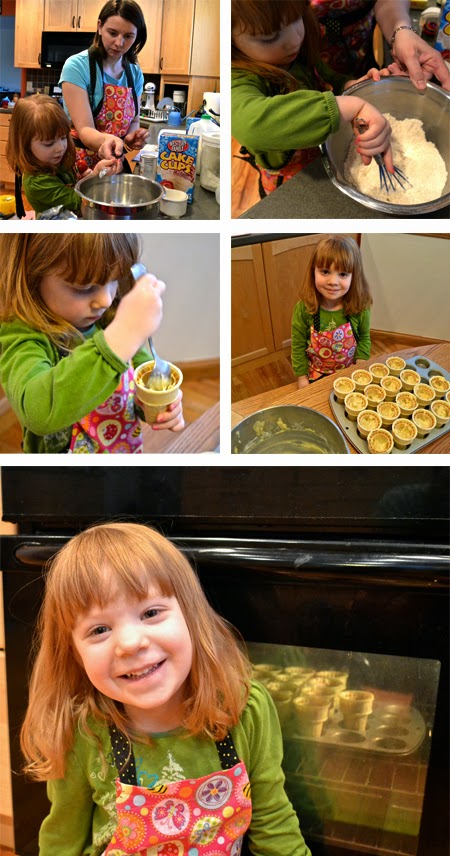
Back from a long hiatus on Little Chef posts. Jellybean has been begging to help me in the kitchen. I've been feeling badly because I let her help so little lately. When you have a nine month old that is attached to you it's hard to do the little planning that it takes to make our adventures in the kitchen run smoothly.
This little girl loves to bake, so we finally managed to find some time to get into the kitchen this past week. We made Cupcake Sundaes. Just choose any cupcake mix or recipe for homemade, pour it into some flat-bottomed ice-cream cones and bake. We just followed the recipe baking temperature and time.
Such an easy thing to make and allowed both kids to get creative after the cupcakes had cooled. I mixed up some cream-cheese frosting (you could use any frosting) and then put a dollop of whipped cream on top. The kids chose from the sprinkles I had in the cupboard. Turns out I had collected quite a few varieties. Do sprinkles have a shelf-life?
They were so much fun to eat, too.
A couple of things: When filling the cones with batter, fill just the stems so that the cake has room to rise. Also, the cones did get a little soggy the second day. The kids didn't seem to mind.
Definitely a pretty good alternative to ice cream on a cold, winter day.
Have a Happy Day!
~MJ
Showing posts with label little chef. Show all posts
Monday, January 27, 2014
Sunday, August 4, 2013
Little Chef: Banana Poppy Seed Muffins
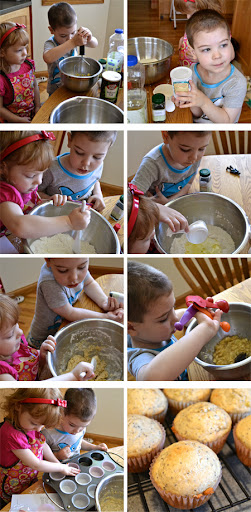
When Jellybeans says she wants to bake muffins, I just can't say no. A few weeks ago we found a particularly good recipe: Banana Poppyseed Muffins. Buddy helped this time around too (in his pajamas).
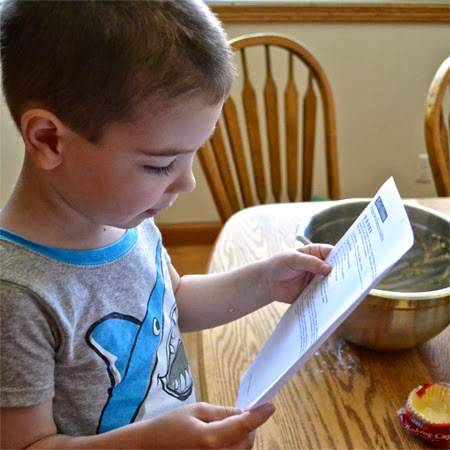
Because Buddy was helping, I decided to talk more about the recipe while we were mixing up the ingredients. He would read the ingredient needed in the recipe and then would help me find the right container. We also talked about why it is important to follow the recipe and about measurements.
Never were there two better helpers than these two kids. They mashed and poured and mixed and dumped. Then Jellybean got the liners ready and I filled them up and put the muffins in the oven.
This recipe made for two very happy children and even got the thumbs up from D. He's a tough judge and doesn't usually go for muffins. A big win on all counts.
1/2 cup sugar
1 1/2 tsp. baking powder
1/2 tsp. salt
1/4 tsp. baking soda
1 egg
1/2 cup milk
1/4 cup vegetable oil
2 medium ripe bananas, mashed (over ripe are fine as well)
2 1/2 tsp. poppy seeds
Because Buddy was helping, I decided to talk more about the recipe while we were mixing up the ingredients. He would read the ingredient needed in the recipe and then would help me find the right container. We also talked about why it is important to follow the recipe and about measurements.
Never were there two better helpers than these two kids. They mashed and poured and mixed and dumped. Then Jellybean got the liners ready and I filled them up and put the muffins in the oven.
This recipe made for two very happy children and even got the thumbs up from D. He's a tough judge and doesn't usually go for muffins. A big win on all counts.
Banana Poppyseed Muffins
yield: 12 muffinsIngredients:
1 1/2 cups all-purpose flour1/2 cup sugar
1 1/2 tsp. baking powder
1/2 tsp. salt
1/4 tsp. baking soda
1 egg
1/2 cup milk
1/4 cup vegetable oil
2 medium ripe bananas, mashed (over ripe are fine as well)
2 1/2 tsp. poppy seeds
Method:
In a small bowl, combine the flour, sugar, baking powder, salt and baking soda. In another bowl, combine the egg, milk and oil. Stir into dry ingredients just until moistened. Fold in bananas and poppy seeds.
Fill paper-lined muffin cups three-fourths full. Bake at 400 degrees for 15-20 minutes or until a toothpick comes out clean. Cool for 5 minutes before removing from pan to a wire rack. Serve warm. These also froze well.
Have a Happy Day!
~MJ
Labels:
baking,
banana,
kids,
little chef,
muffins,
poppy seed,
recipe
Wednesday, July 3, 2013
Little Chef: Banana Date Oat Bars
So, are you getting the impression that the girl pictured above enjoys baking? You would be correct.
We were back in the kitchen recently trying out a new simple recipe: Banana Date Oat Bars.
Simple indeed.
First mashing:
Then pouring:
Pan Prep:
Bake, cut into squares:
and enjoy:
Unfortunately, Jellybean didn't love the end results. I liked them more than she did. It was still a fun, easy baking project. The recipe could probably use a little more spice and may have benefitted from some nuts. (We are tree nut free in our house)
Oh and look, I'm even wearing my matching apron!
Try it out, tweak it, see how you and your little chef enjoy it.
~MJ
We were back in the kitchen recently trying out a new simple recipe: Banana Date Oat Bars.
Simple indeed.
First mashing:
![]() |
| What three year old doesn't enjoy mashing bananas? |
Then pouring:
![]() |
| First time I've ever used dates in anything. They're a bit ugly, but tasty. |
![]() |
| It's fun letting her get hands-on. |
![]() |
| Mmm, oaty goodness. Tiny Buddah approves. |
Unfortunately, Jellybean didn't love the end results. I liked them more than she did. It was still a fun, easy baking project. The recipe could probably use a little more spice and may have benefitted from some nuts. (We are tree nut free in our house)
Oh and look, I'm even wearing my matching apron!
![]() |
| You've got to love a selfie. |
Banana Date Oat Bars
Ingredients
2 large, very ripe bananas
1 teaspoon vanilla
2 cups rolled oats
1/2 teaspoon salt
1/4 cup pitted, chopped dried dates
Grated nutmeg or cinnamon
1 teaspoon vanilla
2 cups rolled oats
1/2 teaspoon salt
1/4 cup pitted, chopped dried dates
Grated nutmeg or cinnamon
Method
Heat the oven to 350°F and lightly grease a 9x9-inch square baking dish with olive oil or butter.
Peel the bananas and mash their flesh in a medium mixing bowl. Mash very thoroughly until no large chunks remain; the bananas should be essentially liquid. (You will have between 1 cup and 1 1/4 cup.) Stir in the vanilla. Add the oats and stir them in. Stir in the salt and dates.
Pat the thick mixture evenly into the baking pan. If desired, sprinkle the top lightly with nutmeg or cinnamon. Bake for 30 minutes or unti the edges just begin to crisp up.
Place the baking pan on a rack to cool. When the pan is mostly cool, cut into bars and enjoy.
Have a Happy Day!~MJ
Thursday, June 20, 2013
Little Chef: Sopapillas
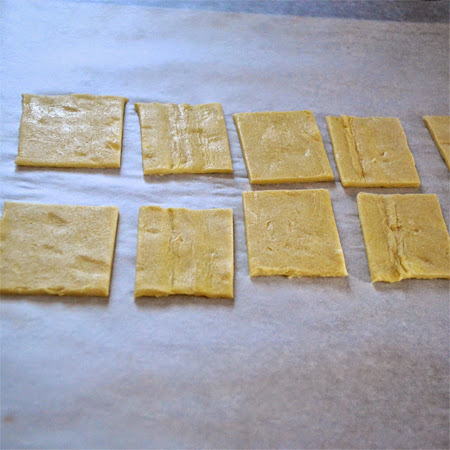
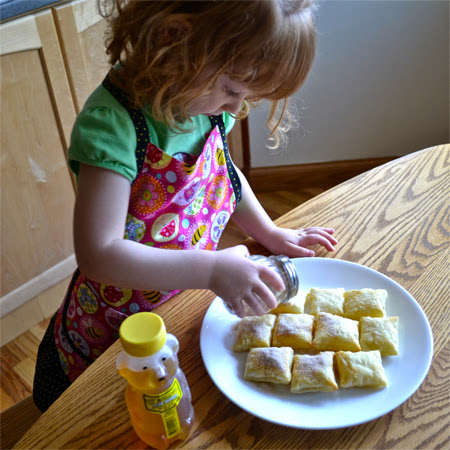
While, these aren't the genuine article when it comes to Sopapillas, this is a similar idea, great to do with a three year old, and very delicious. Not all kitchen adventures have to be complicated.
Thaw some frozen puff pastry (such as Pepperidge Farms). Cut into squares and bake according to package directions.
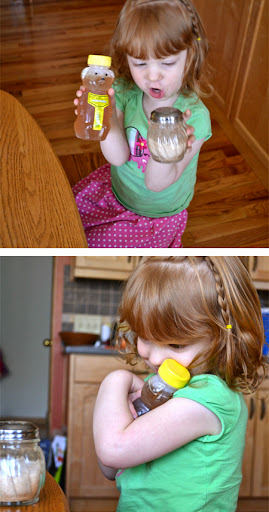
Get the cinnamon sugar and honey ready. Feel free to hug the honey bear.
Sprinkle with cinnamon sugar right out of the oven.
Drizzle with honey. Even Buddy got in on the action.
Enjoy!
Have a Happy Day!
~MJ
Thaw some frozen puff pastry (such as Pepperidge Farms). Cut into squares and bake according to package directions.
Get the cinnamon sugar and honey ready. Feel free to hug the honey bear.
Sprinkle with cinnamon sugar right out of the oven.
Drizzle with honey. Even Buddy got in on the action.
Enjoy!
Have a Happy Day!
~MJ
Labels:
baking,
cooking,
easy,
kitchen,
little chef,
sopapillas,
toddler
Monday, June 10, 2013
Little Chef: Strawberry Pie
I've been trying to make a recipe a week with Jellybean. She really enjoys being in the kitchen so I'm trying to continually give her opportunities. Shortly after the baby came home, she decided that she wanted to make a strawberry pie. As luck would have it, my mother had a pretty good recipe that I thought Jellybean could help a lot with. So we got to work.
We needed to make a graham cracker crust first. We could have gone store bought, but what three year old doesn't enjoy crushing up graham crackers? I put some in a bag, handed the rolling pin to her and let her go to town.
I helped a little, but she did a pretty fine job of making graham cracker crumbs. It was also a good way of working on rolling with the pin.
Then we worked on stirring. I poured in the melted butter and sugar while she stirred.
Then I let her press the crumbs into the pie plate. I put the crust into the oven and then got distracted and didn't hear the timer go off (a very common problem lately). No real harm done, the crust was mighty tough though. I wouldn't recommend an over-baked crust unless you have a jack-hammer on hand.
While the crust cooled, I whipped up some Dream Whip and cream cheese and then I helped Jellybean cut up some strawberries. This was my first attempt at letting her use a knife. A butter knife was sufficient for cutting the strawberries and appropriate for her age. We talked a lot about knife safety and about keeping fingers away from the blade. Also, about the difference between this knife and Mommy's knives in the drawer that she isn't allowed to use.
Once the strawberries were all cut up, I filled the shell with the Dream Whip mixture and let her line the top with the strawberries. She was pretty proud of herself.
Last step, Danish Dessert. I couldn't find any in the store, so I settled for a Lighthouse Strawberry Glaze. It was essentially the same thing. I dolloped the glaze on the pie and Jellybean spread it around.
After a little decoration, the pie was complete.
This was a perfect recipe to put together with my Little Chef. She was able to help with almost every step. The pie was delicious (better the next day after the over-baked crust had softened a bit). Such a fun, simple recipe, too.
Here's the recipe to try with your little chef:
1 Graham Cracker crust (store bought or homemade)
1 Box Dream Whip
1 1/4 Cup Sugar (and a little extra to sprinkle on strawberries)
1 Cup Cold Milk
2 tsp. Vanilla
Cream Cheese (softened)
Strawberries (halved)
Strawberry Danish Dessert or Pre-packaged Strawberry Glaze
Method:
Whip two envelopes Dream Whip with sugar, milk and vanilla. Then incorporate the softened cream cheese. Pour mixture into cooled graham cracker crust.
Halve strawberries and sprinkle with sugar. Top pie with strawberries. Glaze top with cooled Danish Dessert or strawberry glaze. Add more whipped topping and strawberries if desired.
Have a Happy Day!
~MJ
We needed to make a graham cracker crust first. We could have gone store bought, but what three year old doesn't enjoy crushing up graham crackers? I put some in a bag, handed the rolling pin to her and let her go to town.
I helped a little, but she did a pretty fine job of making graham cracker crumbs. It was also a good way of working on rolling with the pin.
Then we worked on stirring. I poured in the melted butter and sugar while she stirred.
Then I let her press the crumbs into the pie plate. I put the crust into the oven and then got distracted and didn't hear the timer go off (a very common problem lately). No real harm done, the crust was mighty tough though. I wouldn't recommend an over-baked crust unless you have a jack-hammer on hand.
While the crust cooled, I whipped up some Dream Whip and cream cheese and then I helped Jellybean cut up some strawberries. This was my first attempt at letting her use a knife. A butter knife was sufficient for cutting the strawberries and appropriate for her age. We talked a lot about knife safety and about keeping fingers away from the blade. Also, about the difference between this knife and Mommy's knives in the drawer that she isn't allowed to use.
Once the strawberries were all cut up, I filled the shell with the Dream Whip mixture and let her line the top with the strawberries. She was pretty proud of herself.
Last step, Danish Dessert. I couldn't find any in the store, so I settled for a Lighthouse Strawberry Glaze. It was essentially the same thing. I dolloped the glaze on the pie and Jellybean spread it around.
After a little decoration, the pie was complete.
This was a perfect recipe to put together with my Little Chef. She was able to help with almost every step. The pie was delicious (better the next day after the over-baked crust had softened a bit). Such a fun, simple recipe, too.
Here's the recipe to try with your little chef:
Strawberry Pie
Ingredients:1 Graham Cracker crust (store bought or homemade)
1 Box Dream Whip
1 1/4 Cup Sugar (and a little extra to sprinkle on strawberries)
1 Cup Cold Milk
2 tsp. Vanilla
Cream Cheese (softened)
Strawberries (halved)
Strawberry Danish Dessert or Pre-packaged Strawberry Glaze
Method:
Whip two envelopes Dream Whip with sugar, milk and vanilla. Then incorporate the softened cream cheese. Pour mixture into cooled graham cracker crust.
Halve strawberries and sprinkle with sugar. Top pie with strawberries. Glaze top with cooled Danish Dessert or strawberry glaze. Add more whipped topping and strawberries if desired.
Have a Happy Day!
~MJ

Labels:
baking,
kitchen,
little chef,
pie,
recipe,
strawberry,
teaching,
toddler
Subscribe to:
Posts (Atom)