Showing posts with label simple. Show all posts

Wednesday, July 3, 2013

Little Chef: Banana Date Oat Bars

So, are you getting the impression that the girl pictured above enjoys baking? You would be correct.

We were back in the kitchen recently trying out a new simple recipe: Banana Date Oat Bars.
Simple indeed.
First mashing:
What three year old doesn't enjoy mashing bananas?

Then pouring:
First time I've ever used dates in anything. They're a bit ugly, but tasty.
Pan Prep:
It's fun letting her get hands-on.
Bake, cut into squares:
Mmm, oaty goodness. Tiny Buddah approves.
and enjoy:
Unfortunately, Jellybean didn't love the end results. I liked them more than she did. It was still a fun, easy baking project. The recipe could probably use a little more spice and may have benefitted from some nuts. (We are tree nut free in our house)

Oh and look, I'm even wearing my matching apron!
You've got to love a selfie.
Try it out, tweak it, see how you and your little chef enjoy it.


Banana Date Oat Bars


Ingredients

2 large, very ripe bananas
1 teaspoon vanilla 
2 cups rolled oats
1/2 teaspoon salt 
1/4 cup pitted, chopped dried dates 
Grated nutmeg or cinnamon 


Method

Heat the oven to 350°F and lightly grease a 9x9-inch square baking dish with olive oil or butter.
Peel the bananas and mash their flesh in a medium mixing bowl. Mash very thoroughly until no large chunks remain; the bananas should be essentially liquid. (You will have between 1 cup and 1 1/4 cup.) Stir in the vanilla. Add the oats and stir them in. Stir in the salt and dates.
Pat the thick mixture evenly into the baking pan. If desired, sprinkle the top lightly with nutmeg or cinnamon. Bake for 30 minutes or unti the edges just begin to crisp up.
Place the baking pan on a rack to cool. When the pan is mostly cool, cut into bars and enjoy.
Have a Happy Day!

~MJ

Wednesday, June 12, 2013

Simple Craft: Father's Day Mouse Pad

D and I already decided on a big gift for Father's Day, but I always like to give him something small and crafty from the kids as well. Here's what I did last year. This year, I noticed the lack of mouse pad on D's computer desk. So, I thought I'd buy a cheap pad to fill the need. Then, I thought, why not decorate said mouse pad by tracing all of our hands? So, I did. And since he doesn't really read this blog, I figured I'd blog about it too. Awesome.
I started by tracing everyone's hands. I'm sure D thought it was mighty strange my stalking him for several days nagging him to let me trace his hand. By the way, it is next to impossible tracing a 7 week old's hand. Just in case you were wondering. If you must do it, definitely wait until they are very asleep and even then, trace as quickly as possible.
I cut out the hand tracings and then traced those with some fabric pens. I got an extra large pad, so there was plenty of room.
I think it will look nice when he is using it. Plus, it's always a nice reminder of how small those hands were once. Simple and useful, that makes a good gift in my book. I hope he likes it.

Have a Happy Day!

~MJ

Tuesday, June 4, 2013

Wanting to say Thank You!

After bringing our new baby boy home, I couldn't believe the generosity of our neighbors. Several of them brought us dinners. I didn't have to lift a finger or go grocery shopping for a week and a half after Teddy Bear was born.  Then, two weeks later, a friend and neighbor showed up at the door with two take and bake pizzas. She saved the day!  We are fairly new to the neighborhood, so I was pretty blown away. I couldn't be more humbled and grateful for the kind people that live in this neighborhood. We even had neighbors drop by with surprise gifts, nothing big, but so very nice and useful.
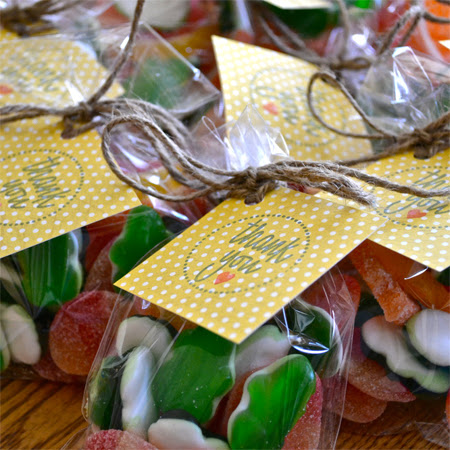
I'm certain that I haven't adequately thanked all those that have helped us in the last 6 weeks, but I did put together some simple thank you treats for those that brought us dinners. It was such a simple thing that I thought I'd share.
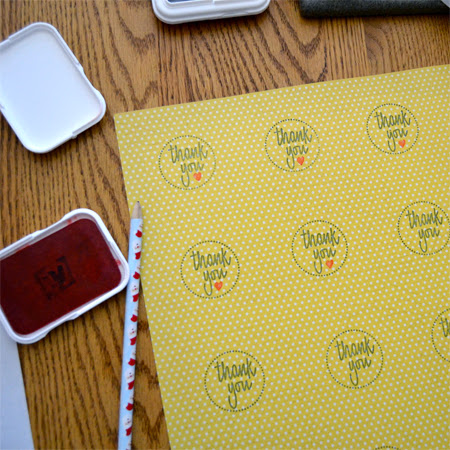
All you need is some ink, stamps, paper and treats to share:
Stamped paper.
Homemade pencil eraser heart stamp.
I love gummy frogs! I hope my neighbors did, too.
Have a Happy Day!

~MJ

Tuesday, January 22, 2013

Cereal Necklace

I've been busy getting ready for a very special conference this week. I'm attending Alt SLC for the first time and am pretty anxious about it. That means, not a whole lot of my brain power has been going towards meaningful activities with the kids. Fortunately, I was able to take a tip from a fellow blogger and keep Jellybean busy making a cereal necklace yesterday afternoon.  I love simple projects and luckily, Jellybean does too. (Thanks Home Learning Journey for the sweet idea. It's an oldie but a goodie.)
Orange yarn (her favorite color) and Fruit Rings (one of her favorite cereals). I wrapped the end of the yarn with some tape to make it a little easier for Jellybean to string the fruit rings. She ate a lot of fruit rings while she put this together. Then she refused to eat any of the cereal on the necklace. Once it's an accessory, it's no longer food.
You can see some of her sticker rewards on her shirt. Potty training is going awesome!
I'm really looking forward to Alt.  Tomorrow, I'm going to post about what I'll be wearing. I want people to recognize me after all.

Have a Happy Day!

~MJ

Thursday, January 3, 2013

New Year's Ice Box Cookies

Though we are past New Year's Eve, I promised I'd post this recipe and I'm finally getting around to it. The traditional New Year's Eve snack around my house growing up was ice box cookies and lime "frappe" to drink (lime sherbet blended with lemon-lime soda). I don't know about the rest of my siblings, but it just doesn't seem like New Year's Eve without that special treat combo.

I love that you can make the dough a day or so ahead. The dough needs to be refrigerated overnight and then you can slice off as many cookies as you want at a time. A full recipe will make approximately 32 cookies. I halved the recipe for my little family. Due to Buddy's tree nut allergy, we had to forgo putting walnuts in them this year. I prefer them with nuts, but they are still very good without. The end result is a light, crisp cookie (softer straight out of the oven) that you will eat way too many of.

New Year's Ice Box Cookies


Ingredients:
-1 lb. Butter or Margarine
-4 medium Eggs
-1 cup Sugar
-1 1/2 cups Brown Sugar
-2 tsp. Baking Soda
-3/4 tsp. Salt
-1 1/2 tsp. Cinnamon
-1 tsp. Vanilla
-5 cups Flour
-1 1/2 cups chopped Walnuts (optional)

Method:
Soften butter and cream together with sugar and brown sugar. Add eggs and vanilla. In a separate bowl mix flour, cinnamon, salt and baking soda together. Combine all ingredients together. Add nuts and mix well.

Shape into two loaves (about 3 inches wide) and roll each in wax paper. Refrigerate overnight.

When ready to bake, pre-heat oven to 400 degrees. Slice each cookie approximately 1/4 inch thick and place on a parchment lined cookie sheet. Bake for 12 to 15 minutes. The longer they bake, the more crisp they will be. I prefer them a little on the softer side.

Enjoy!

In case you were wondering, yes we also had some frappe! We used to call it pureed frogs legs. Buddy is carrying on that tradition.
Have a Happy Day!

~MJ


Thursday, December 6, 2012

Another Holiday Wreath

You may be wondering if I spent any time with my children this week. I'm pretty sure that's who I spent the majority of my time with, though to look at this blog this week, you may not know it.

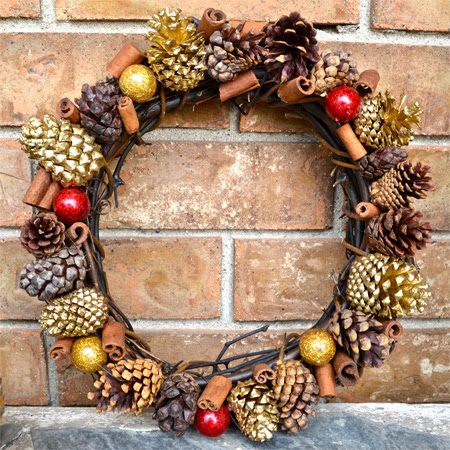
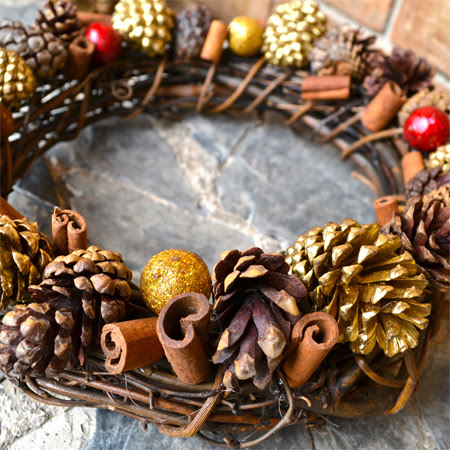
I've just been in the mood to make things lately and have felt the need to take pictures and share (of course). So, here's the last project of the week. A really simple holiday wreath; completed during nap time yesterday. I had a grape vine wreath that has been sitting around since last year just beckoning to me. I also had a bag of holiday "doo-dads"(pine cones, small shiny balls and cinnamon sticks) that has been sitting around. I purchased it on sale last year as well. So, I sat down with my trusty glue gun and went to work.
This sweet little wreath has found its home on my mantel. As an added bonus, the cinnamon sticks still have some scent left. Weird how a quick project like this can lend such a sense of accomplishment. It's the little things I suppose.

Have a Happy Day!

~MJ

Sharing on:

Tuesday, November 6, 2012

Needlecraft Bobby Pins

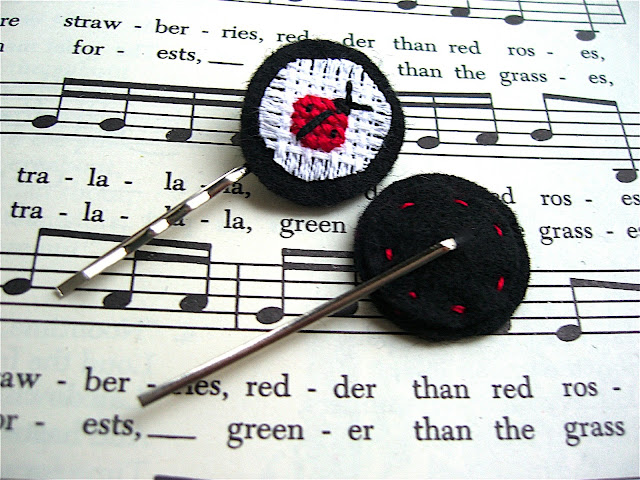
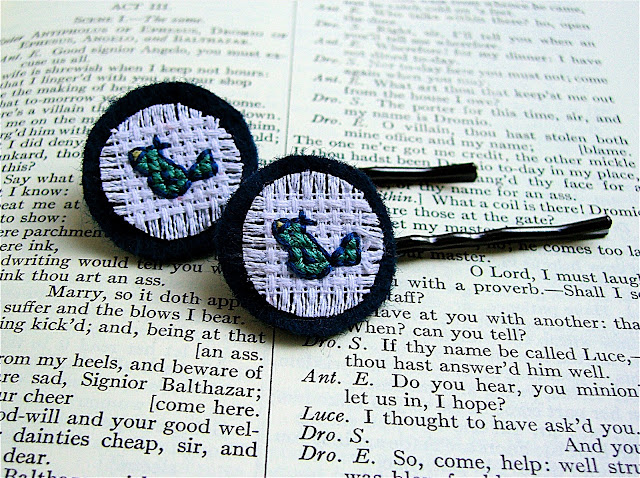
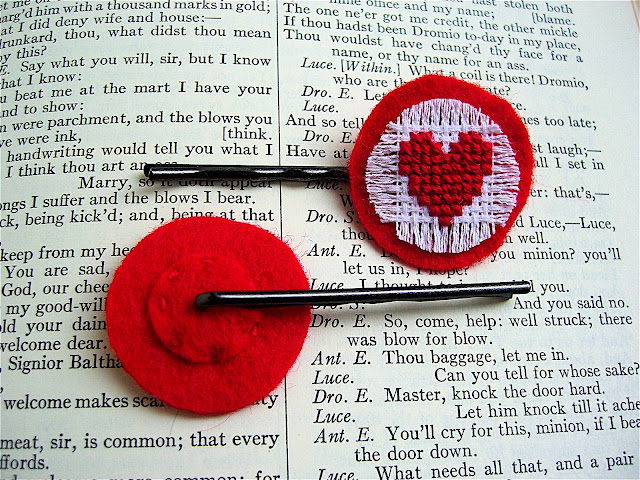
At almost 15 weeks along in my pregnancy, I haven't been feeling my best, so I decided to take a little break from the blog over the weekend. Because of that, I discovered that I really don't have anything new to share. I did get digging around in some of the hair clips that I've made over the last couple of years and decided that I'd share some of my needlecraft bobby pins.
I love to stay busy with my hands, but I've figured out that if I plan to actually complete a project it has to be relatively simple, quick to complete or something I can put down and then pick-up again without having to figure out where I left off. For those reasons, I like putting together small cross-stitch samples that I can use in various ways. I love, love the brooches I created a while back. I've also really enjoyed using my cross-stitch in hair accessories.
Creating a needlecraft bobby pin is really simple.  I don't have any how to pics, but I'll give a summary of the process. All you need is a set of bobby pins, felt, floss, hot glue and a small cross-stitch sample. You'll want to purchase bobby pins with glue pads.  You can generally find them at local craft stores. I found great deals on e-bay as well.
Hot gluing the cross-stitch to the felt, is kind-of the lazy way of doing things, but it also keeps the cross-stitching fabric from fraying beyond the design. I do like to purposely fray the fabric to give it a shabby-chic look.
To mount the cross-stitch and felt to the bobby-pin, just cut out a smaller circle for the back and using your floss, stitch the two circles together. You'll need to slit the smaller circle so that it fits over the back-side of the bobby pin. That's it! How's that for a simple, little project for during nap time?

I just visited Hobby Lobby today and came home with the materials for some new projects, so stay tuned.

Have a Happy Day!

~MJ

Monday, October 22, 2012

Rustic Chicken and Noodles

There is nothing better this time of year, when the weather is starting to cool, than simple, hearty, homemade recipes that really warm you up. Growing up, I loved it when my mother would make this simple, family recipe for homemade chicken stock and noodles made from scratch. Poured over some starchy, mashed potatoes and it's the very definition of comfort food. What a joy it is to make simple, delicious fare for my own family now that I'm all grown up.
This is a very straight forward recipe with few ingredients. It all starts with a stock-pot, salted water, chicken breasts (bone-in), some celery and an onion.
You bring the chicken to a boil and then simmer until fully cooked. While the chicken is simmering, you can roll out your noodles and allow them to dry. You can even prep the noodles earlier in the day.
Once the chicken is fully cooked, remove the onion and celery. Remove the chicken breasts and strip the meat from the chicken.  Bring the broth to a boil, add the noodles and cook for about 10 mins. Add back in the stripped meat and thicken with some water and flour. Sprinkle in some chicken granules to boost the flavor. We like to thicken it enough that it takes on more of a gravy consistency. It's really wonderful poured over some mashed potatoes. The texture of the potatoes is perfect with the noodles and tender chicken.

Homemade Chicken and Noodles

Broth: 
4-8 chicken breasts (bone-in) 4 chicken breasts feed 4 to 6 people.
4-6 Celery Stalks trimmed
1 Large Onion quartered.
Water
Salt
Chicken Granules

Place chicken in a stock pot. Pour in water just to cover the chicken breasts. Salt the water. Bring to a boil, add in celery and onion. Simmer for about 40 mins.  Set chicken aside to cool and remove pieces of celery and onion from broth.
Remove chicken from bones. Discard any skin and bones. Cut chicken into bite sized pieces & reserve.

Noodles:
3 Large Eggs
1 tsp. Salt
Flour 

While chicken is simmering beat together the eggs and salt. Then beat in flour until a very stiff dough is formed. Roll out on a floured board. Cut noodles with a pizza cutter to desired size. Allow to dry on the board.

Add noodles to the boiling broth and cook for about 10 minutes or until tender. Add in the chicken pieces and a mixture of flour and water to thicken to desired consistency. Sprinkle in some chicken granules for added chicken flavor.

Pour over mashed potatoes and enjoy.


Have a Happy Day!

~MJ

Tuesday, August 21, 2012

BLT Pasta

Tomato, Bacon, Spinach Pasta
I decided to search my Pinterest recipe board for a new recipe to make with my fresh garden tomatoes. I found one that I thought would be fun to try: BLT Pasta. It sounded delicious and it turns out that it was delicious.
Tomato, Bacon, Spinach Pasta
BLT Pasta
Adapted from Some The Wiser

Ingredients
5 strips bacon, diced
1 cup grape tomatoes, halved

3 San Marzano or other plum type tomatoes, diced
1 teaspoon sugar
3/4 cup leeks, thinly sliced
1/2 cup dry white wine, or white grape juice
3/4 cup chicken broth
2 teaspoons red wine vinegar
1/2 teaspoon red pepper flakes
7 oz dry rotini pasta
2 cups fresh baby spinach leaves
1/4 teasppon dry thyme

For Garlic Toast Bread Crumbs:

2 cloves of garlic, finely minced
2 cups French bread, cubed
2 tablespoons olive oil
salt


Directions
Cook pasta according to package directions. Drain and set aside.

Whisk together minced garlic and olive oil.  In a large bowl, combine bread crumbs, oil, and garlic.  Stir, making sure bread is thoroughly coated with oil.  Toast coated bread crumbs in a large skillet over medium heat until golden, stirring often.  Season with salt and set aside.

Saute the bacon in a large skillet over medium heat.  Cook until crisp, then set aside on paper towel.   Reserve 2 tablespoons bacon drippings, and drain off remaining oil.

Caramelize the tomatoes and sugar in the bacon drippings in large skillet or sauce pan, over medium heat.  Cook until tomatoes begin to brown, 3 to 5 minutes.  Add the leeks and cook for an additional 3 to 5 minutes, or until leeks soften and plum tomatoes begin to break down.

Deglaze with wine and allow sauce to simmer until the wine is nearly evaporated and sauce is thick.  Add the broth, vinegar, and pepper flakes.  Simmer until reduced by 1/3, approximately 5 minutes.

Add the spinach, thyme, and bacon to the sauce, then add the cooked pasta.  Toss lightly until pasta is well coated with sauce.  Season with salt as needed.  Top each serving with garlic toast bread crumbs.

Makes 4 servings.

Tomato, Bacon, Spinach Pasta
Have a Happy Day!

~MJ

Sharing on:


Thursday, July 26, 2012

Color Sort- Let's Learn Colors

Jellybean has been having a little trouble with her colors. So, I decided to put together a simple game to help her. I pulled out some sheets of dollar store craft foam in red, yellow, blue, green and orange. Then I pulled out our tupperware of puff balls and asked the kids to sort the colors.
Yes, we were still in our pajamas. Why do you ask?
After the puff balls had been sorted, I asked the kids to run through the house and find two or three toys that matched each color.
They did an awesome job
and were pretty proud of themselves.
At the end of the activity, I asked Jellybean to name the different colors.  She now has Orange, Red and Yellow down pat (at least for now). We're still working on Green and Blue.  3 out of 5? That's a good morning's work in my book. When we were finished, Jellybean surprised me by breaking into a rendition of the Rainbow Song. "Red and yellow and pink and green, purple and orange and blue. I can sing a rainbow, sing a rainbow, sing a rainbow too."  This was also a good opportunity for Buddy to exercise his teaching skills. He loved helping Jellybean learn her colors. He's a good big brother.
Before we could clean everything up, the game devolved into "Dump the Puff Balls on Jellybean." It was a natural conclusion.

Have a Happy Day!

~MJ

Tuesday, June 26, 2012

Leaf Pressing In Progress

I constantly have projects in various stages of completeness. I thought for today's post I'd visit one of those projects in progress.
I love leaf pressing.  This may come as no surprise if you happened to catch one of my previous projects inspired by an Orangeola Japanese Maple.
When we moved to our new home I became obsessed with a red bud tree in our backyard.  I posted a beautiful picture of it in the Spring.  It went from this:
To this:
When I posted the photo of the tree in bloom, I thought that it was a Western Redbud.  Once the leaves emerged it turned out to be a Forest Pansy Redbud.  The leaves are a gorgeous purple red and perfectly heart shaped.  How could I not try and save some of these beautiful leaves?
I picked several leaves (there were way too many to choose from) and went ahead and prepped them for pressing. I started by washing the leaves and then drying them on a paper towel.
After that, I took an sharp knife and carefully cut the stem away so that the heart shape would be more apparent. I usually just press the leaves between two sheets of printer paper, but I decided that I'd try slipping them in some cello bags.  I'm thinking that this will make transport and storage a little easier. I hope it was a good idea. (ETA: Putting them in bags was not a good idea. I felt a little dumb when I realized that pressing them this way would just keep the moisture in. Glad I took the leaves out of the bags before it ruined them.)
Pressing is easy after that.  I like to do it old school. I slipped the leaves between the pages of one of my large coffee table books and then added on a lot of weight. Another valuable lesson brought to you from my elementary school education.
So, there they'll stay for now while the Complete Works of Shakespeare works its magic.  I have so many ideas of how to use the leaves once they are fully dry. Simply framed would be beautiful, but can't you see one of those beautiful leaves as the center piece on a Valentine's Day card?  I can.

Now go and find some lovely leaves to press and...

Have a Happy Day!

~MJ

This post is participating in:

Tip Junkie handmade projects