Showing posts with label recipe. Show all posts

Thursday, September 5, 2013

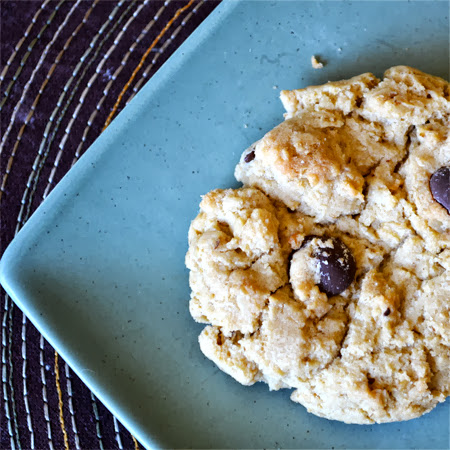
Maudsley's Killer Cookies

We made these bad boys a couple of weeks ago and I thought I ought to share this excellent recipe. It is borrowed from the in-laws who acquired it through a friend's mother. At least that's the story that I know.
Buddy enjoying his before bed treat.
These "killer" cookies are fantastic right out of the oven. They are also the only cookie I know of that I actually prefer with milk chocolate chips rather than semi-sweet. I only had semi-sweet in the cupboard when I made these, they were still awesome.
Word to the wise, they'll be tastier the next day if you are careful not to overcook them. Of course, it's not likely that there will be any left the next day.
Post bath chocolate face.

Maudsley's Killer Cookies

Ingredients:

1 Cup Shortening
1 Cup Brown Sugar (firmly packed)
1 Cup White Sugar
2 tsp. Vanilla
2 Eggs
2 Cups Flour
1 tsp. Baking Soda
1 tsp. Baking Powder
1 tsp. Salt
2 Cups Oatmeal
12 oz. Chocolate Chips (I prefer milk chocolate chips)

Method:

Pre-heat oven to 350 degrees. Mix together shortening, sugars, vanilla and eggs. Mix together the dry ingredients and add into the wet mixture. Stir in chocolate chips. Dough will be fairly dry and crumbly.

Shape dough into balls and place on parchment lined cookie sheet. Bake for 15 mins or slightly under. Bake until just lightly golden. Be careful not to over bake. 

These are at their absolute best when they are still warm from the oven. Yum!

Have a Happy Day!

~MJ

Sunday, August 4, 2013

Little Chef: Banana Poppy Seed Muffins

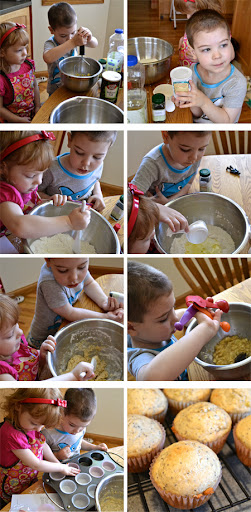
When Jellybeans says she wants to bake muffins, I just can't say no. A few weeks ago we found a particularly good recipe: Banana Poppyseed Muffins. Buddy helped this time around too (in his pajamas).
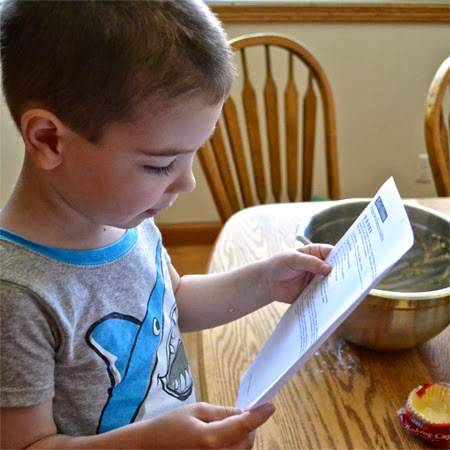
Because Buddy was helping, I decided to talk more about the recipe while we were mixing up the ingredients. He would read the ingredient needed in the recipe and then would help me find the right container. We also talked about why it is important to follow the recipe and about measurements.
Never were there two better helpers than these two kids. They mashed and poured and mixed and dumped. Then Jellybean got the liners ready and I filled them up and put the muffins in the oven.
This recipe made for two very happy children and even got the thumbs up from D. He's a tough judge and doesn't usually go for muffins. A big win on all counts.

Banana Poppyseed Muffins

yield: 12 muffins

Ingredients:

1 1/2 cups all-purpose flour
1/2 cup sugar
1  1/2 tsp. baking powder
1/2 tsp. salt
1/4 tsp. baking soda
1 egg
1/2 cup milk
1/4 cup vegetable oil
2 medium ripe bananas, mashed (over ripe are fine as well)
2 1/2 tsp. poppy seeds


Method:

In a small bowl, combine the flour, sugar, baking powder, salt and baking soda. In another bowl, combine the egg, milk and oil. Stir into dry ingredients just until moistened. Fold in bananas and poppy seeds. 

Fill paper-lined muffin cups three-fourths full. Bake at 400 degrees for 15-20 minutes or until a toothpick comes out clean. Cool for 5 minutes before removing from pan to a wire rack. Serve warm. These also froze well.

Have a Happy Day!

~MJ

Wednesday, July 3, 2013

Little Chef: Banana Date Oat Bars

So, are you getting the impression that the girl pictured above enjoys baking? You would be correct.

We were back in the kitchen recently trying out a new simple recipe: Banana Date Oat Bars.
Simple indeed.
First mashing:
What three year old doesn't enjoy mashing bananas?

Then pouring:
First time I've ever used dates in anything. They're a bit ugly, but tasty.
Pan Prep:
It's fun letting her get hands-on.
Bake, cut into squares:
Mmm, oaty goodness. Tiny Buddah approves.
and enjoy:
Unfortunately, Jellybean didn't love the end results. I liked them more than she did. It was still a fun, easy baking project. The recipe could probably use a little more spice and may have benefitted from some nuts. (We are tree nut free in our house)

Oh and look, I'm even wearing my matching apron!
You've got to love a selfie.
Try it out, tweak it, see how you and your little chef enjoy it.


Banana Date Oat Bars


Ingredients

2 large, very ripe bananas
1 teaspoon vanilla 
2 cups rolled oats
1/2 teaspoon salt 
1/4 cup pitted, chopped dried dates 
Grated nutmeg or cinnamon 


Method

Heat the oven to 350°F and lightly grease a 9x9-inch square baking dish with olive oil or butter.
Peel the bananas and mash their flesh in a medium mixing bowl. Mash very thoroughly until no large chunks remain; the bananas should be essentially liquid. (You will have between 1 cup and 1 1/4 cup.) Stir in the vanilla. Add the oats and stir them in. Stir in the salt and dates.
Pat the thick mixture evenly into the baking pan. If desired, sprinkle the top lightly with nutmeg or cinnamon. Bake for 30 minutes or unti the edges just begin to crisp up.
Place the baking pan on a rack to cool. When the pan is mostly cool, cut into bars and enjoy.
Have a Happy Day!

~MJ

Monday, June 10, 2013

Little Chef: Strawberry Pie

I've been trying to make a recipe a week with Jellybean. She really enjoys being in the kitchen so I'm trying to continually give her opportunities. Shortly after the baby came home, she decided that she wanted to make a strawberry pie. As luck would have it, my mother had a pretty good recipe that I thought Jellybean could help a lot with. So we got to work.

We needed to make a graham cracker crust first. We could have gone store bought, but what three year old doesn't enjoy crushing up graham crackers?  I put some in a bag, handed the rolling pin to her and let her go to town.
I helped a little, but she did a pretty fine job of making graham cracker crumbs. It was also a good way of working on rolling with the pin.
Then we worked on stirring. I poured in the melted butter and sugar while she stirred.
Then I let her press the crumbs into the pie plate. I put the crust into the oven and then got distracted and didn't hear the timer go off (a very common problem lately). No real harm done, the crust was mighty tough though. I wouldn't recommend an over-baked crust unless you have a jack-hammer on hand.
While the crust cooled, I whipped up some Dream Whip and cream cheese and then I helped Jellybean cut up some strawberries. This was my first attempt at letting her use a knife. A butter knife was sufficient for cutting the strawberries and appropriate for her age. We talked a lot about knife safety and about keeping fingers away from the blade. Also, about the difference between this knife and Mommy's knives in the drawer that she isn't allowed to use.
Once the strawberries were all cut up, I filled the shell with the Dream Whip mixture and let her line the top with the strawberries. She was pretty proud of herself.
Last step, Danish Dessert. I couldn't find any in the store, so I settled for a Lighthouse Strawberry Glaze. It was essentially the same thing. I dolloped the glaze on the pie and Jellybean spread it around.
After a little decoration, the pie was complete.
This was a perfect recipe to put together with my Little Chef. She was able to help with almost every step. The pie was delicious (better the next day after the over-baked crust had softened a bit).  Such a fun, simple recipe, too.

Here's the recipe to try with your little chef:

Strawberry Pie

Ingredients:
1 Graham Cracker crust (store bought or homemade)
1 Box Dream Whip
1 1/4 Cup Sugar (and a little extra to sprinkle on strawberries)
1 Cup Cold Milk
2 tsp. Vanilla
Cream Cheese (softened)
Strawberries (halved)
Strawberry Danish Dessert or Pre-packaged Strawberry Glaze

Method:
Whip two envelopes Dream Whip with sugar, milk and vanilla. Then incorporate the softened cream cheese.  Pour mixture into cooled graham cracker crust.
Halve strawberries and sprinkle with sugar. Top pie with strawberries. Glaze top with cooled Danish Dessert or strawberry glaze. Add more whipped topping and strawberries if desired.

Have a Happy Day!

~MJ

Thursday, February 21, 2013

The Perfect Baked Potato

So, I realized that I really didn't have anything to blog about. I've been a bit distracted from my regular crafty routine. Tuesday, we had a run in with what I *think* was a carpet beetle larvae. Massive cleaning ensued and I didn't find any signs of another so we hope we're in the clear. The house was cleaner for a day and I was really worn out. Yesterday, D decided to be sick. That means, that while there isn't a ton of extra load as far as child care is concerned (I mean, I take care of the all day anyway), it seems like there is a whole lot more because there is an absolutely useless adult laying around all day and not helping. Plus, I didn't get to shower. He looks like he's on the mend, so hopefully, life can resume as normal today.

Anyway, we're having baked potatoes tonight, so I thought I'd share a couple of excellent recipes. One for the perfect baked potato and another for the perfect baked potato topping: Potato Sauce.  I hope my family isn't offended that I'm sharing our potato sauce recipe. It's just that, you can't have "the perfect baked potato" without it.

Without further ado:

How to bake the perfect baked potato


Ingredients:
4 medium russet potatoes (7 to 8 oz. each), scrubbed
Olive Oil
Salt

Method:
Pre-heat oven to 450 degrees with oven rack in the middle position.
With a paring knife, pierce each potato here and there on each side. Microwave potatoes on high power for 4 minutes (for fewer potatoes plan on 2 minutes total cooking time for each potato). Out of the microwave, use a basting brush to brush the potatoes on all sides with olive oil. Season each potato with salt.
Place potatoes directly on the oven rack and bake for approx. 30 minutes or until a skewer glides easily through the flesh, turning potatoes half-way through cooking time. (I like to put a drip pan on a lower oven rack beneath the potatoes.)
Remove potatoes from oven and pierce them with a fork to create a dotted X on the top of each potato. Press in at the ends of each potato to push the flesh up and out. Note: To ensure that the flesh does not steam and become dense, it's imperative to open a baked potato as soon as it comes out of the oven. This will keep the potato fluffy and light.
Serve with Potato Sauce and other toppings of your choice.
So, above is how I like to top my baked potato (though sometimes I add bacon). Cheese (lots of it), broccoli and potato sauce (I'm obsessed with "the sauce").

Potato Sauce


Ingredients:
1 8 oz Cream Cheese, softened
1/2 Cup Buttermilk
1/2 Cup Mayonaise
1/2 tsp. Onion Salt

Method:
Using a hand mixer, blend all ingredients until smooth.

I always halve the recipe. I've found that is the perfect amount for my family of 4 (two adults, two small children).

And there you have it. I can't wait for dinner tonight!

Have a Happy Day!

~MJ


Tuesday, February 12, 2013

German Chocolate Cake

One of my favorite cakes (and my husband's) is German Chocolate Cake. I make it a couple of times a year. Once for D's birthday and once just for fun. Now, unfortunately, both times I make it will involve heartbreak over Buddy's tree nut allergy. Sad.

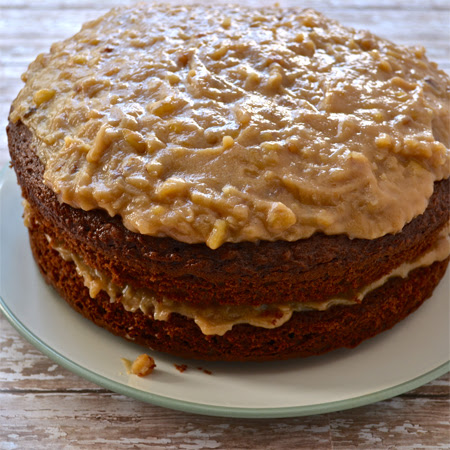
I'll grant it that this is not an authentic german chocolate cake. I use a boxed cake mix. I do, however, think that the recipe for the frosting is pretty darn good, so I thought I'd share it.

German Chocolate Cake Frosting


Ingredients:

1 Cup Sugar
3 Egg Yolks
1/2 Cup Walnuts
2 Tbs. Butter
1 Can Evaporated Milk (not quite the entire can)
1 Cup Coconut
1 Ts. Vanilla


Method:

Mix all ingredients together in a medium saucepan (I like to use my non-stick sauce pan). Bring to a medium boil. Stir constantly for 5-10 minutes. Let cool. Frost one recipe of german chocolate cake. 

Yum!

Have a Happy Day!

~MJ


Monday, October 22, 2012

Rustic Chicken and Noodles

There is nothing better this time of year, when the weather is starting to cool, than simple, hearty, homemade recipes that really warm you up. Growing up, I loved it when my mother would make this simple, family recipe for homemade chicken stock and noodles made from scratch. Poured over some starchy, mashed potatoes and it's the very definition of comfort food. What a joy it is to make simple, delicious fare for my own family now that I'm all grown up.
This is a very straight forward recipe with few ingredients. It all starts with a stock-pot, salted water, chicken breasts (bone-in), some celery and an onion.
You bring the chicken to a boil and then simmer until fully cooked. While the chicken is simmering, you can roll out your noodles and allow them to dry. You can even prep the noodles earlier in the day.
Once the chicken is fully cooked, remove the onion and celery. Remove the chicken breasts and strip the meat from the chicken.  Bring the broth to a boil, add the noodles and cook for about 10 mins. Add back in the stripped meat and thicken with some water and flour. Sprinkle in some chicken granules to boost the flavor. We like to thicken it enough that it takes on more of a gravy consistency. It's really wonderful poured over some mashed potatoes. The texture of the potatoes is perfect with the noodles and tender chicken.

Homemade Chicken and Noodles

Broth: 
4-8 chicken breasts (bone-in) 4 chicken breasts feed 4 to 6 people.
4-6 Celery Stalks trimmed
1 Large Onion quartered.
Water
Salt
Chicken Granules

Place chicken in a stock pot. Pour in water just to cover the chicken breasts. Salt the water. Bring to a boil, add in celery and onion. Simmer for about 40 mins.  Set chicken aside to cool and remove pieces of celery and onion from broth.
Remove chicken from bones. Discard any skin and bones. Cut chicken into bite sized pieces & reserve.

Noodles:
3 Large Eggs
1 tsp. Salt
Flour 

While chicken is simmering beat together the eggs and salt. Then beat in flour until a very stiff dough is formed. Roll out on a floured board. Cut noodles with a pizza cutter to desired size. Allow to dry on the board.

Add noodles to the boiling broth and cook for about 10 minutes or until tender. Add in the chicken pieces and a mixture of flour and water to thicken to desired consistency. Sprinkle in some chicken granules for added chicken flavor.

Pour over mashed potatoes and enjoy.


Have a Happy Day!

~MJ

Tuesday, October 9, 2012

Sweet Halloween Treat: Ghosts in the Graveyard

Wow, two recipe posts in two days! My sister-in-law made the cutest Halloween treat for our Sunday family get-together, so I had to share.  We were celebrating my nephew's birthday and it was so fun to have a sweet treat.  She got the idea courtesy of Kraft and mustered her creativity. I do believe that the substitution of Milano cookies was pure genius.  Didn't she do a great job?
Buddy checking it out.
My mother took one look at the dessert and called me over to take photos for the blog. (Thanks, Mom!) It is such a fun idea for a seasonal dessert.  Plus, it's easy and delicious.
I'm pretty sure my nephew was happy about it, too:
He was hamming it up during the birthday song.
Here's the link to the Kraft Ghosts in the Graveyard recipe.

Have a Happy Day!

~MJ

Monday, October 8, 2012

Swedish Pancakes

My side of the family is very serious about tradition. This is something that D has yet to grasp accept the full extent of. Since starting a family of my own, I've thought a lot about the traditions I grew up with and what traditions I'd like to start with my children. Many of the traditions I'd like to keep are food based (specific foods for specific times/holidays).
One of my favorites is making Swedish Pancakes on LDS Conference weekend. Of course, we made swedish pancakes at other times of the year, but there is something particularly special about a nice breakfast before the bi-annual broadcast begins. Swedish pancakes and church in your pajamas, what is better than that?
So, since we just enjoyed the Conference broadcast, I thought I'd share my family's swedish pancake recipe with you. If you don't know what they are, picture crepes, but thicker, more flavor and just a whole lot more awesome. In short: delicious.

Swedish Pancakes

(makes about 8 pancakes)

Ingredients:

*6 Eggs
*2 C Flour
*1/4 C Sugar
*Dash of Cinnamon
*Dash of Salt
*3 C Milk

(To increase recipe to 14 pancakes change the following measurements: 9 Eggs, 3 C Flour, 1/3 C Sugar, and 4 1/2 C Milk. Cinnamon and Salt stay the same, or to taste.)

Method:

Pre-heat a large skillet (medium-high heat) on the stove or pre-heat an electric griddle. I prefer the griddle and heat mine to around 370 degrees F.
Mix all ingredients together until smooth. Batter will be thin. I like to mix the batter in a plastic pitcher for easy pouring.
Spray skillet or griddle with vegetable oil or pour a bit of vegetable oil on the surface and swirl or spread it around. If using spray, you will probably want to use it between each pancake.
Pour the batter onto your cooking surface. The size of the pancake is up to your discretion or up to the size of your pan. I like to make them about the size of a dinner plate or a bit smaller. (They are easier to turn if you keep them smaller.) When the middle of the pancake loses its shine and the first side is golden, it is time to turn. Carefully, turn to the second side. Turning can take some practice; a wide spatula makes it a bit easier. When the second side is golden, move to a plate and cover with foil.  When I have a nice stack, I like to move them to the oven, on its lowest heat, just to keep warm.

For serving, top with anything you like. We like butter and syrup. Other family favorites: homemade strawberry jam, powdered sugar, or if you are like my Mom, butter and granulated sugar.
Once you've topped your pancake with the topping of your choice, roll it up and enjoy. I love having fresh strawberries on the side.
While, D is not a breakfast person, the kids and I enjoyed our pancakes immensely. Of course, Buddy and Jellybean refused to eat theirs rolled up (I must teach them to enjoy them the "correct" way).
Yum!
After breakfast, Jellybean decided it was time for a piano break. I heard her playing around and singing songs to herself, so I naturally had to snap a shot.

Have a Happy Day!

~MJ

Sharing On:


Tuesday, August 21, 2012

BLT Pasta

Tomato, Bacon, Spinach Pasta
I decided to search my Pinterest recipe board for a new recipe to make with my fresh garden tomatoes. I found one that I thought would be fun to try: BLT Pasta. It sounded delicious and it turns out that it was delicious.
Tomato, Bacon, Spinach Pasta
BLT Pasta
Adapted from Some The Wiser

Ingredients
5 strips bacon, diced
1 cup grape tomatoes, halved

3 San Marzano or other plum type tomatoes, diced
1 teaspoon sugar
3/4 cup leeks, thinly sliced
1/2 cup dry white wine, or white grape juice
3/4 cup chicken broth
2 teaspoons red wine vinegar
1/2 teaspoon red pepper flakes
7 oz dry rotini pasta
2 cups fresh baby spinach leaves
1/4 teasppon dry thyme

For Garlic Toast Bread Crumbs:

2 cloves of garlic, finely minced
2 cups French bread, cubed
2 tablespoons olive oil
salt


Directions
Cook pasta according to package directions. Drain and set aside.

Whisk together minced garlic and olive oil.  In a large bowl, combine bread crumbs, oil, and garlic.  Stir, making sure bread is thoroughly coated with oil.  Toast coated bread crumbs in a large skillet over medium heat until golden, stirring often.  Season with salt and set aside.

Saute the bacon in a large skillet over medium heat.  Cook until crisp, then set aside on paper towel.   Reserve 2 tablespoons bacon drippings, and drain off remaining oil.

Caramelize the tomatoes and sugar in the bacon drippings in large skillet or sauce pan, over medium heat.  Cook until tomatoes begin to brown, 3 to 5 minutes.  Add the leeks and cook for an additional 3 to 5 minutes, or until leeks soften and plum tomatoes begin to break down.

Deglaze with wine and allow sauce to simmer until the wine is nearly evaporated and sauce is thick.  Add the broth, vinegar, and pepper flakes.  Simmer until reduced by 1/3, approximately 5 minutes.

Add the spinach, thyme, and bacon to the sauce, then add the cooked pasta.  Toss lightly until pasta is well coated with sauce.  Season with salt as needed.  Top each serving with garlic toast bread crumbs.

Makes 4 servings.

Tomato, Bacon, Spinach Pasta
Have a Happy Day!

~MJ

Sharing on:


Tuesday, August 14, 2012

Green Gables Lemonade

Awhile back, I ran across a website where the sole purpose was to recreate recipes from classic literature. They even had a post regarding Anne of Green Gables' recipe for old fashioned lemonade. I thought the idea was cute at the time, but it wasn't until we were hitting above 100 degrees this summer that I was reminded of it and decided it was high time I got a good lemonade recipe.  I searched for the Green Gables lemonade recipe and found it!  I'm thinking that Anne (with an 'e') would appreciate how much we enjoyed it.
We set up our afternoon snack out on the back deck in the shade.  It was a lovely way to spend the afternoon: sipping lemonade and laughing with my kids.
There's my glass waiting for me!
Jellybean found an interesting way of enjoying her lemonade:
That's right, dipping her wheat thins.
Old Fashioned Lemonade 
1 ½ cups sugar
1 ½ cups water
Zest from one lemon
1 ½ cups fresh lemon juice (about 6 or 7 lemons)
Ice cubes
Cold water or sparkling water

Measure the sugar and water into a sauce pan. While stirring with a wooden spoon, bring the mixture to a boil for 5 minutes. Remove the saucepan from the heat. Let cool slightly.

Add fresh squeezed lemon juice and lemon zest to the sugar syrup. Cool completely. Pour the lemonade syrup into a quart jar. Cover tightly with the lid. The syrup can be kept in the refrigerator for 2 or 3 weeks.

When you’re ready to serve the lemonade, put some ice cubes in the bottom of a glass. Our ¼ cup of the lemon syrup over the ice cubes. Add ¾ cup cold water or sparkling water and stir. I decided that I wasn't a real fan of the zest in my glass, so I've started straining that out.

The recipe makes enough syrup for 14 glasses of lemonade.
I couldn't help sipping while I took photos.  Here's my jar of syrup, too. Yum.
Just incase you are wondering, "It looks good, but is it really?" Here's what my children thought of our new recipe, they were pretty enthusiastic...


Lemonade Critique from A Happy Song on Vimeo.

Have a Happy Day!

~MJ

Sharing at:

PhotobucketI Heart Nap Time