One of our favorite easy activities to stave off boredom around here: Balloon People.
I had the kids describe to me the features they wanted on their balloons and I went to town with a sharpie. They were both very pleased with their people.
Buddy especially loved his two creations: "Math Mouth" and "Opto." Jellybean talks to her's like they are real people.
They both had to have a 10 eyed alien as well. I swear that playing with balloons never gets old. I like to keep a bag of them around all of the time. Such an easy thing to whip out.
Have a Happy Day!
~MJ
Showing posts with label play. Show all posts
Friday, August 30, 2013
Thursday, June 27, 2013
Colored Salt Play
Now that the weather is hot, sometimes we are stuck inside. With the new baby demanding my attention, I've been trying to find more activities for the kids. We've really been enjoying this colored salt tray.
I just poured some salt into a ziplock and added a few drops of food coloring and mixed it in. I thought this light blue color was soothing. Then I set up a "play invitation" for Jellybean. She came down from her nap and discovered it.
I set out several brushes, a jar with some different rocks in it and the flash cards for copying letters. She mostly wanted to use her hands and bury the different items. The little bulldozer was a favorite, though.
Buddy came down from his nap and took a while to warm up to the idea of playing in the salt. I think he thought it would make his hands messy. When he realized that it wouldn't, he was all over it.
He really got a kick out of using the brushes to draw.
This was such a fantastic after-nap activity. They are both on the grumpy side when the first wake up. Working in the salt was calming and kept them both busy for a long time. Perfect for me.
I didn't get pictures, but yesterday, we used the salt tray to play paleontologist. Buddy has a dinosaur bone model kit. I broke the bones apart and hid them in the salt, then he used his brush to find each bone. So fun.
Have a Happy Day!
~MJ
I just poured some salt into a ziplock and added a few drops of food coloring and mixed it in. I thought this light blue color was soothing. Then I set up a "play invitation" for Jellybean. She came down from her nap and discovered it.
I set out several brushes, a jar with some different rocks in it and the flash cards for copying letters. She mostly wanted to use her hands and bury the different items. The little bulldozer was a favorite, though.
Buddy came down from his nap and took a while to warm up to the idea of playing in the salt. I think he thought it would make his hands messy. When he realized that it wouldn't, he was all over it.
He really got a kick out of using the brushes to draw.
This was such a fantastic after-nap activity. They are both on the grumpy side when the first wake up. Working in the salt was calming and kept them both busy for a long time. Perfect for me.
I didn't get pictures, but yesterday, we used the salt tray to play paleontologist. Buddy has a dinosaur bone model kit. I broke the bones apart and hid them in the salt, then he used his brush to find each bone. So fun.
Have a Happy Day!
~MJ
Labels:
activity,
brush,
drawing,
invitation,
paleontology,
play,
preschool,
salt,
sand,
toddler,
tray
Thursday, February 28, 2013
Quiet Toy: Animals in a Blanket
I'm always on the look out for good quiet toys for my kids. I especially like something I can throw in my bag for church, doctor's visits or long car trips. I decided to make my own quiet toy during a few nap times this week. A simple little toy that will be perfect for my activity bag.
I went a little overboard on creating the animals for my little pouch. So, now the kids can choose which three they'd like to play with.
They can go with farm animals:
Forest animals:
Or a mixture of the two. Jellybean was pretty excited when I finished these today and promptly introduced herself to each one of the animals. She decided that the fox isn't a very nice animal, so she's letting Buddy play with it. I think I'm going to have to make another pouch for the extra three just so that Buddy and Jellybean can each have their own.
So would you like to make one? Here's the tutorial:
1/4 yard duck cloth
1/4 yard soft flannel, or other fabric for liner
1 package double folded bias tape
Thread, pins, scissors
Protractor
Air erasable pen
Ribbon
Animals:
Scrap fabric in several different patterns
Felt in several different colors (depending on what animals you'd like to create)
Floss (in coordinating colors)
Soft batting
Start with a 10X11 inch piece of your duck cloth and flannel (wrong sides together). You can pin them together if you wish. On one end, pin and sew a piece of bias tape. Before I made this, I had no idea how to sew on bias tape. I used this tutorial on Dana Made It in order to figure it out.
Fold the bias tape edge up 4 inches. Use your protractor and pen to get a nicely rounded edge on both sides.
Pin and sew your final length of bias tape along the outside edge. Sew three equal pockets. Each of mine measures 3 inches. Now, stitch your ribbon to the back of your pouch and it's done, wasn't that easy?
I spent one of my precious nap times sketching out the animal faces that I wanted to use. Then I took my sketches and cut them all out in felt.
Using floss, I stitched the little faces together and then attached them to the bodies. I used an oval pattern that was 5X3 inches for the bodies of my little animals. Then I used a 1/4 inch seam. Make sure when sewing the bodies that you leave at least an inch un-sewn for turning the fabric and stuffing.
Six sweet little animals, now ready for travel. Can't wait to take them for a test run.
Have a Happy Day!
~MJ
![]() |
| Just tie and toss. |
They can go with farm animals:
Forest animals:
Or a mixture of the two. Jellybean was pretty excited when I finished these today and promptly introduced herself to each one of the animals. She decided that the fox isn't a very nice animal, so she's letting Buddy play with it. I think I'm going to have to make another pouch for the extra three just so that Buddy and Jellybean can each have their own.
So would you like to make one? Here's the tutorial:
Animals in Blanket Quiet Toy:
Time to completion: approx. 3-4 nap timesMaterials:
Pouch:1/4 yard duck cloth
1/4 yard soft flannel, or other fabric for liner
1 package double folded bias tape
Thread, pins, scissors
Protractor
Air erasable pen
Ribbon
Animals:
Scrap fabric in several different patterns
Felt in several different colors (depending on what animals you'd like to create)
Floss (in coordinating colors)
Soft batting
Start with a 10X11 inch piece of your duck cloth and flannel (wrong sides together). You can pin them together if you wish. On one end, pin and sew a piece of bias tape. Before I made this, I had no idea how to sew on bias tape. I used this tutorial on Dana Made It in order to figure it out.
Fold the bias tape edge up 4 inches. Use your protractor and pen to get a nicely rounded edge on both sides.
Pin and sew your final length of bias tape along the outside edge. Sew three equal pockets. Each of mine measures 3 inches. Now, stitch your ribbon to the back of your pouch and it's done, wasn't that easy?
I spent one of my precious nap times sketching out the animal faces that I wanted to use. Then I took my sketches and cut them all out in felt.
Using floss, I stitched the little faces together and then attached them to the bodies. I used an oval pattern that was 5X3 inches for the bodies of my little animals. Then I used a 1/4 inch seam. Make sure when sewing the bodies that you leave at least an inch un-sewn for turning the fabric and stuffing.
Six sweet little animals, now ready for travel. Can't wait to take them for a test run.
Have a Happy Day!
~MJ
Labels:
animals,
diy,
duck,
farm,
forest,
fox rabbit,
imaginative,
owl,
pic,
play,
quiet activity,
sheep,
Spring,
tutorial
Wednesday, February 27, 2013
Bag Monster = Awesome.
I ran across a blog post recently that sparked my interest. It was a post about a few indoor activities that the blogger had put together for her kids. One of the activity ideas was creating a "bag monster." Basically, a trash bag stuffed with grocery bags hung from the ceiling for the kids to kick. This idea is genius. I made our monster, which the kids call "Waga," a couple of weeks ago. The kids love it so much that I can't actually keep it attached to the ceiling, they always manage to kick it down in about 10 minutes. I don't hang it for them every day, but when I do, they go nuts. Evidence below:
BagMonster from A Happy Song on Vimeo
It is the perfect activity for getting out a lot of excess energy. Please disregard the background mess in the video. We hang the monster in our "formal dining room", which we like to use as a multi-purpose room: Play-room, craft room, photo shoot area, and weirdly, it's also where I blow dry my hair. Hair drying always ends up turning into a round of puff-ball air cannon play.
Yesterday, after the kids had worn themselves out punching/running around the bag. They decided just to lay down and kick it. Seriously awesome exercise going on here.
BagMonster2 1 from A Happy Song on Vimeo.
BagMonster from A Happy Song on Vimeo
It is the perfect activity for getting out a lot of excess energy. Please disregard the background mess in the video. We hang the monster in our "formal dining room", which we like to use as a multi-purpose room: Play-room, craft room, photo shoot area, and weirdly, it's also where I blow dry my hair. Hair drying always ends up turning into a round of puff-ball air cannon play.
![]() |
| Waga the bag monster. I do excellent artwork. |
Thanks so much to Play, Create, Explore for this great idea. There have been several times when letting the kids get their energy out on that bag has absolutely saved my sanity.
Have a Happy Day!
~MJ
Thursday, November 29, 2012
Nativity Play
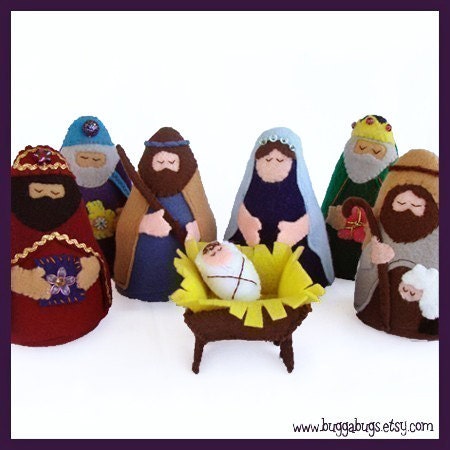
Growing up, my siblings and I had a white plastic nativity set that we could set up and play with during the Christmas season. For the last few years, I've been looking for a nativity set that my children could enjoy. The Little People set seems to be popular, but I just don't like the look of it. I guess I'm picky, but I've also had it in my head that I'd like to make the nativity set. Two years ago, I purchased this nativity pattern from BuggaBugs on Etsy. The pattern is really well done, but I just haven't been able to find the time to actually complete it. Last year, the excuse was that I could not find flesh-toned felt. This year I'm determined to make at least the baby Jesus, Mary and Joseph. I even ordered some felt from one of my favorite shops on Etsy, Giant Dwarf.
While Buddy was at preschool yesterday, Jellybean and I went to peruse the toy store. I noticed the Melissa and Doug nativity set was on sale and I liked the way it looked. So, I broke down and bought it.
The kids have already taken to it, setting it up and moving the figures around. I still plan on making the other set, but at least they have something to play with in the meantime.
Have a Happy Day!
~MJ
![]() |
| Isn't that adorable? |
The kids have already taken to it, setting it up and moving the figures around. I still plan on making the other set, but at least they have something to play with in the meantime.
Have a Happy Day!
~MJ
Monday, November 12, 2012
Snowpocalypse 2012
I know, I know by stating that we had a snowpocalypse, I'm just asking for more snow. That said, we received around 17" of snow over the last few days. I'm not sure I can remember the last time it dumped snow like this. Maybe when I was a child, but I was a lot shorter then, so I may not have an accurate memory of the snow depth. Then again, my memory has never been the best.
After almost two entire days cooped up inside (because we are wimps that like to stay warm and dry) we decided to venture out for a family walk on Sunday afternoon. It was one of the most exasperating walks I've ever been on.
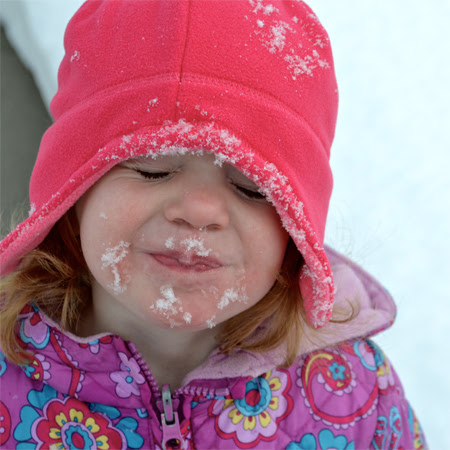
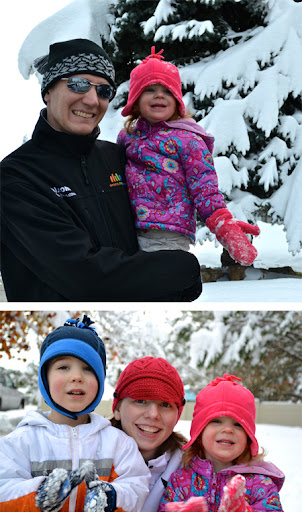
Jellybean spent the majority of her time putting her face in snowbanks and eating snow by the glove- full. Buddy spent the time gathering snow boulders and pelting them at my back-side. Both activities made our walk two to three times longer than it should have been and I was cold. I said the phrase, "keep walking, please." way more than I would have liked.
Luckily, D was there to draw some of the fire. Buddy then discovered that his dad knows how to dish it out, too. One great thing: the kids were both worn out for nap time.
While the fresh air was definitely a pleasant change, I still prefer warmth... Unfortunately, I foresee a whole lot more time spent outside while the snow lasts.
On a side note, I found out today that someone had stolen some pictures of Buddy from this site and were pretending that he was her son. At first I was annoyed, then incredibly saddened that someone would feel desperate enough (either for acceptance or to be a mother, who knows) to pretend to have a child. I don't know what that person's situation was, but I've had a little taste of desperation and disappointment. We went through 3 years of heart ache trying to conceive Buddy. Our story had the happy ending that some never get to have. So, I can be understanding.
That said, please remember that the photos contained on this website are copyright and should not be used without permission. Thanks!
Have a Happy Day!
~MJ
After almost two entire days cooped up inside (because we are wimps that like to stay warm and dry) we decided to venture out for a family walk on Sunday afternoon. It was one of the most exasperating walks I've ever been on.
Jellybean spent the majority of her time putting her face in snowbanks and eating snow by the glove- full. Buddy spent the time gathering snow boulders and pelting them at my back-side. Both activities made our walk two to three times longer than it should have been and I was cold. I said the phrase, "keep walking, please." way more than I would have liked.
Luckily, D was there to draw some of the fire. Buddy then discovered that his dad knows how to dish it out, too. One great thing: the kids were both worn out for nap time.
While the fresh air was definitely a pleasant change, I still prefer warmth... Unfortunately, I foresee a whole lot more time spent outside while the snow lasts.
On a side note, I found out today that someone had stolen some pictures of Buddy from this site and were pretending that he was her son. At first I was annoyed, then incredibly saddened that someone would feel desperate enough (either for acceptance or to be a mother, who knows) to pretend to have a child. I don't know what that person's situation was, but I've had a little taste of desperation and disappointment. We went through 3 years of heart ache trying to conceive Buddy. Our story had the happy ending that some never get to have. So, I can be understanding.
That said, please remember that the photos contained on this website are copyright and should not be used without permission. Thanks!
Have a Happy Day!
~MJ
Monday, October 29, 2012
First Snow Day
The day after the first coat day came the first snow day of the season. The snow has been slowly melting all weekend, but I had to share some of our snow fun from last week.
After the kids had their fun trying to pelt me with snowballs, Buddy and Jellybean decided to build a snow "ghost." It just seemed appropriate for Halloween.
They were pretty proud of their handiwork. (Note that Jellybean does not have matching gloves. I emptied the entire contents of our coat closet looking for the snow gear and I could not find any gloves that matched! I think we'll have to remedy that for the next snow day.)
Have a Happy Day!
~MJ
After the kids had their fun trying to pelt me with snowballs, Buddy and Jellybean decided to build a snow "ghost." It just seemed appropriate for Halloween.
They were pretty proud of their handiwork. (Note that Jellybean does not have matching gloves. I emptied the entire contents of our coat closet looking for the snow gear and I could not find any gloves that matched! I think we'll have to remedy that for the next snow day.)
Have a Happy Day!
~MJ
Friday, September 14, 2012
Humpty Dumpty Tutorial & Pattern
Welcome back for the Humpty Dumpty Doll Tutorial and Pattern!
First, here is the pattern that I put together for the doll:
In the process of turning the pattern into a PDF, it got shrunk slightly, so I've noted to add a 1/4" seam allowance to each piece when cutting. I don't have pictures for everything. So, if you have questions, feel free to leave them in the comment section.
Now let's make the Humpty Dumpty:
1. Choose your fabrics and gather materials. I just used scrap material that I had around. I chose 5 different fabrics for the following: Face/Hands, Body/Arms, Legs/Bow tie, Spats/Collar and Shoes. You'll need scissors, pins and some coordinating ribbon and thread.
2. Cut out the pattern. You'll need to make sure to cut out 4 each of the shoe, spats, legs, arms and hands. You'll also need 2 each of the body, head and collar. Make sure to fold fabric at indicated fold lines before pinning and cutting.
3. Pay attention to how you are cutting. I laid out all of the pieces after I cut them to make sure I had both right and left legs/arms when all of the fabric pieces are right sides facing out.
4. Pin one head piece and one body piece together, right sides facing each other. Repeat with other two pieces.
5. Sew both along the straight edge.
6. Pin one hand and arm piece together right sides facing each other. Repeat 4 times.
7. Sew hand and arm pieces together. *After sewing each piece, I made sure to iron the seams.
8. Pin together shoe and spat pieces. Right sides facing each other and repeat 4 times. Then sew together. *As I went along, I checked to make sure that I did indeed have a right and left leg/ right and left arm. I was a little paranoid about it.
9. Now pin spats and leg pieces together. Right sides facing each other and repeat 4 times. Now iron the seams. * I ended up ironing the seams for the shoe/spat and leg/spat opposite each other. I wanted the leg (or pant) to look like it had a slight cuff over the spat. If that makes sense.
10. I further defined the cuff look by sewing a straight seam across the outside of each leg.
11. Pin two arm pieces together, right sides facing in and sew together leaving the top open for stuffing. Repeat for the second arm. Pin two leg pieces together (make sure the cuff line matches up), right sides together and sew together leaving the top open for stuffing. Repeat for the second leg.
12. Stuff arms and legs leaving about a 1/2" of fabric at the top. Sew across the top to secure the stuffing. *While stuffing, I left each limb a bit sparse were the knee/elbow join would be, so that they'd still have a bit of movement. Just don't overstuff.
13. Pin and sew head/body pieces together. Only sew across the head portion, leaving the body open. Pin the arms in on each side of the body. I hand stitched the arms in place. *thumbs pointing up.
14. Stuff the head and body.
15. *This is the trickiest part of this whole project. Pin the rest of the body closed and pin in the legs where you want them. Hand stitch the body closed and stitch in the legs as you work. I just tried to make my stitching as neat as possible. Before you completely close up the body, add extra stuffing if needed so that the body is nice and filled out.
16. Now I wanted to add a few details. Pin the two collar pieces together and sew. I left the middle bottom section open for turning. Just make sure you leave an opening for turning. Then iron.
17. Cut two rectangles (as big as you want the bow tie to be) Pin and sew the two rectangle bow tie pieces together. Leave a space for turning! I trimmed the corners before I turned it right side out. Then iron and stitch the center together to create the bow tie.
18. I sketched out the faces I wanted to use. Then I used a disappearing ink quilting pen to draw them onto the fabric. That type of pen is awesome. It makes it really easy to fix any mistakes. I used fabric paint for the faces. I like the Scribblers fabric paint. You can find it at Hobby Lobby for a $1 per bottle.
19. Cut out a rectangle of head fabric and round the corners. I wanted this piece to be about the same width as the doll face and just a little longer to accomodate the seam when stitched on and to leave a little to tuck into the collar on front when in use. Paint your "cracked" face onto this piece of fabric. *I didn't want this to fray, so I used some liquid fray block around the edge of the fabric. Make sure you spot check it on your fabric first to make sure that it dries clear.
20. You're almost done! Some last details: Cut a bit of ribbon (I like to use a polyester blend so that I can melt the edges of the ribbon to prevent fraying). I folded down the top of the collar to shorten it a bit and then sewed the ribbon to the top of the collar. Then I cut a small piece of ribbon and attached it around the middle of the bow tie. Attach the bow tie to the collar. Now stitch the collar around your Humpty Dumpty. I left a little bit of a pocket at the top of the collar while stitching where I could tuck in the bottom of the alternate face.
21. I didn't picture it, but now you'll want to attach the "cracked" face. I stitched it onto the very top seam on my Humpty's head. I only stitched across the top, so that I could pull the face forward and then pull it back when not in use. As I stitched, I tried to pull the fabric as flat as possible, so that it would lay mostly flat across the face. Then I trimmed away any excess fabric.
That's the long and short of it. This is my first sewing tutorial. So, I hope all of the steps make sense.
I originally wanted to add some rosy cheeks to my Humpty, then decided against it because I was in a rush and Jellybean wanted the doll right away. I did discover that fabric pastels will work well for that. I also neglected to add a little button detail to the spats. I'll have to get on that.
One final note, I don't have a clever way of hiding the "cracked" face when not in use. I thought about putting a little hat on top of his head to tuck it into or just attaching a bit of velcro to the back of his neck. If you come up with something, do let me know.
Be sure and let me know if you enjoyed this tutorial or if you have questions.
Have a Happy Day!
~MJ
First, here is the pattern that I put together for the doll:
In the process of turning the pattern into a PDF, it got shrunk slightly, so I've noted to add a 1/4" seam allowance to each piece when cutting. I don't have pictures for everything. So, if you have questions, feel free to leave them in the comment section.
Now let's make the Humpty Dumpty:
1. Choose your fabrics and gather materials. I just used scrap material that I had around. I chose 5 different fabrics for the following: Face/Hands, Body/Arms, Legs/Bow tie, Spats/Collar and Shoes. You'll need scissors, pins and some coordinating ribbon and thread.
2. Cut out the pattern. You'll need to make sure to cut out 4 each of the shoe, spats, legs, arms and hands. You'll also need 2 each of the body, head and collar. Make sure to fold fabric at indicated fold lines before pinning and cutting.
3. Pay attention to how you are cutting. I laid out all of the pieces after I cut them to make sure I had both right and left legs/arms when all of the fabric pieces are right sides facing out.
4. Pin one head piece and one body piece together, right sides facing each other. Repeat with other two pieces.
5. Sew both along the straight edge.
6. Pin one hand and arm piece together right sides facing each other. Repeat 4 times.
7. Sew hand and arm pieces together. *After sewing each piece, I made sure to iron the seams.
8. Pin together shoe and spat pieces. Right sides facing each other and repeat 4 times. Then sew together. *As I went along, I checked to make sure that I did indeed have a right and left leg/ right and left arm. I was a little paranoid about it.
9. Now pin spats and leg pieces together. Right sides facing each other and repeat 4 times. Now iron the seams. * I ended up ironing the seams for the shoe/spat and leg/spat opposite each other. I wanted the leg (or pant) to look like it had a slight cuff over the spat. If that makes sense.
10. I further defined the cuff look by sewing a straight seam across the outside of each leg.
11. Pin two arm pieces together, right sides facing in and sew together leaving the top open for stuffing. Repeat for the second arm. Pin two leg pieces together (make sure the cuff line matches up), right sides together and sew together leaving the top open for stuffing. Repeat for the second leg.
12. Stuff arms and legs leaving about a 1/2" of fabric at the top. Sew across the top to secure the stuffing. *While stuffing, I left each limb a bit sparse were the knee/elbow join would be, so that they'd still have a bit of movement. Just don't overstuff.
13. Pin and sew head/body pieces together. Only sew across the head portion, leaving the body open. Pin the arms in on each side of the body. I hand stitched the arms in place. *thumbs pointing up.
14. Stuff the head and body.
15. *This is the trickiest part of this whole project. Pin the rest of the body closed and pin in the legs where you want them. Hand stitch the body closed and stitch in the legs as you work. I just tried to make my stitching as neat as possible. Before you completely close up the body, add extra stuffing if needed so that the body is nice and filled out.
16. Now I wanted to add a few details. Pin the two collar pieces together and sew. I left the middle bottom section open for turning. Just make sure you leave an opening for turning. Then iron.
17. Cut two rectangles (as big as you want the bow tie to be) Pin and sew the two rectangle bow tie pieces together. Leave a space for turning! I trimmed the corners before I turned it right side out. Then iron and stitch the center together to create the bow tie.
18. I sketched out the faces I wanted to use. Then I used a disappearing ink quilting pen to draw them onto the fabric. That type of pen is awesome. It makes it really easy to fix any mistakes. I used fabric paint for the faces. I like the Scribblers fabric paint. You can find it at Hobby Lobby for a $1 per bottle.
19. Cut out a rectangle of head fabric and round the corners. I wanted this piece to be about the same width as the doll face and just a little longer to accomodate the seam when stitched on and to leave a little to tuck into the collar on front when in use. Paint your "cracked" face onto this piece of fabric. *I didn't want this to fray, so I used some liquid fray block around the edge of the fabric. Make sure you spot check it on your fabric first to make sure that it dries clear.
20. You're almost done! Some last details: Cut a bit of ribbon (I like to use a polyester blend so that I can melt the edges of the ribbon to prevent fraying). I folded down the top of the collar to shorten it a bit and then sewed the ribbon to the top of the collar. Then I cut a small piece of ribbon and attached it around the middle of the bow tie. Attach the bow tie to the collar. Now stitch the collar around your Humpty Dumpty. I left a little bit of a pocket at the top of the collar while stitching where I could tuck in the bottom of the alternate face.
21. I didn't picture it, but now you'll want to attach the "cracked" face. I stitched it onto the very top seam on my Humpty's head. I only stitched across the top, so that I could pull the face forward and then pull it back when not in use. As I stitched, I tried to pull the fabric as flat as possible, so that it would lay mostly flat across the face. Then I trimmed away any excess fabric.
That's the long and short of it. This is my first sewing tutorial. So, I hope all of the steps make sense.
I originally wanted to add some rosy cheeks to my Humpty, then decided against it because I was in a rush and Jellybean wanted the doll right away. I did discover that fabric pastels will work well for that. I also neglected to add a little button detail to the spats. I'll have to get on that.
One final note, I don't have a clever way of hiding the "cracked" face when not in use. I thought about putting a little hat on top of his head to tuck it into or just attaching a bit of velcro to the back of his neck. If you come up with something, do let me know.
Be sure and let me know if you enjoyed this tutorial or if you have questions.
Have a Happy Day!
~MJ
Labels:
diy,
doll,
hand stitched,
Humpty Dumpty,
nursery rhyme,
pattern,
play,
preschool,
sewing,
stuffed,
toy,
tutorial
Wednesday, September 12, 2012
WW- Feed The Birds
Apparently, the birds look hungry enough to eat sand...
Feed the birds from A Happy Song on Vimeo.
I'll note that Jellybean chose her red and hot pink outfit all by herself. :)
Join in the Wordless Wednesday fun.
Have a Happy Day!
~MJ
Feed the birds from A Happy Song on Vimeo.
I'll note that Jellybean chose her red and hot pink outfit all by herself. :)
Join in the Wordless Wednesday fun.
Have a Happy Day!
~MJ
Tuesday, September 11, 2012
Belly Swinging
We've been loving the heck out of our new swingset. In the afternoon, that part of the yard is in shade and it becomes a nice semi-cool escape from the heat. I'm a nice mom (no, really) so, I will push the kids on the swings but, there's a limit to my niceness. (When will my 4 year old learn to pump already?!) My new best friend is my digital timer. I set it for 20 minutes and then miraculously, there is no crying when the time is up. It's kind of like magic. Once I'm done pushing, my kids find other means of entertaining themselves. This usually involves at least another 20 minutes of belly swinging.
They think they are absolutely hilarious and spend the time giggling at each other's antics. This is when I get to just sit in the shade and relax. I love these afternoons.
Have a Happy Day!
~MJ
They think they are absolutely hilarious and spend the time giggling at each other's antics. This is when I get to just sit in the shade and relax. I love these afternoons.
Have a Happy Day!
~MJ
Wednesday, September 5, 2012
Taking Care of Baby
Our neighbors were cleaning out their old toys and thought Jellybean would like their old doll highchair.
![]() |
| Feeding baby cookies... |
![]() |
| Wash it down with juice... |
![]() |
| and burp the baby. |
Looks like she has this mothering thing down.
Have a Happy Day!
~MJ
Wednesday, August 29, 2012
Backyard Make-Over
I'll be honest, what I really want to be doing right now is re-watching one of my favorite Korean dramedies. Instead, I decided that I should bust out a quick post. I've been waiting to post these photos for a while. We had the play chips blown-in yesterday, so now I think it's time to reveal our backyard make-over.
One final thing: I think it's important to note that I planted all of the plants you can see there with the exception of the trees. That was 40+ plants. Whew. It makes me tired just looking at it.
Have a Happy Day!
~MJ
Before:
After:
Another angle, plus my two views sitting on the patio:
We took out the hot-tub and koi pond. Some would say that it is a shame. We were a little saddened at removing the pond, but couldn't stand having it around with toddlers. Now we have a kid-friendly area and a lovely space for reading. Best part? The low maintenance.One final thing: I think it's important to note that I planted all of the plants you can see there with the exception of the trees. That was 40+ plants. Whew. It makes me tired just looking at it.
Have a Happy Day!
~MJ
Monday, August 20, 2012
Play and Eat with Oatmeal
Occasionally, I'll be working on the computer and Jellybean will come sit with me. Because I'm often looking at craft and activity ideas to do with her, she likes to point at the screen and tell me what she'd like me to make or what activity looks fun to her. Last week, she saw this post on Play Through The Day for an oatmeal sensory bin. Jellybean wanted to do this activity so badly, that I couldn't turn her down.
This is actually my first bonafide sensory bin and an easy one to put together at that. I had an old container of oatmeal that was expired, so I dumped that in and then grabbed my daughter's Fisher Price farm animals and tossed those in as well. I also grabbed a couple of cans so that they could dig and pour.
Both Jellybean and Buddy enjoyed digging their hands in the bin and playing together with the animals. It's so fun to see them work so creatively with something simple.
I left them to their own devices until I noticed that the oatmeal was being thrown around the room. That was my cue that the activity was over and it was time for snacks. Guess what they wanted to eat? Oatmeal. No, we did not eat the oatmeal they played with. Just in case you were wondering.
Have a Happy Day!
~MJ
Sharing on:
This is actually my first bonafide sensory bin and an easy one to put together at that. I had an old container of oatmeal that was expired, so I dumped that in and then grabbed my daughter's Fisher Price farm animals and tossed those in as well. I also grabbed a couple of cans so that they could dig and pour.
Both Jellybean and Buddy enjoyed digging their hands in the bin and playing together with the animals. It's so fun to see them work so creatively with something simple.
I left them to their own devices until I noticed that the oatmeal was being thrown around the room. That was my cue that the activity was over and it was time for snacks. Guess what they wanted to eat? Oatmeal. No, we did not eat the oatmeal they played with. Just in case you were wondering.
![]() |
| Yum! |
~MJ
Sharing on:
Subscribe to:
Posts (Atom)