Showing posts with label necklace. Show all posts

Monday, February 25, 2013

Jewelry Travel Pouch Tutorial

When I was young, my grandmother made a small jewelry travel pouch for me. That little pouch has gone with me on all of my trips and has kept my jewelry safe and my necklaces from getting tangled. When I'm not traveling, I keep it on my dresser with my rings and watch in it.
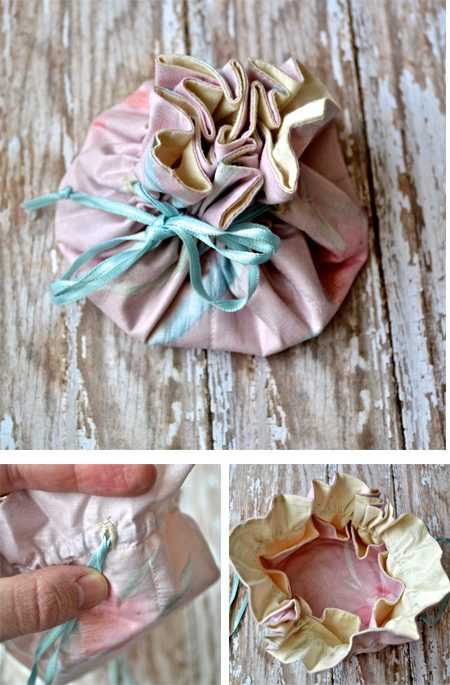
Original Travel Pouch
I got looking at my little pouch the other day and decided that I'd like to re-create it. I thought it would make a fantastic gift for friends or family. So, that's exactly what I did.
It's a really simple concept and except for one bit of laziness on my part, I tried to make mine true to the original. It's such a sweet little pouch. So easy to wrap up and throw in your bag.

Jewelry Travel Pouch Tutorial


Materials:
Just over a quarter of a yard of printed fabric
Just over a quarter of a yard of plain fabric for lining
Coordinating thread
Measuring tape or protractor
Air-erasable pen
43 inches of thin, coordinating ribbon

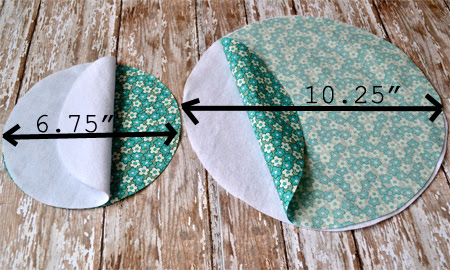
Start with two sets of circles (place them right sides together):
Sew a .25" seam around each circle and make sure to leave an inch or so open for turning. (You'll notice in the original that she used a buttonholer to create the openings for the ribbon. I am not an expert seamstress. I *think* she must have measured and done the button holes before she sewed the large circle together. I'm not sure, but i was too lazy to figure it out.)

Iron and place finished circles on top of each other like so:
 Now, you'll actually need to pull out the tape measure. I pulled out my trusty protractor. Find the center of the small circle. Using a air-erasable pen, you'll want to mark out the 8 pockets. I started at 90 degrees and then worked around the circle making another mark at 45 degrees. Just like cutting up a pizza.
Sew straight lines along your markings out to the edge of the small circle. Then sew a small circle about an inch from the edge. After that, sew two circles (.25" apart) around the outside of the smaller circle (on the large circle) to create a channel for your ribbon.
Time to insert your ribbon. This is where my laziness came in. I used my craft knife to gently cut a slit on each side of the pouch for the ribbon. I was careful not to slit the liner fabric. Then I used some fray check on the slits. You could also get out some needle and thread and wrap the edges of the slits in thread (seemed like a lot of work at the moment, but would make the holes more finished). Using a safety pin, insert your ribbon into the channel and then knot the ends of the ribbon together.

As a final touch for gift giving, add the little poem that my grandmother added to mine:
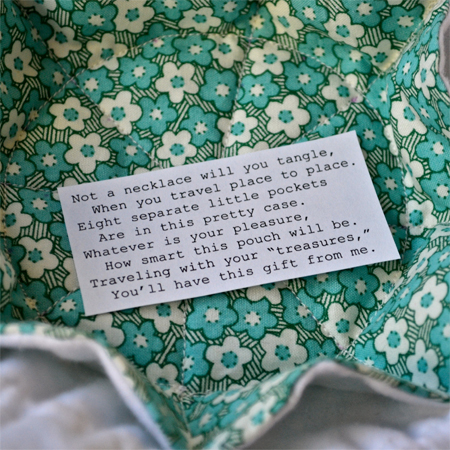
"Not a necklace will you tangle, when you travel place to place. Eight separate little pockets are in this pretty case. Whatever is your pleasure, how smart this pouch will be. Traveling with your 'treasures,' you'll have this gift from me."
I've even made of a PDF you can print with the words:

If you are keeping it for yourself, all that is left to do is to load it up with your jewelry:
I love my little pouch so much, can't wait to make a bunch to give as gifts. That's right friends, you may have something to look forward to. :)

Have a Happy Day!

~MJ

Thursday, January 31, 2013

Spreading the Love. Three Clay Heart Ideas.

This last week, I was really inspired by a beautiful, sterling silver conversation heart necklace. I knew Jellybean would love it, but unfortunately, I'm not that into spending $86 on my 2 year old daughter. Fortunately, I love working with oven-baked clay (take a peek at my clay rose necklace). So, I whipped it out and put together a sweet necklace for my little girl. GO HERE FOR THE TUTORIAL.
It didn't turn out exactly as I had envisioned, but it was greatly appreciated by the recipient.
Couldn't decide on which photo was cuter.
I wanted to share two more ideas for creating clay hearts with you. These two are both gift-tags/ornaments. I created them a few years ago and decided to make more this year. Hope they give you some inspiration.

Have a Happy Day!

~MJ

Tuesday, January 22, 2013

Cereal Necklace

I've been busy getting ready for a very special conference this week. I'm attending Alt SLC for the first time and am pretty anxious about it. That means, not a whole lot of my brain power has been going towards meaningful activities with the kids. Fortunately, I was able to take a tip from a fellow blogger and keep Jellybean busy making a cereal necklace yesterday afternoon.  I love simple projects and luckily, Jellybean does too. (Thanks Home Learning Journey for the sweet idea. It's an oldie but a goodie.)
Orange yarn (her favorite color) and Fruit Rings (one of her favorite cereals). I wrapped the end of the yarn with some tape to make it a little easier for Jellybean to string the fruit rings. She ate a lot of fruit rings while she put this together. Then she refused to eat any of the cereal on the necklace. Once it's an accessory, it's no longer food.
You can see some of her sticker rewards on her shirt. Potty training is going awesome!
I'm really looking forward to Alt.  Tomorrow, I'm going to post about what I'll be wearing. I want people to recognize me after all.

Have a Happy Day!

~MJ

Monday, January 21, 2013

Rose and Lace Necklace

With the weather so frigid and the air so crummy lately, I've been really looking forward to Spring and finding myself drawn to both floral and feminine things. I saw this great tutorial on how to make polymer clay roses and thought I'd give it a shot. I decided to make mine more stylized and to use them as beads for a necklace.
I started out by practicing with Jellybean's play dough.  I made several green roses for her. She stuck each one on a toothpick and added it to her creation.
I love scented play dough. Mmm, smells like green apple.
After I'd practiced for a little while, I decided to break out the clay.
Then I carefully poked a hole at the base of each rose using a toothpick. If you need a hole for your project, definitely remember to do it before baking.
After the roses were baked and cooled, I decided to stitch them to a lace ribbon necklace I found at Hobby Lobby.
I love the way it turned out. The necklace might work better as a choker, but I fear that my neck is too short to wear it like that.
A rose beaded necklace strung on lace. What could be more feminine? I kind of love the blue rose the most. I made several more roses and plan to put together a hair clip for Jellybean. More on that soon.

Have a Happy Day!

~MJ

Thursday, November 8, 2012

Fall Leaf Ornaments

I decided to get out the polymer clay again (here's what I did with it the first time) and do a little project for Fall. I actually started two projects at the same time, so here's the first one: Fall Leaf Ornaments.
I decided to use these as ornaments for my Thanksgiving tree, but these could just as easily become necklaces, gift tags or (if you leave off the hole for stringing) brooches.
I pulled out my new leaf shaped cookie cutters (mini and regular sized). I wish I had checked to make sure that all of the clay was good. The burgundy clay I'm working above was terribly dry. It really gave my fingers a workout. None of the other packages were as stiff, thank goodness.  It still worked though. I used 4 tongue depressors to control the thickness of the clay while I rolled. Then I used a toothpick to draw in the design and put in the hole for stringing.
I also have some small letter stamps that I put to use.
Once the clay was all cut out and ready, I put them in the oven (per package directions) to harden.
After the leaves cooled, I pulled out some acrylic paint and a paint brush. I painted each shape, allowed it to mostly dry and then took a damp cloth and rubbed off the excess paint from the surface. Then I strung each leaf with some yarn.
I probably will need to make a few more leaves to fill out the tree, but these four definitely add some personality to the branches.   Next week I'll show you what I was doing with the larger leaves.

Have a Happy Day and a Great Weekend, too.

~MJ

Sharing on:

Thursday, August 30, 2012

Chain Letters

It's amazing having a child who is obsessed with the ABCs. That kid will make the alphabet out of anything and everything if given a chance. One of Buddy's new favorite activities is stealing one of my necklaces and creating letters out of it.  I have to admit, it's so fun using a simple necklace and watching how the letters can morph into one another.
Today we had fun doing the entire alphabet together. D put together a montage of our efforts.

ChainLetters from A Happy Song on Vimeo.

Have a Happy Day!

~MJ