Showing posts with label heart. Show all posts

Thursday, February 14, 2013

Love is in the Air

Eat some chocolate today and have a very happy Valentine's day, but whatever you do, Don't eat Mom's Love Chocolate. I don't know what it is, and I'm not sure I want to know.
Have a Happy Day!

~MJ

Wednesday, February 13, 2013

Last Minute Valentine Odds & Ends

With Valentine's Day coming tomorrow, I decided to just dump the rest of my Valentine related photos today.
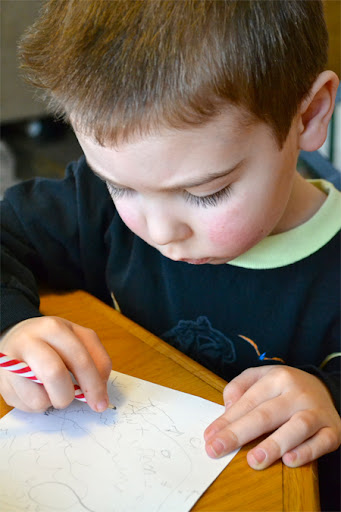
Buddy working very seriously on a valentine for his little sister's mailbox.
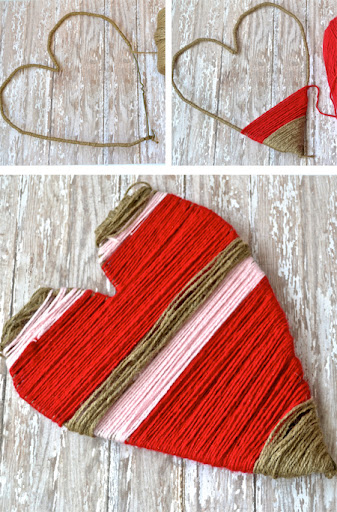
First attempt at a wire hanger, yarn wrapped heart. Kind of a craft fail. Next attempt will involve hot glue.
Jellybean painting a wood, heart-shaped wand her favorite color. This kid loves to paint.
An extra little Valentine's treat for Buddy's pre-school class. Trying to satisfy everyone: Gluten-free, nut-free and friendly for the kid who's mother won't let her eat sweets (I hope).
Have a Happy Day!

~MJ

Monday, February 11, 2013

Heart Leaf Art

Valentine's Day is just a few days away and I just can't stop my brain from working on heart shapes. I've had a whole slew of dried leaves hanging around since last June when I decided to press a bunch from my Forest Pansy Red Bud. At that time, I announced my intention to use them for something Valentine's related. Then, in the Fall, I decided that I wanted to paint some of them. I liked those results, but still wanted to use the natural leaves this season.

I found a $3 red frame last week when I was out shopping with Jellybean (the best shopping buddy ever) and decided that I'd go ahead and frame my collection of leaves. After a bit of arranging and rearranging, this is what I came up with.
Total cost: $3.53 + tax (the $.53 was for the scrapbook paper background). Not so Valentine's specific that I can't keep it up on the mantel all year. Those leaves are so pretty, I'll have to be sure and press more of them this next Summer.

Have a Happy Day!

~MJ

Thursday, January 31, 2013

Spreading the Love. Three Clay Heart Ideas.

This last week, I was really inspired by a beautiful, sterling silver conversation heart necklace. I knew Jellybean would love it, but unfortunately, I'm not that into spending $86 on my 2 year old daughter. Fortunately, I love working with oven-baked clay (take a peek at my clay rose necklace). So, I whipped it out and put together a sweet necklace for my little girl. GO HERE FOR THE TUTORIAL.
It didn't turn out exactly as I had envisioned, but it was greatly appreciated by the recipient.
Couldn't decide on which photo was cuter.
I wanted to share two more ideas for creating clay hearts with you. These two are both gift-tags/ornaments. I created them a few years ago and decided to make more this year. Hope they give you some inspiration.

Have a Happy Day!

~MJ

Tuesday, January 29, 2013

Faux Wood Heart

While out and about shopping for Valentine's Day decor, I've been really disappointed in what I've seen.  I guess I'm just not a bright red/pink heart with lace/glitter fan. As I was driving home after another disappointing shopping trip, I decided I should just make myself a decoration. I began thinking about what I already had in the house and devised a cheap, non-glittery idea for my mantel.
One thing I had on hand was cardboard and plenty of it. I also had some sheets of scrapbooking paper.
In a predictable move for me, I didn't even remove the packing material, I just started cutting into a box that was being used by the kids, then I just threw the box back in the pile ready to be used in more fort building. This was a very confusing development for Jellybean who couldn't figure out why one of her boxes suddenly developed a heart-shaped hole.
I glued my scrapbook paper heart and my cardboard heart together. Then I grabbed some twine (left over from the pine cone bird-feeder project) and some red felt circles (left over from my felt circle belt project).
I stitched the felt circles into some flowers and glued them on top. Okay, it's obviously not real wood, but there is something about a blue Valentine's heart that makes me smile. I don't know why. Plus, it still looks cute on my mantel. At least it was basically free and there wasn't any lace or glitter involved...


Have a Happy Day!

~MJ

Thursday, January 24, 2013

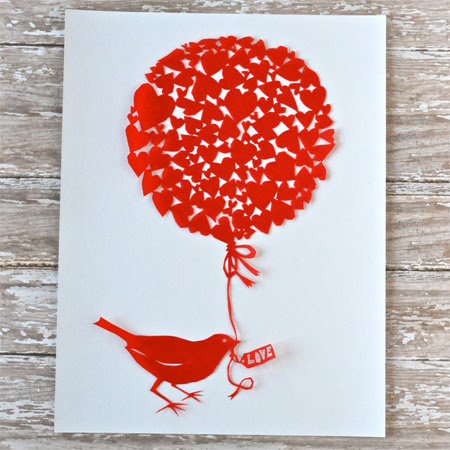
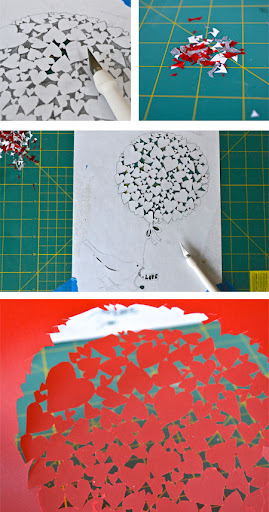
Paper Cut Valentine

I absolutely love the art of paper cutting (Scherenschnitte). There are many true artists out there that create amazing, intricate work. I took a class on that topic a couple of years ago and have been trying my hand at it now and again ever since.

Because I'm not much of an artist and because I'm such an amateur at paper cutting, I shamelessly stole a beautiful paper cut pattern from the internet (here. Wish I had a true photo credit for it.) and then simplified it a little so that I could actually make it work for me. I added some of my own touches as well.

Here's a few tips I picked up in my class if you'd like to dabble a little in paper cutting yourself.
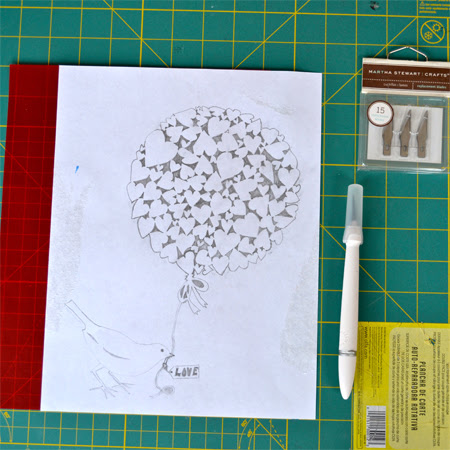
First, you'll need a pattern to work from. (at least I do) I sketched my pattern onto a piece of printer paper. Then you'll need a nice sheet of paper to cut the pattern onto. I decided to go with a sheet of red vellum. I figured that it isn't the easiest to tear, but it is still relatively thin. Whatever paper you choose, make sure that it is the same color all the way through.
Next, you'll want a few tools: A nice craft knife, (this one from Martha Stewart is awesome), a new sharp blade, and a self healing mat to cut on. (A smaller mat than mine is preferable so that you can turn it this way and that with more ease.)
Start cutting the small details on the interior of your pattern. You'll want the excess paper, it makes everything more stable. Go slowly and make small cuts. Once you are done with the small details, move onto the bigger details and then cut the main outline.
As you can see, my cuts are far from perfect, but oh is it satisfying seeing the end result of your hard work. It's almost magical when you carefully separate the paper cut from the outside paper. One last note: Remember to cut the paper and not yourself. That's always good advice.

Have a Happy Day!

~MJ

Sharing on:


Tuesday, June 26, 2012

Leaf Pressing In Progress

I constantly have projects in various stages of completeness. I thought for today's post I'd visit one of those projects in progress.
I love leaf pressing.  This may come as no surprise if you happened to catch one of my previous projects inspired by an Orangeola Japanese Maple.
When we moved to our new home I became obsessed with a red bud tree in our backyard.  I posted a beautiful picture of it in the Spring.  It went from this:
To this:
When I posted the photo of the tree in bloom, I thought that it was a Western Redbud.  Once the leaves emerged it turned out to be a Forest Pansy Redbud.  The leaves are a gorgeous purple red and perfectly heart shaped.  How could I not try and save some of these beautiful leaves?
I picked several leaves (there were way too many to choose from) and went ahead and prepped them for pressing. I started by washing the leaves and then drying them on a paper towel.
After that, I took an sharp knife and carefully cut the stem away so that the heart shape would be more apparent. I usually just press the leaves between two sheets of printer paper, but I decided that I'd try slipping them in some cello bags.  I'm thinking that this will make transport and storage a little easier. I hope it was a good idea. (ETA: Putting them in bags was not a good idea. I felt a little dumb when I realized that pressing them this way would just keep the moisture in. Glad I took the leaves out of the bags before it ruined them.)
Pressing is easy after that.  I like to do it old school. I slipped the leaves between the pages of one of my large coffee table books and then added on a lot of weight. Another valuable lesson brought to you from my elementary school education.
So, there they'll stay for now while the Complete Works of Shakespeare works its magic.  I have so many ideas of how to use the leaves once they are fully dry. Simply framed would be beautiful, but can't you see one of those beautiful leaves as the center piece on a Valentine's Day card?  I can.

Now go and find some lovely leaves to press and...

Have a Happy Day!

~MJ

This post is participating in:

Tip Junkie handmade projects

Tuesday, February 21, 2012

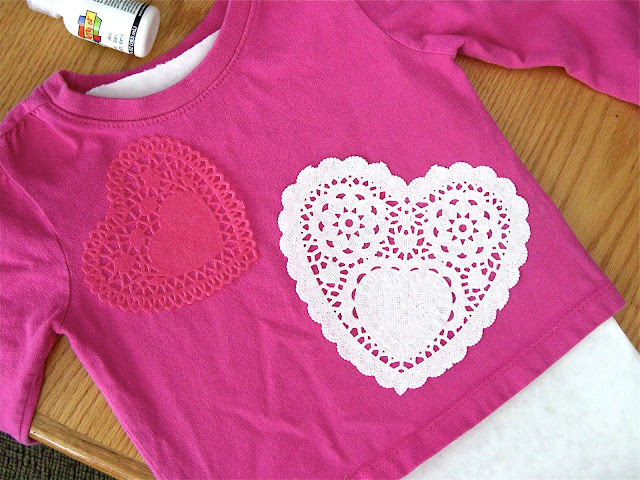
Valentine's Shirt Project

Yes, this V-day craft is about a week late, but in my defense, I had it completed on the day.

This is a project that has been going around. I found it in Family Fun Magazine and decided to expound on the theme.

I mentioned in an earlier post that I found some $2 shirts on my thrift shopping adventure. I used one of those shirts to create this masterpiece.

Materials:

t-shirt
craft paper
paper doilies
fabric paint
paint brush
glue stick
cookie cutters

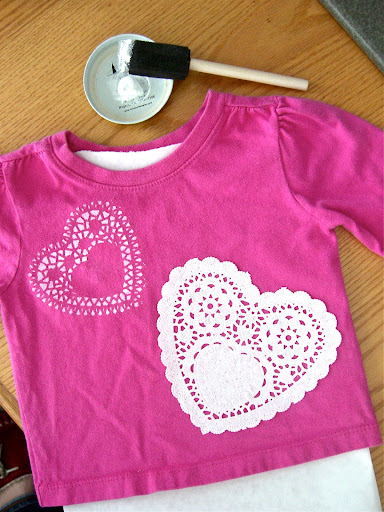
First, I took a sheet of craft paper and put it on the inside of the shirt (I didn't want paint going through to the other side.

Then I took my doilies and place them where I thought they looked nice. I put a small streak of glue-stick glue on each doily to keep it in place.
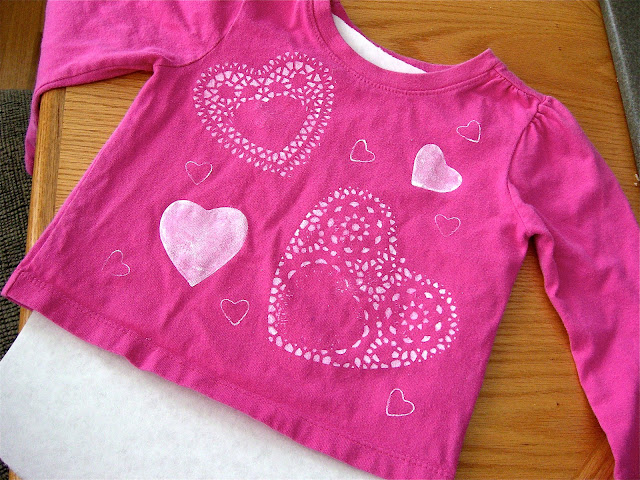
After I had painted through each doily and peeled them up, I thought to myself, "It needs more..." This is never a good thought.
I found a few heart shaped cookie cutters and went crazy!
Read the instructions on the fabric paint and make sure you give it enough time to dry.
Jellybean loves her shirt and while she refuses to let me take normally posed pictures of her, she was still pleased to show it off.

I'm sure we'll get a lot of use out of the shirt this spring. I'm thinking this project would work really great with round doilies as well.

Try it out and have a Happy Day!

~MJ

I'm linking up with:
Today's Creative Blog