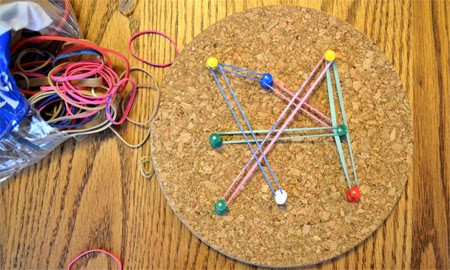
A few weeks ago, I saw a great picture of a push pin geo board using a cork board, push pins and rubber bands. I wish I had the link. It was such a simple idea, that I thought I'd give it a try with my kids.
I purchased some cork trivets from Ikea, some push pins and a mega bag of assorted rubber bands.
I laid the materials out for the kids and before I could show them how I wanted the activity to go, they had already started making works of art on their own. I swear that 9 times out of 10, I have a very specific idea in mind for an activity and then the kids totally change it. I have had to learn to just roll with it.
This was a great activity. I worried that Jellybean was a little young to be messing with push pins, but it turned out to not be a problem at all. I can see us breaking this out regularly. They'll also be fun to use in conjunction with Buddy's kindergarten curriculum. Right now they are working on shapes.
Teddy Bear was pleasant as usual and just hung-out in his high chair while we played. Sweet boy, I can't wait until he is big enough to play too.
Have a Happy Day!
~MJ
Showing posts with label Art. Show all posts
Showing posts with label Art. Show all posts
Monday, October 28, 2013
Tuesday, September 3, 2013
Sidewalk Chalk Paint!
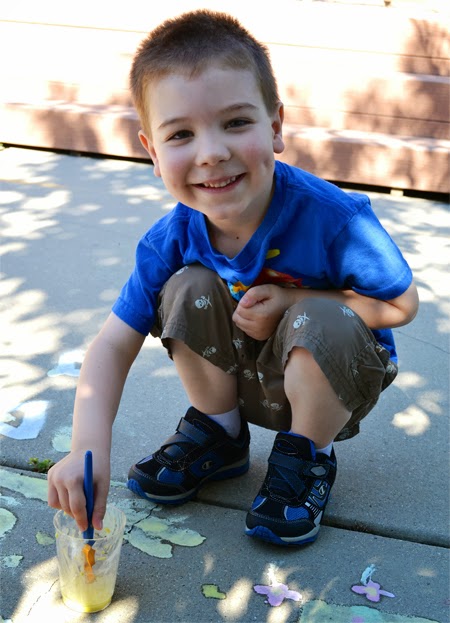
It has been so hot this summer that we haven't spent as much time outside as I would have wished. Fortunately, we are starting to see some cooler days now which means that I need to find activities that will motivate the kids to play outside. I have one child that will spend all day outside and one child that I have to drag out there. A good friend of mine suggested that I try chalk paint. I had seen it several places, but hadn't yet tried it.
It's so easy to put together, I don't know why I didn't try it before. The recipe is just equal parts cornstarch and water. Then add whatever food coloring you like. We just pulled out random craft brushes. I wouldn't recommend the foam brushes, they get torn up too easily when painting on cement.
The color is really nice when going down. It mostly dries white. The kids had a great time splashing the colors around. Jellybean is into abstract color patterns.
Buddy is more into painting greek letters.
Teddy Bear was napping, so I decided to try some painting myself. Because I'm awesome.
Have a Happy Day!
~MJ
Tuesday, March 19, 2013
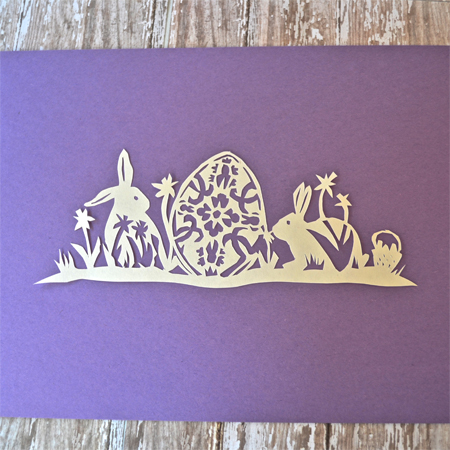
Bunny Paper Cut
Looking for more Easter decor to put up around the house, I decided to design another paper cut for the season. You might remember that I designed this paper cut for Valentine's. I've mentioned before that I'm definitely an amateur when it comes to the art of paper cutting, but I still enjoy it. The bunny design I put together has a couple of flaws, but I still like the way it turned out.
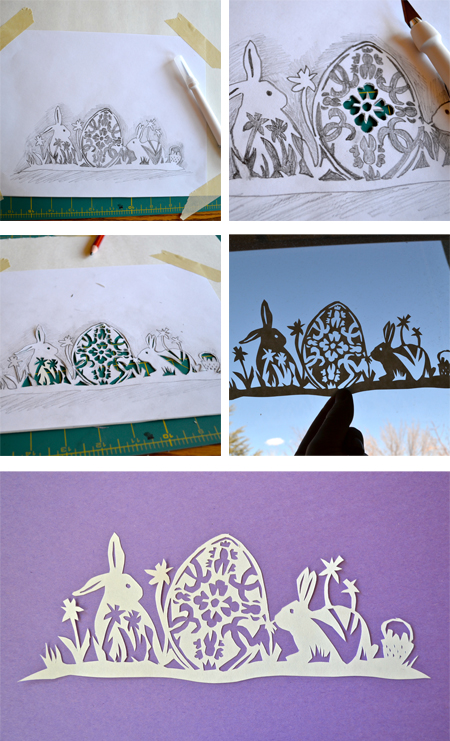
The above shows my cutting process. There are more detailed photos of the process on my Valentine's paper cut post. The pattern needs a little tweaking and I modified it a little as I went along, but I still thought I'd provide my sketch in case you'd like to try it out yourself.Download the Bunny Paper Cut PDF here:
Bunny Paper Cut
Easter is coming up so quickly and I feel very unprepared. Jellybean's birthday is in a week and I keep forgetting that I need to get our Easter plans figured out for just another week after that. Then, of course, there's the whole birth of our third child looming. I still have about 6 weeks to go. I told D today that I need a baby-cation. I'm thinking that involves me, a hotel room, room service, movies and some serious alone time. I doubt that's possible, but it's nice to dream about.
Have a Happy Day!
~MJ
Labels:
Art,
bunny,
decor,
decorating,
diy,
easter,
home,
Knife,
paper cut,
pattern,
scherenschnitte,
Spring
Tuesday, March 12, 2013
Paint!
Buddy is a fastidious child. He doesn't like getting his hands messy. Because of this, he has gone almost the entire year of pre-school refusing to participate in painting projects. Right now, his class is working on a dress-up wardrobe for a school fundraising auction. The children have been painting the wardrobe. Making balloons with their fingerprints as well as flowers, butterflies and grass with handprints. Just imagine how much of this painting my son has done.... His teacher has wanted him to be involved so she sent home some paint and the handles for the wardrobe drawers. She figured that I'd be able to find him in the right mood to paint the handles if we did it at home.
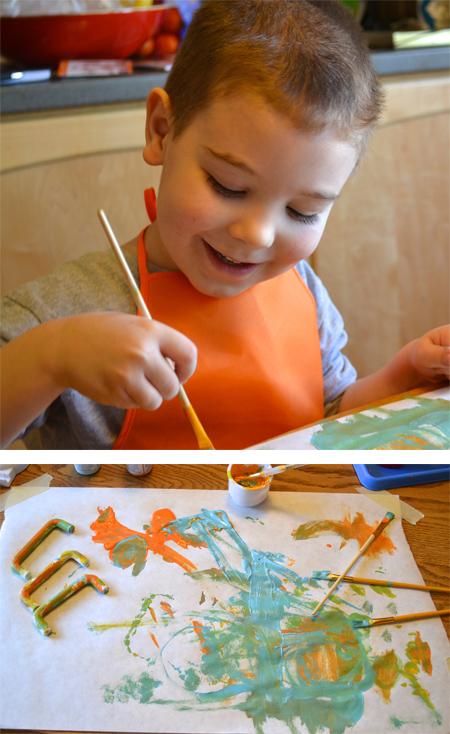
Well, it took a couple of weeks to find a time when he was willing and boy did I find him willing:
After he painted the handles, he just kept going.
Buddy said, (and I quote) "I like painting!" So, I asked him why he doesn't paint at school. He responded very matter of fact, "I just like cutting and gluing at school."
So, did Jellybean paint too? Yep, she did.
I love the end results of both of their work.
I think I'm going to need to frame both of these.
Have a Happy Day!
~MJ
Well, it took a couple of weeks to find a time when he was willing and boy did I find him willing:
After he painted the handles, he just kept going.
Buddy said, (and I quote) "I like painting!" So, I asked him why he doesn't paint at school. He responded very matter of fact, "I just like cutting and gluing at school."
So, did Jellybean paint too? Yep, she did.
 |
| She was a little disturbed when I told her not to paint her mouth. |
I think I'm going to need to frame both of these.
Have a Happy Day!
~MJ
Labels:
activities,
around the house,
Art,
indoor play,
paint,
preschool,
Projects
Monday, February 11, 2013
Heart Leaf Art
Valentine's Day is just a few days away and I just can't stop my brain from working on heart shapes. I've had a whole slew of dried leaves hanging around since last June when I decided to press a bunch from my Forest Pansy Red Bud. At that time, I announced my intention to use them for something Valentine's related. Then, in the Fall, I decided that I wanted to paint some of them. I liked those results, but still wanted to use the natural leaves this season.
I found a $3 red frame last week when I was out shopping with Jellybean (the best shopping buddy ever) and decided that I'd go ahead and frame my collection of leaves. After a bit of arranging and rearranging, this is what I came up with.
Total cost: $3.53 + tax (the $.53 was for the scrapbook paper background). Not so Valentine's specific that I can't keep it up on the mantel all year. Those leaves are so pretty, I'll have to be sure and press more of them this next Summer.
Have a Happy Day!
~MJ
Labels:
Art,
Fall,
forest pansy,
framed,
heart,
heart shaped,
Holiday,
leaf,
Leaves,
red bud,
Spring,
valentine's day
Thursday, January 24, 2013
Paper Cut Valentine
I absolutely love the art of paper cutting (Scherenschnitte). There are many true artists out there that create amazing, intricate work. I took a class on that topic a couple of years ago and have been trying my hand at it now and again ever since.
Because I'm not much of an artist and because I'm such an amateur at paper cutting, I shamelessly stole a beautiful paper cut pattern from the internet (here. Wish I had a true photo credit for it.) and then simplified it a little so that I could actually make it work for me. I added some of my own touches as well.
Here's a few tips I picked up in my class if you'd like to dabble a little in paper cutting yourself.
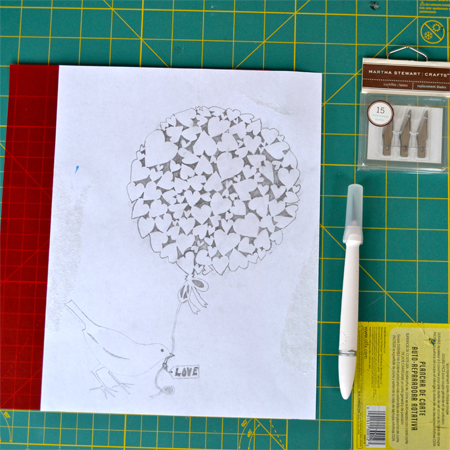
First, you'll need a pattern to work from. (at least I do) I sketched my pattern onto a piece of printer paper. Then you'll need a nice sheet of paper to cut the pattern onto. I decided to go with a sheet of red vellum. I figured that it isn't the easiest to tear, but it is still relatively thin. Whatever paper you choose, make sure that it is the same color all the way through.
Next, you'll want a few tools: A nice craft knife, (this one from Martha Stewart is awesome), a new sharp blade, and a self healing mat to cut on. (A smaller mat than mine is preferable so that you can turn it this way and that with more ease.)
Start cutting the small details on the interior of your pattern. You'll want the excess paper, it makes everything more stable. Go slowly and make small cuts. Once you are done with the small details, move onto the bigger details and then cut the main outline.
As you can see, my cuts are far from perfect, but oh is it satisfying seeing the end result of your hard work. It's almost magical when you carefully separate the paper cut from the outside paper. One last note: Remember to cut the paper and not yourself. That's always good advice.
Have a Happy Day!
~MJ
Sharing on:
Labels:
Art,
balloon,
bird,
decor,
diy,
heart,
paper cut,
scherenschnitte,
tutorial,
valentine,
valentine's day
Tuesday, September 18, 2012
Painted Leaves
I guess I'm continuing on the leaf theme for the week. I posted a while ago about pressing leaves from my Forest Pansy Red Bud tree. That tree has such beautifully shaped leaves, it was difficult to resist.
Now that the weather is cooling, I've been able to snatch up a few leaves that have begun changing color. So, of course, I pressed those as well. I have some more "valentiney" plans for some of the heart-shaped leaves, but since I love the look of pressed leaves around the house in the Fall, I thought I'd do something different with a couple of them.
I had some paint around the house and some fine paint brushes, so I spent about five minutes and experimented with leaf painting.
I really thought I was ruining the leaf above, but now I think I like the end result. Most of the time, it's best not to tamper with the beauty of nature.
Some of these leaves were too beautiful to touch. I'm thinking of framing the above collection just as it is for my Fall decor. I can't wait to press more of the Fall leaves as they continue to change.
Have a Happy Day!
~MJ
Sharing on:
Monday, September 17, 2012
"Stain Glass" Leaves and Pumpkins
It's been a little while since I've done a formal art activity with the kids. With Buddy starting school, I've felt a bit at loose ends and haven't been very good at planning. I decided to change that today. I saw this project somewhere on the internets last Fall and have been meaning to do it ever since. Now that Fall is nearly here, I keep seeing it pop up here and there on other blogs, so I decided to get the kids busy today and make some "stain glass" leaves. Buddy, being obsessed with Halloween, decided that he wanted to make "stain glass" jack-o-lanterns instead.
Materials needed:
-Clear contact paper
-Tissue paper
-Construction paper
-Scissors
-Masking tape
-Pen
We started by ripping up a lot of tissue paper in varying shades. I let the kids choose which colors they wanted to use and we went to town on it.
It was not hard to convince the kids to rip up paper. Jellybean could hardly contain her glee, "Mama, I'm making a mess!"
Once the kids were done ripping up the paper, I sent them off to play for a little while. I sketched out a maple leaf on some scratch paper and then copied it onto the back of the contact paper a couple of times. Then, I also sketched out a couple of simple pumpkin shapes.
I cut those out, peeled off the backing and placed them sticky side up in work stations for the kids. I used just a little bit of masking tape to secure them in place.
Materials needed:
-Clear contact paper
-Tissue paper
-Construction paper
-Scissors
-Masking tape
-Pen
We started by ripping up a lot of tissue paper in varying shades. I let the kids choose which colors they wanted to use and we went to town on it.
 |
| Torn up tissue paper pile got larger and larger. |
 |
| Jellybean was pretty proud of the mess she was making. |
Once the kids were done ripping up the paper, I sent them off to play for a little while. I sketched out a maple leaf on some scratch paper and then copied it onto the back of the contact paper a couple of times. Then, I also sketched out a couple of simple pumpkin shapes.
I cut those out, peeled off the backing and placed them sticky side up in work stations for the kids. I used just a little bit of masking tape to secure them in place.
 |
| Contact paper maple leaf ready to go. |
Then I cut out a few jack-o-lantern eyes, noses and mouth shapes for Buddy's pumpkins.
I called the kids over and they started to cover the contact paper with the torn-up tissue and face shapes for the pumpkins.
The kids had a really fun time plastering their shapes with color. Once the shapes were completely covered, I removed the masking tape and used my scissors to clean up any tissue that went out of the shape. We hung them up in the window to get the full effect. I think they turned out pretty cute.
 |
| Stain Glass Jack-O-Lanterns. Buddy loves the gold one. |
 |
| Stain Glass Leaf. My photos don't quite catch how pretty these are in the window. The sun shining through really makes the colors pop. |
 |
| All of the shapes hung up over looking the back yard. Note our wasp trap, in the background, that is completely full. |
Definitely a fun afternoon project. We're really getting excited for Fall over here.
Have a Happy Day!
~MJ
Sharing On:
Labels:
Art,
Autumn,
diy,
Fall,
Halloween,
jack-o-lantern,
leaf,
preschool,
project,
pumpkin,
stain glass,
window
Wednesday, July 18, 2012
WW- Form and Function
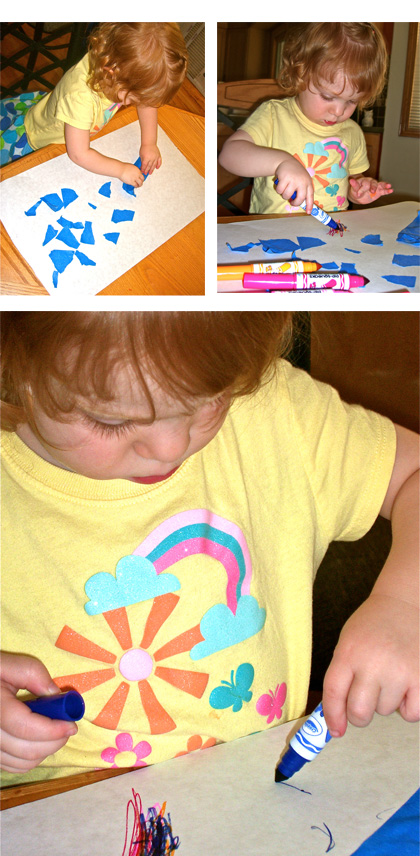 |
| Serious concentration here. Love the pouty lips. |
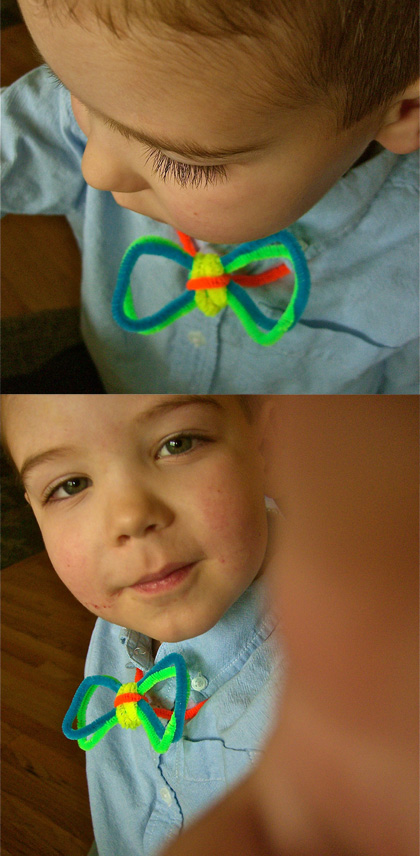 |
| Long lashes and peanut butter jelly cheeks. |
Have a Happy Day!
~MJ
Labels:
Art,
bow tie,
form,
function,
markers,
pipe cleaners,
tape,
wordless Wednesday
Tuesday, July 3, 2012
Fizzing Planet Art
 |
| Jellybean's complete planet with extra cheesy grin. |
 |
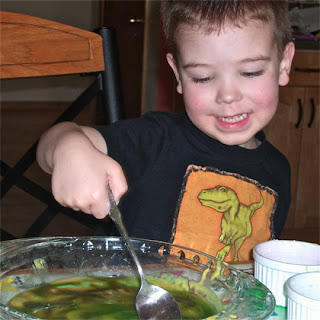
| Buddy and Jellybean working on their creations. |
 |
| Adding more and more color. Jellybean started adding baking soda to her ramekins so that the entire thing would fizz. |
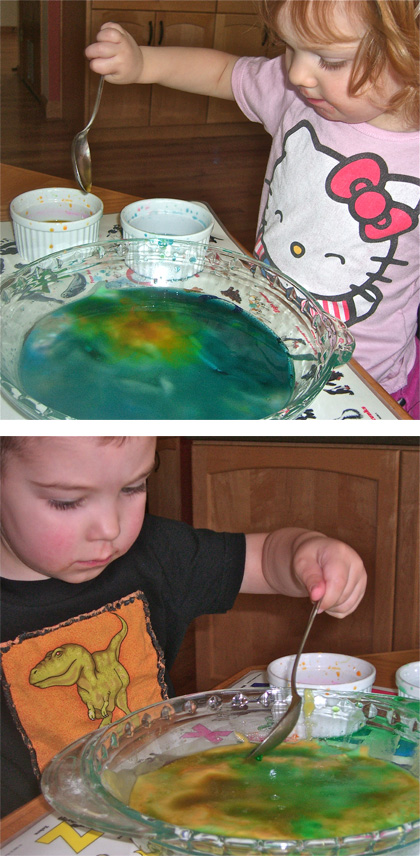 |
| Plates transforming into alien planets |
 |
| Buddy putting the final touches on his monster planet. |
So, what are your favorite rainy/scorching hot day activities??
Have a Happy Day!
~MJ
This post is participating in:


Tuesday, June 26, 2012
Leaf Pressing In Progress
I constantly have projects in various stages of completeness. I thought for today's post I'd visit one of those projects in progress.
I love leaf pressing. This may come as no surprise if you happened to catch one of my previous projects inspired by an Orangeola Japanese Maple.
When we moved to our new home I became obsessed with a red bud tree in our backyard. I posted a beautiful picture of it in the Spring. It went from this:
To this:
When I posted the photo of the tree in bloom, I thought that it was a Western Redbud. Once the leaves emerged it turned out to be a Forest Pansy Redbud. The leaves are a gorgeous purple red and perfectly heart shaped. How could I not try and save some of these beautiful leaves?
I picked several leaves (there were way too many to choose from) and went ahead and prepped them for pressing. I started by washing the leaves and then drying them on a paper towel.
After that, I took an sharp knife and carefully cut the stem away so that the heart shape would be more apparent. I usually just press the leaves between two sheets of printer paper,but I decided that I'd try slipping them in some cello bags. I'm thinking that this will make transport and storage a little easier. I hope it was a good idea. (ETA: Putting them in bags was not a good idea. I felt a little dumb when I realized that pressing them this way would just keep the moisture in. Glad I took the leaves out of the bags before it ruined them.)
Pressing is easy after that. I like to do it old school. I slipped the leaves between the pages of one of my large coffee table books and then added on a lot of weight. Another valuable lesson brought to you from my elementary school education.
So, there they'll stay for now while the Complete Works of Shakespeare works its magic. I have so many ideas of how to use the leaves once they are fully dry. Simply framed would be beautiful, but can't you see one of those beautiful leaves as the center piece on a Valentine's Day card? I can.
Now go and find some lovely leaves to press and...
Have a Happy Day!
~MJ
This post is participating in:

I love leaf pressing. This may come as no surprise if you happened to catch one of my previous projects inspired by an Orangeola Japanese Maple.
When we moved to our new home I became obsessed with a red bud tree in our backyard. I posted a beautiful picture of it in the Spring. It went from this:
To this:
When I posted the photo of the tree in bloom, I thought that it was a Western Redbud. Once the leaves emerged it turned out to be a Forest Pansy Redbud. The leaves are a gorgeous purple red and perfectly heart shaped. How could I not try and save some of these beautiful leaves?
I picked several leaves (there were way too many to choose from) and went ahead and prepped them for pressing. I started by washing the leaves and then drying them on a paper towel.
After that, I took an sharp knife and carefully cut the stem away so that the heart shape would be more apparent. I usually just press the leaves between two sheets of printer paper,
Pressing is easy after that. I like to do it old school. I slipped the leaves between the pages of one of my large coffee table books and then added on a lot of weight. Another valuable lesson brought to you from my elementary school education.
So, there they'll stay for now while the Complete Works of Shakespeare works its magic. I have so many ideas of how to use the leaves once they are fully dry. Simply framed would be beautiful, but can't you see one of those beautiful leaves as the center piece on a Valentine's Day card? I can.
Now go and find some lovely leaves to press and...
Have a Happy Day!
~MJ
This post is participating in:

Labels:
Art,
craft,
crafting,
forest pansy,
heart,
japanese maple,
leaf pressing,
Leaves,
redbud,
simple,
valentine's day
Subscribe to:
Posts (Atom)

