Showing posts with label valentine. Show all posts

Thursday, February 13, 2014

Happy Heart Day!

This year, for Valentine's, Buddy wanted to make something special for his classmates at school.  So, we pulled out the perler beads and got to work. We've been playing with the larger beads. I think they are way easier for small fingers to work with.
He designed the hearts himself and I ironed them and hot glued a pin to the back.
We mounted most of the pins inside some ready made cards that Buddy received in his Karate class. I'm torn about advertising with a valentine, but he really likes them and it was less work for me.  He's really excited to give his friends something that he designed. He even has one special heart for his favorite friend in class. What do you think? Better than candy?

Have a Happy Day and a Great Heart Day.

~MJ

Wednesday, February 13, 2013

Last Minute Valentine Odds & Ends

With Valentine's Day coming tomorrow, I decided to just dump the rest of my Valentine related photos today.
Buddy working very seriously on a valentine for his little sister's mailbox.
First attempt at a wire hanger, yarn wrapped heart. Kind of a craft fail. Next attempt will involve hot glue.
Jellybean painting a wood, heart-shaped wand her favorite color. This kid loves to paint.
An extra little Valentine's treat for Buddy's pre-school class. Trying to satisfy everyone: Gluten-free, nut-free and friendly for the kid who's mother won't let her eat sweets (I hope).
Have a Happy Day!

~MJ

Monday, February 4, 2013

Caution: Air Heads Valentine Printable

A little over a week ago, I attended a fantastic conference: Alt SLC. I'm still decompressing from it. I received tons of amazing information, tips and inspiration while I was there. I met a ton of incredibly talented people as well. Now I have a whole lot on my to do list in regards to this blog.

As I was feeling a little overwhelmed, suddenly crafty inspiration struck. One of the awesome sponsors for Alt, Air Heads Candy, is holding a valentine crafting contest. When I first heard about the contest, I had nothing, so I just put it aside. Then on a whim, I decided to look it up again and discovered that none of the current entries contained puns.

Now, I'm of the opinion that a valentine just isn't a valentine if it doesn't contain a pun. So, I submit for your viewing enjoyment, my entry for the AirHeads Craft Your Valentine Contest. (My mother is a master of puns, so I hope my wording will make her proud.)
Isn't it amazing!? If you want to print your own, you can! (It's free after all.) Go to the following link:

Once it has been approved, you can also vote for my valentine. I'd love it if you did. Go to the contest page on Facebook and click on "view entries." Look for my caution sign entry and cast your vote. I'd really appreciate it. You can even vote once every day! Hooray!

Have a Happy Day!

~MJ

Thursday, January 24, 2013

Paper Cut Valentine

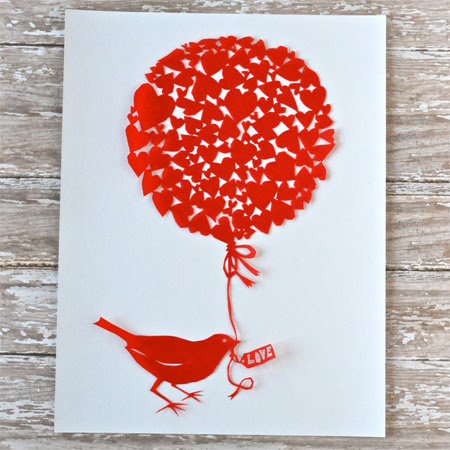
I absolutely love the art of paper cutting (Scherenschnitte). There are many true artists out there that create amazing, intricate work. I took a class on that topic a couple of years ago and have been trying my hand at it now and again ever since.

Because I'm not much of an artist and because I'm such an amateur at paper cutting, I shamelessly stole a beautiful paper cut pattern from the internet (here. Wish I had a true photo credit for it.) and then simplified it a little so that I could actually make it work for me. I added some of my own touches as well.

Here's a few tips I picked up in my class if you'd like to dabble a little in paper cutting yourself.
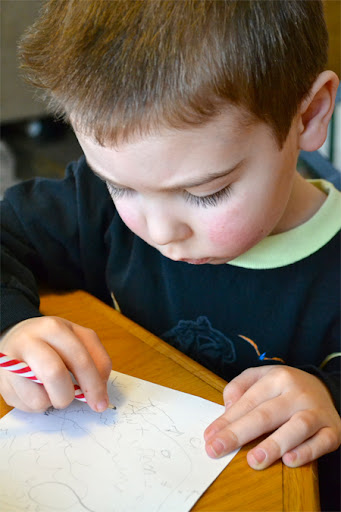
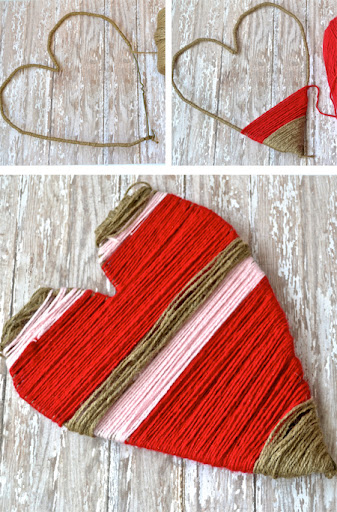
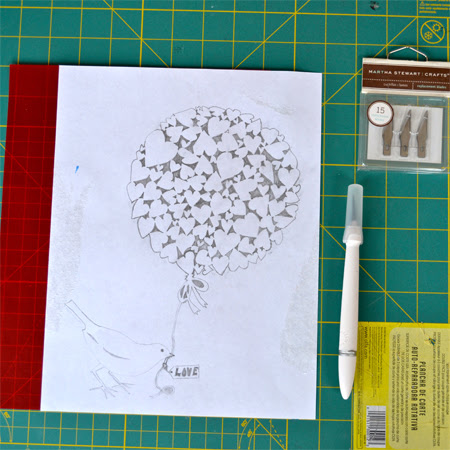
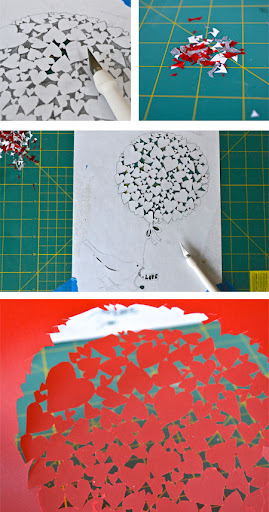
First, you'll need a pattern to work from. (at least I do) I sketched my pattern onto a piece of printer paper. Then you'll need a nice sheet of paper to cut the pattern onto. I decided to go with a sheet of red vellum. I figured that it isn't the easiest to tear, but it is still relatively thin. Whatever paper you choose, make sure that it is the same color all the way through.
Next, you'll want a few tools: A nice craft knife, (this one from Martha Stewart is awesome), a new sharp blade, and a self healing mat to cut on. (A smaller mat than mine is preferable so that you can turn it this way and that with more ease.)
Start cutting the small details on the interior of your pattern. You'll want the excess paper, it makes everything more stable. Go slowly and make small cuts. Once you are done with the small details, move onto the bigger details and then cut the main outline.
As you can see, my cuts are far from perfect, but oh is it satisfying seeing the end result of your hard work. It's almost magical when you carefully separate the paper cut from the outside paper. One last note: Remember to cut the paper and not yourself. That's always good advice.
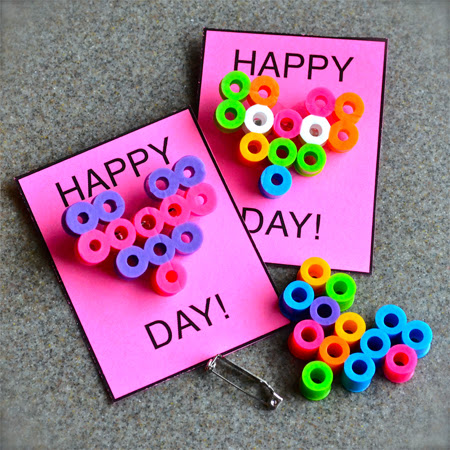
Have a Happy Day!

~MJ

Sharing on: