Showing posts with label summer. Show all posts

Monday, September 3, 2012

Changing Seasons

Lately, I've been noticing the slow change of the leaves. The mountainside is changing to fall shades and I've even noticed, here and there, some orange and yellow replacing the green leaves in my back yard. I realized, over the Labor Day weekend, that we are coming up on the one year anniversary of moving into our current home. The year has flown by. As the seasons have changed throughout the last year, I made it a habit to take a photo of the way the trees look from one of our upstairs windows.
Summer, Fall, Winter, Spring, Seasons
Fall and Spring are especially breathtaking.
The view of the trees is so beautiful from there. When I look out, I'm reminded of how quickly the time is passing and I look forward to the beauty that each new season will bring. I'm grateful for the year we've spent in our home and I look forward to the many years ahead of us.

Have a Happy Day!

~MJ

Tuesday, August 28, 2012

Homemade Root Beer Float

Homemade, Root beer, Float
Growing up, one of the highlights of summer was the homemade root beer that my father would brew, bottle and ferment in the garage.  It didn't appeal to everyone, in fact, it was an acquired taste. There was even that memorable event when one of my sister's friends took a sip and spit it across the kitchen. I'll tell you something though, nothing tastes better with a bacon and tomato (fresh from the garden) sandwich than that root beer.

This summer, I decided that it was time to revive the tradition of homemade root beer.  I didn't have my father's equipment or recipe. Plus, I wasn't sure I was up to making it in quite the quantity that he bottles it in. So, when I ran across this Mr. Root Beer home brewing kit, I thought it was worth a try.
Homemade, Root beer, Float
When it arrived in the mail, it engulfed my kitchen in the wonderful smell of root beer extract.  The instructions were fairly simple and I was able to brew my first batch during nap time. After letting it ferment for the prescribed amount of time and then chilling it in the fridge, I ventured a first taste. I'll be honest, it wasn't as satisfying as I had hoped. I think I was craving something a bit "yeastier" and because this tasted more like root beer than yeast, it really wasn't what I was expecting. It's funny how a taste memory can be so strong.
Homemade, Root beer, Float
Yet, the kids loved it and the taste has grown on me.  It made for one amazing root beer float while the kids were again napping (I love nap time). What's great is that it isn't quite as sugary sweet as the root beer you might purchase in the store. It was definitely a worthy experiment. We have bacon and tomato sandwiches on the menu this week.
Homemade, Root beer, Float
Have a Happy Day!

~MJ

Sharing on:

Tuesday, August 14, 2012

Green Gables Lemonade

Awhile back, I ran across a website where the sole purpose was to recreate recipes from classic literature. They even had a post regarding Anne of Green Gables' recipe for old fashioned lemonade. I thought the idea was cute at the time, but it wasn't until we were hitting above 100 degrees this summer that I was reminded of it and decided it was high time I got a good lemonade recipe.  I searched for the Green Gables lemonade recipe and found it!  I'm thinking that Anne (with an 'e') would appreciate how much we enjoyed it.
We set up our afternoon snack out on the back deck in the shade.  It was a lovely way to spend the afternoon: sipping lemonade and laughing with my kids.
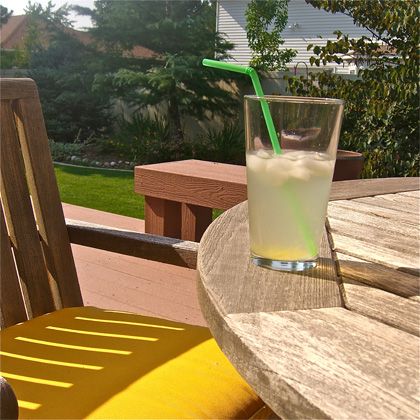
There's my glass waiting for me!
Jellybean found an interesting way of enjoying her lemonade:
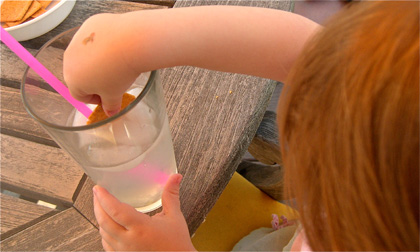
That's right, dipping her wheat thins.
Old Fashioned Lemonade 
1 ½ cups sugar
1 ½ cups water
Zest from one lemon
1 ½ cups fresh lemon juice (about 6 or 7 lemons)
Ice cubes
Cold water or sparkling water

Measure the sugar and water into a sauce pan. While stirring with a wooden spoon, bring the mixture to a boil for 5 minutes. Remove the saucepan from the heat. Let cool slightly.

Add fresh squeezed lemon juice and lemon zest to the sugar syrup. Cool completely. Pour the lemonade syrup into a quart jar. Cover tightly with the lid. The syrup can be kept in the refrigerator for 2 or 3 weeks.

When you’re ready to serve the lemonade, put some ice cubes in the bottom of a glass. Our ¼ cup of the lemon syrup over the ice cubes. Add ¾ cup cold water or sparkling water and stir. I decided that I wasn't a real fan of the zest in my glass, so I've started straining that out.

The recipe makes enough syrup for 14 glasses of lemonade.
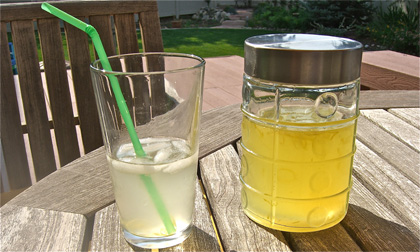
I couldn't help sipping while I took photos.  Here's my jar of syrup, too. Yum.
Just incase you are wondering, "It looks good, but is it really?" Here's what my children thought of our new recipe, they were pretty enthusiastic...


Lemonade Critique from A Happy Song on Vimeo.

Have a Happy Day!

~MJ

Sharing at:

PhotobucketI Heart Nap Time

Monday, August 6, 2012

Nap Time Treat: Sweet Cherry Ice Cream

I look forward to the summertime road-side fruit stands.  Usually, the fruit is outstanding and very fresh.   We visited a fruit stand this last week and picked up a bag of sweet cherries.  Unfortunately, on closer inspection at home, they weren't as pretty as I'd hoped for (major disappointment and annoyance). I was able to salvage enough for the kids to enjoy. After that, I still had maybe two cups left that were usable. What to do?
I have an on going love affair with my new ice cream maker.  So, I went searching for an sweet cherry ice-cream recipe. I found a few that I thought would work, so I made a mismash of them and put together a batch of delicious cherry ice-cream.
I decided to make myself and ice cream cone after the kids had gone down for their naps. Then I proceeded to devour it. It was lovely sitting on my back deck enjoying an ice cream cone in the shade. I'm so lucky that both of my children still nap at the same time.

Sweet Cherry Ice Cream:

-1 1/2 cups pitted ripe sweet cherries (from about 3/4 lb cherries)
-3/4 cup milk
-1 3/4 cups cream
-1/2 cup sugar
-1 pinch salt
-1 teaspoon lemon juice
-1 Tbsp vanilla extract
-8 pieces Dove dark chocolate, chopped fine

METHOD

1 Put cherries, milk, one cup of the cream, sugar, and salt into a medium saucepan. Heat on medium heat until the mixture is steamy, then lower the heat to warm and just let sit for about 15 minutes. Remove from heat. Pour mixture into a blender, or use an immersion blender, and carefully purée. (Careful because you are dealing with a hot liquid. Make sure you hold the cap down on the top of the blender while puréeing.)
2 Put mixture into a large bowl. Stir in the remaining 3/4 cup of cream. Chill for several hours in the refrigerator until completely cold. (Can also place bowl over an ice bath, to speed up the cooling process.)
3 Before putting the mixture into your ice cream maker, stir in the lemon juice and vanilla. Churn the ice cream in your ice cream maker according to the manufacturer's instructions.
4 Once the ice cream has completed churning, the ice cream should be pretty soft. Gently fold in the finely chopped chocolate. Put in an airtight container and place in the freezer for at least an hour, preferably several hours.
Makes about one quart.
Just awesome.

Have a Happy Day!
~MJ

Sharing on:

PhotobucketI Heart Nap Time

Tuesday, May 8, 2012

Easy Recipe: Zucchini Casserole

There are a lot of people out there who turn up their noses at casseroles.  Apparently, they aren't an "in" food anymore.  I hear that they haven't really been in since the 60's.  I think this is a travesty.  I grew up with two different casseroles that I love to come back to for a simple, quick and delicious meal. 

I've decided to share my family's zucchini casserole recipe. It is one of those comfort meals from my childhood. There's nothing high brow about this recipe, but it is a great way to use up all of that extra zucchini you are undoubtedly growing this Summer. 

Zucchini Casserole

1 C shredded carrots
6 C cubed zucchini
1/4 C diced onion
1 can cream of chicken soup
1 6 oz package stove top dressing mix (pork)
1/2 C margarine or butter
1 C sour cream
1 C cubed fresh or canned turkey or chicken

Method:

Cook onion, carrots and zucchini in a large pan until tender.
Mix sour cream and soup into veggies.
Melt butter and stir into stuffing mix.
Place half stuffing in bottom of buttered casserole dish.
Pour veggies on top. Top with remaining stuffing.
Bake at 350 degrees for 25 minutes.

As simple as that.

Have a Happy Day!

~MJ

Tuesday, May 1, 2012

Project: Sew Skirt

I found a great tutorial on MADE recently. In fact, all of Dana's tutorials are fantastic.  Anyway, I usually have a ton of fabric laying around, so I decided I needed to sew my daughter a skirt.  I took her measurements and pulled out some fabric. Then I proceeded to do absolutely nothing else for two months.  Fast forward to today.  I buckled down and sewed my daughter a skirt! I'm saying that I actually created clothing for my child to wear and it was really easy! If I can do it, anyone can.
I'm pretty proud of the end result. Not only does it look cute, but it actually fits! Jellybean liked it enough that she wanted to try it on the minute I sewed the last stitch.  She's pretty particular about what she wears, so it was a huge compliment.
The t-shirt doesn't match it perfectly and I didn't brush her hair, but she is still adorable.  I have a vision of creating a t-shirt to match it, but that may be another two months down the line.
 Buddy had to get in on the photo shoot action in his new Target pirate outfit.
A HUGE thank you to Dana at MADE for helping me feel like a super mom!

Have a Happy Day!

~MJ

This post is participating in:


Tip Junkie handmade projects