Showing posts with label treat. Show all posts

Tuesday, June 4, 2013

Wanting to say Thank You!

After bringing our new baby boy home, I couldn't believe the generosity of our neighbors. Several of them brought us dinners. I didn't have to lift a finger or go grocery shopping for a week and a half after Teddy Bear was born.  Then, two weeks later, a friend and neighbor showed up at the door with two take and bake pizzas. She saved the day!  We are fairly new to the neighborhood, so I was pretty blown away. I couldn't be more humbled and grateful for the kind people that live in this neighborhood. We even had neighbors drop by with surprise gifts, nothing big, but so very nice and useful.
I'm certain that I haven't adequately thanked all those that have helped us in the last 6 weeks, but I did put together some simple thank you treats for those that brought us dinners. It was such a simple thing that I thought I'd share.
All you need is some ink, stamps, paper and treats to share:
Stamped paper.
Homemade pencil eraser heart stamp.
I love gummy frogs! I hope my neighbors did, too.
Have a Happy Day!

~MJ

Tuesday, February 5, 2013

Chocolate Chip Oatmeal Pan Cookies

When I'm pregnant, I seem to gravitate towards the comfort foods from my childhood. Of course, I've also been craving sweets like nobody's business. Last week, I was feeling like Chocolate Chip Oatmeal Pan Cookies.  Would they more accurately be called a brownie or blondie? I don't know, but they are delicious.
The kids are always up for baking with me. Jellybean would help me every step of the way if I'd let her. Unfortunately, I have my limits when it comes to their "help." So, it ended shortly after mixing up the dry ingredients. Then I suited them up in their snow gear and sent them outside while I finished the baking.
It turned out to be a good compromise, plus they got freshly baked cookies when they came in from playing in the snow.

Chocolate Chip Oatmeal Pan Cookies

Ingredients:

2 cups unsifted All-Purpose Flour
2 tsp. Baking Powder
1 tsp. Baking Soda
1 tsp. Salt
1 cup Butter, softened
3/4 cup Sugar
3/4 cup Brown Sugar, firmly packed
2 Eggs
1 Tbs. Water
1 1/2 cup Quick Oats
1 cup Semi-Sweet Chocolate Chips
1 tsp. Vanilla

Method:

Pre-heat oven to 375 degrees F.

Combine flour, baking powder, baking soda and salt. Cream butter, brown sugar, sugar, eggs and water. Add flour mixture. Stir in oats, chocolate chips and vanilla. Mixture will be a bit on the dry side. Spread in a greased 13x9 pan. Bake at 375 for 20-25 minutes. Cool and cut into 2" squares.

I didn't think that we could eat an entire pan, so I halved the recipe. Did you know that there are 12 Tablespoons in a 3/4 Cup? There are. :)  

Have a Happy Day!

~MJ
-

Tuesday, January 15, 2013

Stuck Indoors. Completing Some Pins.

I pin a lot on Pinterest. I especially enjoy pinning recipes, but don't always have the time to actually make anything that I've pinned. Well, like I mentioned yesterday, we've been stuck indoors a ton over the last week. In that time, I managed to make four of the recipes that I had pinned. Three of them worked out wonderfully, one I think I'll have to tweak to make it really work for me. Here they are with my reviews:

1. Soft Caramel Corn from The Girl Who Ate Everything. This recipe claims that it is the softest most wonderful carmel corn you will ever have (or something along those lines). We had a movie afternoon last week, so I decided that we'd have this for a little treat. I used a single bag of popcorn and halved the other ingredients. This truly is the best carmel corn I've ever had. The kids loved what little I gave them (I ate all of the rest). It came together really easily and delivered. This recipe is a keeper.

2. Buttermilk Roast Chicken from Smitten Kitchen. D doesn't love roasted chicken, but sometimes it just sounds like something that I have to make. You can hardly go wrong with a recipe from Smitten Kitchen. This recipe requires that you marinate/brine your chicken for a good 24 hours. The end result was probably the moistest chicken I've ever had. A couple of notes: I used smoked paprika (which I'm now in love with) and it ended up taking my chicken a lot longer to get up to temperature. I used all legs, but they were gigantic legs. I think they were in the oven for a good 45 mins. I started checking them after the recommended 30 minutes and they definitely needed more time. Also, the skin never did get very crispy, I ended up removing the skin on my serving  (after roasting) and enjoyed it a lot better that way. Again, this recipe would be a keeper if D appreciated bone in chicken more.

3. Cheesy Biscuits from Plain Chicken. I was really excited about this recipe and felt rather like Martha Stewart baking these on the same night as the roasted chicken.  I was really hoping that they would taste more like the biscuits at Red Lobster. No joy. In my opinion, these need more cheese and less sugar. The end result was just too sweet for me. That said, the kids liked them more than I did. For my taste, this recipe needs tweaking.

4. Snow Ice Cream from Life with Moore Babies. I'm amazed that with all of the snowy winters I've been through, I'd never heard of snow ice cream. I heard mention of it from one of my Face Book friends and promptly pinned this recipe. We certainly had enough snow for it, so I had Jellybean help me collect some and we mixed up a batch.
It was delicious. We added a little extra snow to cut the sweetness. I think we'll have to make a tradition out of making this on snowy days.
The kids agree.

Have a Happy Day!

~MJ

Tuesday, October 9, 2012

Sweet Halloween Treat: Ghosts in the Graveyard

Wow, two recipe posts in two days! My sister-in-law made the cutest Halloween treat for our Sunday family get-together, so I had to share.  We were celebrating my nephew's birthday and it was so fun to have a sweet treat.  She got the idea courtesy of Kraft and mustered her creativity. I do believe that the substitution of Milano cookies was pure genius.  Didn't she do a great job?
Buddy checking it out.
My mother took one look at the dessert and called me over to take photos for the blog. (Thanks, Mom!) It is such a fun idea for a seasonal dessert.  Plus, it's easy and delicious.
I'm pretty sure my nephew was happy about it, too:
He was hamming it up during the birthday song.
Here's the link to the Kraft Ghosts in the Graveyard recipe.

Have a Happy Day!

~MJ

Tuesday, August 28, 2012

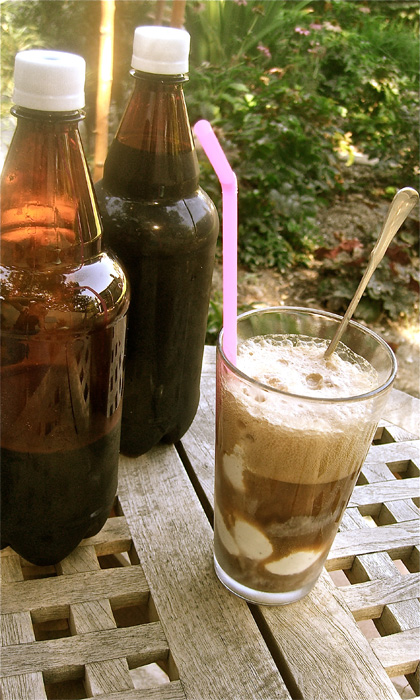
Homemade Root Beer Float

Homemade, Root beer, Float
Growing up, one of the highlights of summer was the homemade root beer that my father would brew, bottle and ferment in the garage.  It didn't appeal to everyone, in fact, it was an acquired taste. There was even that memorable event when one of my sister's friends took a sip and spit it across the kitchen. I'll tell you something though, nothing tastes better with a bacon and tomato (fresh from the garden) sandwich than that root beer.

This summer, I decided that it was time to revive the tradition of homemade root beer.  I didn't have my father's equipment or recipe. Plus, I wasn't sure I was up to making it in quite the quantity that he bottles it in. So, when I ran across this Mr. Root Beer home brewing kit, I thought it was worth a try.
Homemade, Root beer, Float
When it arrived in the mail, it engulfed my kitchen in the wonderful smell of root beer extract.  The instructions were fairly simple and I was able to brew my first batch during nap time. After letting it ferment for the prescribed amount of time and then chilling it in the fridge, I ventured a first taste. I'll be honest, it wasn't as satisfying as I had hoped. I think I was craving something a bit "yeastier" and because this tasted more like root beer than yeast, it really wasn't what I was expecting. It's funny how a taste memory can be so strong.
Homemade, Root beer, Float
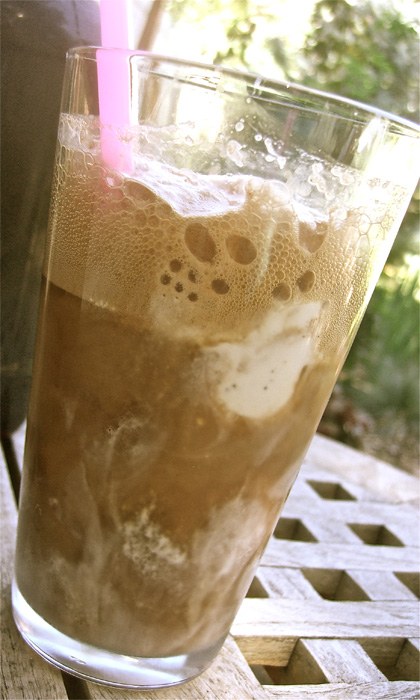
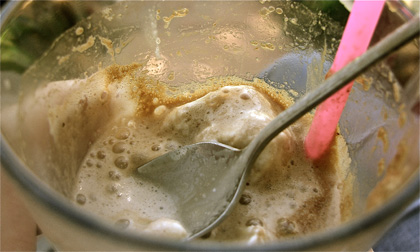
Yet, the kids loved it and the taste has grown on me.  It made for one amazing root beer float while the kids were again napping (I love nap time). What's great is that it isn't quite as sugary sweet as the root beer you might purchase in the store. It was definitely a worthy experiment. We have bacon and tomato sandwiches on the menu this week.
Homemade, Root beer, Float
Have a Happy Day!

~MJ

Sharing on:

Monday, August 6, 2012

Nap Time Treat: Sweet Cherry Ice Cream

I look forward to the summertime road-side fruit stands.  Usually, the fruit is outstanding and very fresh.   We visited a fruit stand this last week and picked up a bag of sweet cherries.  Unfortunately, on closer inspection at home, they weren't as pretty as I'd hoped for (major disappointment and annoyance). I was able to salvage enough for the kids to enjoy. After that, I still had maybe two cups left that were usable. What to do?
I have an on going love affair with my new ice cream maker.  So, I went searching for an sweet cherry ice-cream recipe. I found a few that I thought would work, so I made a mismash of them and put together a batch of delicious cherry ice-cream.
I decided to make myself and ice cream cone after the kids had gone down for their naps. Then I proceeded to devour it. It was lovely sitting on my back deck enjoying an ice cream cone in the shade. I'm so lucky that both of my children still nap at the same time.

Sweet Cherry Ice Cream:

-1 1/2 cups pitted ripe sweet cherries (from about 3/4 lb cherries)
-3/4 cup milk
-1 3/4 cups cream
-1/2 cup sugar
-1 pinch salt
-1 teaspoon lemon juice
-1 Tbsp vanilla extract
-8 pieces Dove dark chocolate, chopped fine

METHOD

1 Put cherries, milk, one cup of the cream, sugar, and salt into a medium saucepan. Heat on medium heat until the mixture is steamy, then lower the heat to warm and just let sit for about 15 minutes. Remove from heat. Pour mixture into a blender, or use an immersion blender, and carefully purée. (Careful because you are dealing with a hot liquid. Make sure you hold the cap down on the top of the blender while puréeing.)
2 Put mixture into a large bowl. Stir in the remaining 3/4 cup of cream. Chill for several hours in the refrigerator until completely cold. (Can also place bowl over an ice bath, to speed up the cooling process.)
3 Before putting the mixture into your ice cream maker, stir in the lemon juice and vanilla. Churn the ice cream in your ice cream maker according to the manufacturer's instructions.
4 Once the ice cream has completed churning, the ice cream should be pretty soft. Gently fold in the finely chopped chocolate. Put in an airtight container and place in the freezer for at least an hour, preferably several hours.
Makes about one quart.
Just awesome.

Have a Happy Day!
~MJ

Sharing on:

PhotobucketI Heart Nap Time

Monday, July 9, 2012

Homemade Frozen Yogurt

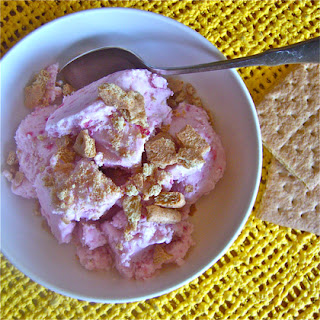
One of the nice things about having more cupboard space is that I can finally purchase some kitchen gadgets that I've been wanting and actually have somewhere to put them. So, last week I finally purchased myself an ice cream maker. I was in a hurry to make some ice cream, but didn't have the correct ingredients. I did however, have 3 very important ingredients for making some frozen yogurt.  
Only 3 ingredients and oh my goodness was it delicious. Sweet, tangy and especially yummy with graham crackers crumbled on top.  In fact, I'm thinking this would make a fantastic frozen pie. just pour it in graham cracker crust then top with a few more crumbs and fresh strawberries. 


Strawberry Frozen Yogurt w/Graham Cracker Topping
3 6oz containers of plain greek yogurt (I used the Chobani brand, it's my favorite)
1 small carton Fresh Strawberries ( I didn't actually use the entire carton, as my strawberries had almost reached the end of their freshness.)
1 14oz can sweetened condensed milk


Prep strawberries by cutting them each in half and placing them in your food processor. Process for a few seconds until nicely pulverized. Mix strawberries, condensed milk and yogurt together in a small bowl. Now just follow the manufacturer's instructions on your ice cream maker.  
Crush some graham crackers for topping and enjoy! We definitely did.
Have a Happy Day!

~MJ

This post is participating in:

Tip Junkie handmade projects Photobucket

Monday, April 30, 2012

Stepping Out For Fro Yo

I remember my parents taking myself and my siblings to a frozen yogurt place called Yozen Frogurt.  I thought the name was terribly clever at the time.  Frozen yogurt seemed like a really special treat.  My favorite flavor then and now? Chocolate with gummy bears.
Am I crazy or is frozen yogurt majorly back in? I've seen frozen yogurt places popping up everywhere.  Because I love, love it, I made it a habit to treat my kids every once in a while.  When I discovered Red Mango, I started treating myself and my kids a little more often.  It's all natural, so I can justify eating it for lunch. It's delicious. I think I've become an addict.
I don't get chocolate with gummy bears, but I do get the mixed berry parfait.  My little ones like the original flavor with berries and mochi.  We have a good time of it as you can see.
I suggest stepping out and treating yourself (and your little ones) to your favorite fro yo.

Have A Happy Day!

~MJ


 *This is NOT a paid advertisement.