Showing posts with label sweet. Show all posts

Monday, February 25, 2013

Jewelry Travel Pouch Tutorial

When I was young, my grandmother made a small jewelry travel pouch for me. That little pouch has gone with me on all of my trips and has kept my jewelry safe and my necklaces from getting tangled. When I'm not traveling, I keep it on my dresser with my rings and watch in it.
Original Travel Pouch
I got looking at my little pouch the other day and decided that I'd like to re-create it. I thought it would make a fantastic gift for friends or family. So, that's exactly what I did.
It's a really simple concept and except for one bit of laziness on my part, I tried to make mine true to the original. It's such a sweet little pouch. So easy to wrap up and throw in your bag.

Jewelry Travel Pouch Tutorial


Materials:
Just over a quarter of a yard of printed fabric
Just over a quarter of a yard of plain fabric for lining
Coordinating thread
Measuring tape or protractor
Air-erasable pen
43 inches of thin, coordinating ribbon

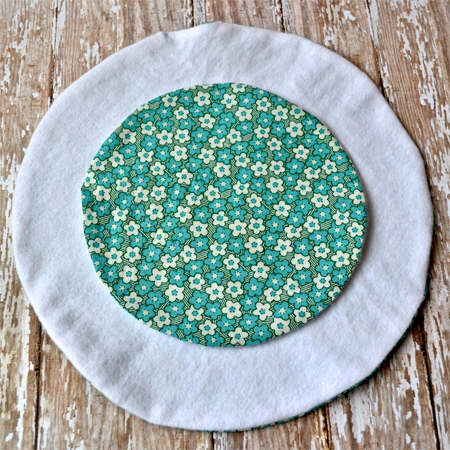
Start with two sets of circles (place them right sides together):
Sew a .25" seam around each circle and make sure to leave an inch or so open for turning. (You'll notice in the original that she used a buttonholer to create the openings for the ribbon. I am not an expert seamstress. I *think* she must have measured and done the button holes before she sewed the large circle together. I'm not sure, but i was too lazy to figure it out.)

Iron and place finished circles on top of each other like so:
 Now, you'll actually need to pull out the tape measure. I pulled out my trusty protractor. Find the center of the small circle. Using a air-erasable pen, you'll want to mark out the 8 pockets. I started at 90 degrees and then worked around the circle making another mark at 45 degrees. Just like cutting up a pizza.
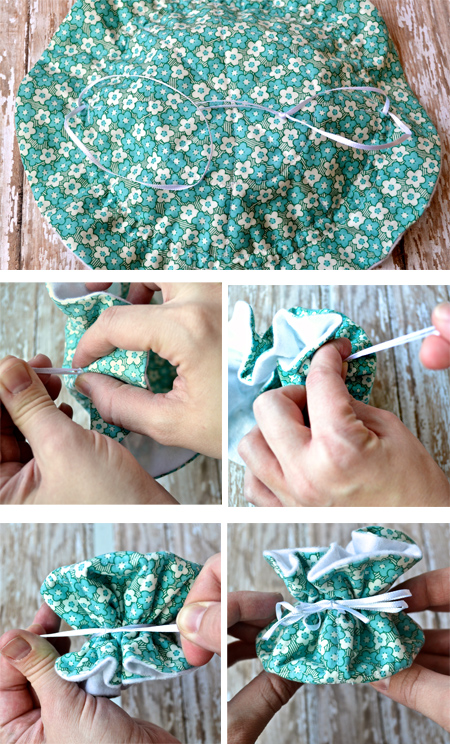
Sew straight lines along your markings out to the edge of the small circle. Then sew a small circle about an inch from the edge. After that, sew two circles (.25" apart) around the outside of the smaller circle (on the large circle) to create a channel for your ribbon.
Time to insert your ribbon. This is where my laziness came in. I used my craft knife to gently cut a slit on each side of the pouch for the ribbon. I was careful not to slit the liner fabric. Then I used some fray check on the slits. You could also get out some needle and thread and wrap the edges of the slits in thread (seemed like a lot of work at the moment, but would make the holes more finished). Using a safety pin, insert your ribbon into the channel and then knot the ends of the ribbon together.

As a final touch for gift giving, add the little poem that my grandmother added to mine:
"Not a necklace will you tangle, when you travel place to place. Eight separate little pockets are in this pretty case. Whatever is your pleasure, how smart this pouch will be. Traveling with your 'treasures,' you'll have this gift from me."
I've even made of a PDF you can print with the words:

If you are keeping it for yourself, all that is left to do is to load it up with your jewelry:
I love my little pouch so much, can't wait to make a bunch to give as gifts. That's right friends, you may have something to look forward to. :)

Have a Happy Day!

~MJ

Monday, February 18, 2013

5 minutes: Clay and Felt Flower Clip

I decided to finally get around to using the extra roses I had laying around from when I put together my rose and lace necklace. I'm calling it a 5 minute craft, but of course, that asserts that you already have the clay roses laying around and ready for use. You do, right?
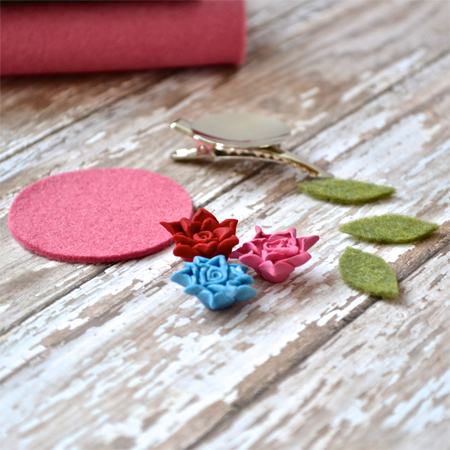
If you've got those roses, then gather the rest of your materials: A felt circle, felt leaves and a clip to mount them on.
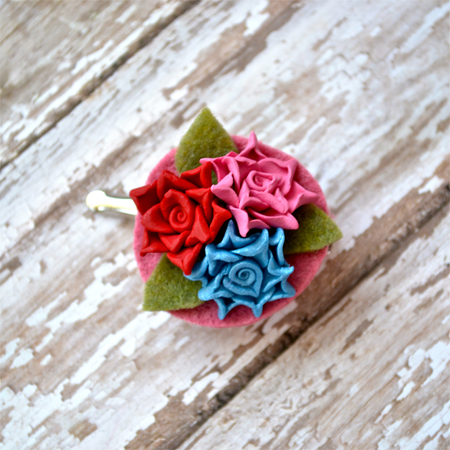
A little hot glue later and you have a springy clip or brooch.  In my case, a clip that looks sweet in my daughter's hair.
I paid that girl 4 orange M&Ms (the only color she'll eat) to pose for pictures. Next time, she's going to want more...

Have a Happy Day!

~MJ

Thursday, December 20, 2012

Lemon Pound Cake

We are in full "holidrama" mode over here. This may be the first year that I wondered why I bother with half of the things that I've found so important previous years (i.e. Christmas cards, neighbor gifts..etc.) I look at the list of things that still need to be done and I have to remind myself to take it a day at a time.  I've already resigned myself to the fact that the gifts I was supposed to ship to my friends in time for Christmas, will just not make it before Christmas. (sorry friends) Also, I haven't wrapped a single gift and am starting to regret the number of gifts purchased just because I don't want to wrap them.
Today, I felt like I was making some headway on my to-do list, however. I managed to actually mail those totally unnecessary Christmas cards and I did some totally unnecessary baking for our neighbors. Growing up, the traditional baked good for the neighbors was lemon pound cake. I thought I'd revive the tradition for our new neighborhood. Really, I'm just trying to make my mother proud.
Once the pound cakes were cool, I wrapped them up and brought Jellybean along to deliver them. My across the street neighbor never fails to look suspicious when I come over to deliver a small gift. Today, he looked at me in silence for a moment and then asked, "Oh, from across the street?" Uh, yeah, we've been here for more than a year, I was really hoping you'd recognize me by now...


Lemon Pound Cake:

Makes 2 standard loaves or 5 mini loaves (5.5x3x2)

Ingredients:
2 sticks butter (softened)
2 1/2 cups sugar
6 eggs
3 cups flour
1/4 tsp. baking soda
1/2 tsp. salt
1 cup sour cream
1 tsp. vanilla
1 tsp. lemon extract

Method:
Pre-heat oven to 350 degrees F. Cream together butter and sugar. In a separate bowl, mix flour, baking soda and salt. Alternate adding eggs (2 at a time) and flour mixture to creamed butter. Mix in sour cream, vanilla and lemon extract.

Line loaf pans with parchment and grease well. Fill each loaf pan half full.

Bake standard loaves at 350 degrees F for 1 hour.

Bake mini loaf pans at 350 degrees F for 40-45 minutes.

Loaves are done when a toothpick comes out clean and the tops have a nice light golden color.

These cakes smell delicious right out of the oven, but will develop more flavor as they cool.

Enjoy!

Have a Happy Day!

~MJ

Monday, August 6, 2012

Nap Time Treat: Sweet Cherry Ice Cream

I look forward to the summertime road-side fruit stands.  Usually, the fruit is outstanding and very fresh.   We visited a fruit stand this last week and picked up a bag of sweet cherries.  Unfortunately, on closer inspection at home, they weren't as pretty as I'd hoped for (major disappointment and annoyance). I was able to salvage enough for the kids to enjoy. After that, I still had maybe two cups left that were usable. What to do?
I have an on going love affair with my new ice cream maker.  So, I went searching for an sweet cherry ice-cream recipe. I found a few that I thought would work, so I made a mismash of them and put together a batch of delicious cherry ice-cream.
I decided to make myself and ice cream cone after the kids had gone down for their naps. Then I proceeded to devour it. It was lovely sitting on my back deck enjoying an ice cream cone in the shade. I'm so lucky that both of my children still nap at the same time.

Sweet Cherry Ice Cream:

-1 1/2 cups pitted ripe sweet cherries (from about 3/4 lb cherries)
-3/4 cup milk
-1 3/4 cups cream
-1/2 cup sugar
-1 pinch salt
-1 teaspoon lemon juice
-1 Tbsp vanilla extract
-8 pieces Dove dark chocolate, chopped fine

METHOD

1 Put cherries, milk, one cup of the cream, sugar, and salt into a medium saucepan. Heat on medium heat until the mixture is steamy, then lower the heat to warm and just let sit for about 15 minutes. Remove from heat. Pour mixture into a blender, or use an immersion blender, and carefully purée. (Careful because you are dealing with a hot liquid. Make sure you hold the cap down on the top of the blender while puréeing.)
2 Put mixture into a large bowl. Stir in the remaining 3/4 cup of cream. Chill for several hours in the refrigerator until completely cold. (Can also place bowl over an ice bath, to speed up the cooling process.)
3 Before putting the mixture into your ice cream maker, stir in the lemon juice and vanilla. Churn the ice cream in your ice cream maker according to the manufacturer's instructions.
4 Once the ice cream has completed churning, the ice cream should be pretty soft. Gently fold in the finely chopped chocolate. Put in an airtight container and place in the freezer for at least an hour, preferably several hours.
Makes about one quart.
Just awesome.

Have a Happy Day!
~MJ

Sharing on:

PhotobucketI Heart Nap Time