Showing posts with label Holiday. Show all posts

Friday, July 12, 2013

Fourth of July 2013

I took a few photos on the Fourth of July while we waited for our neighborhood parade to pass. It's mostly made up of kids riding bicycles, but we still waved our flags and cheered as loudly as we could.
Waiting for the parade.
Flags are fun.
Even some smiles from the little guy.
Have a Happy Day!

~MJ

Monday, March 11, 2013

Getting Some Green On

I realized last week that St. Patty's Day was coming up and that my sweet daughter has no green in her wardrobe. So, I determined to do something about it. I decided that despite her lack of green clothing, I could at least make her something to wear in her hair. So, I pulled out the materials and set to work.
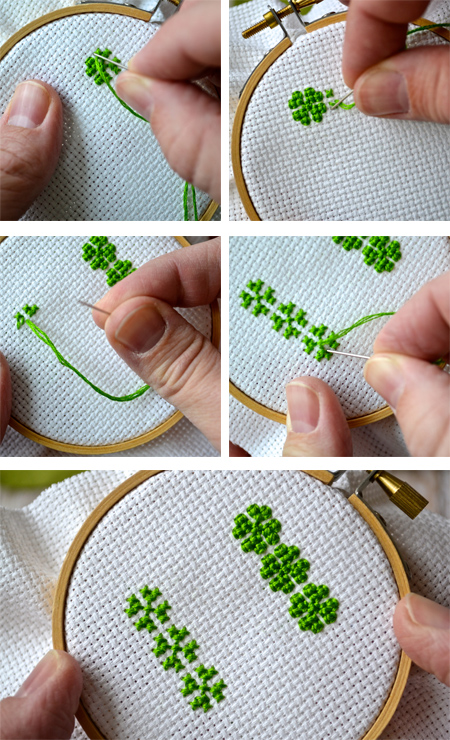
I sketched out a simple cross-stitch pattern and started on the first set of clips:
Approximately 60 inches of floss (three strands) used for each clip pattern.
A little felt and some stitched on clips and those were completed.
I even made something for myself:
These didn't seem enough, so I broke out the felt again and got cutting:
I'm really in to the four-leaf clover.
I like having a cute little girl to wear my clips.
I think these were my favorites:
and if those three ideas don't do it for you, here are a couple more green inspired clips from when I was running my Etsy shop.
Top: Layered fabric and felt. Bottom: fabric yo-yo with brads.
Have a Happy Day!

~MJ

Monday, February 11, 2013

Heart Leaf Art

Valentine's Day is just a few days away and I just can't stop my brain from working on heart shapes. I've had a whole slew of dried leaves hanging around since last June when I decided to press a bunch from my Forest Pansy Red Bud. At that time, I announced my intention to use them for something Valentine's related. Then, in the Fall, I decided that I wanted to paint some of them. I liked those results, but still wanted to use the natural leaves this season.

I found a $3 red frame last week when I was out shopping with Jellybean (the best shopping buddy ever) and decided that I'd go ahead and frame my collection of leaves. After a bit of arranging and rearranging, this is what I came up with.
Total cost: $3.53 + tax (the $.53 was for the scrapbook paper background). Not so Valentine's specific that I can't keep it up on the mantel all year. Those leaves are so pretty, I'll have to be sure and press more of them this next Summer.

Have a Happy Day!

~MJ

Tuesday, February 5, 2013

Chocolate Chip Oatmeal Pan Cookies

When I'm pregnant, I seem to gravitate towards the comfort foods from my childhood. Of course, I've also been craving sweets like nobody's business. Last week, I was feeling like Chocolate Chip Oatmeal Pan Cookies.  Would they more accurately be called a brownie or blondie? I don't know, but they are delicious.
The kids are always up for baking with me. Jellybean would help me every step of the way if I'd let her. Unfortunately, I have my limits when it comes to their "help." So, it ended shortly after mixing up the dry ingredients. Then I suited them up in their snow gear and sent them outside while I finished the baking.
It turned out to be a good compromise, plus they got freshly baked cookies when they came in from playing in the snow.

Chocolate Chip Oatmeal Pan Cookies

Ingredients:

2 cups unsifted All-Purpose Flour
2 tsp. Baking Powder
1 tsp. Baking Soda
1 tsp. Salt
1 cup Butter, softened
3/4 cup Sugar
3/4 cup Brown Sugar, firmly packed
2 Eggs
1 Tbs. Water
1 1/2 cup Quick Oats
1 cup Semi-Sweet Chocolate Chips
1 tsp. Vanilla

Method:

Pre-heat oven to 375 degrees F.

Combine flour, baking powder, baking soda and salt. Cream butter, brown sugar, sugar, eggs and water. Add flour mixture. Stir in oats, chocolate chips and vanilla. Mixture will be a bit on the dry side. Spread in a greased 13x9 pan. Bake at 375 for 20-25 minutes. Cool and cut into 2" squares.

I didn't think that we could eat an entire pan, so I halved the recipe. Did you know that there are 12 Tablespoons in a 3/4 Cup? There are. :)  

Have a Happy Day!

~MJ
-

Monday, February 4, 2013

Caution: Air Heads Valentine Printable

A little over a week ago, I attended a fantastic conference: Alt SLC. I'm still decompressing from it. I received tons of amazing information, tips and inspiration while I was there. I met a ton of incredibly talented people as well. Now I have a whole lot on my to do list in regards to this blog.

As I was feeling a little overwhelmed, suddenly crafty inspiration struck. One of the awesome sponsors for Alt, Air Heads Candy, is holding a valentine crafting contest. When I first heard about the contest, I had nothing, so I just put it aside. Then on a whim, I decided to look it up again and discovered that none of the current entries contained puns.

Now, I'm of the opinion that a valentine just isn't a valentine if it doesn't contain a pun. So, I submit for your viewing enjoyment, my entry for the AirHeads Craft Your Valentine Contest. (My mother is a master of puns, so I hope my wording will make her proud.)
Isn't it amazing!? If you want to print your own, you can! (It's free after all.) Go to the following link:

Once it has been approved, you can also vote for my valentine. I'd love it if you did. Go to the contest page on Facebook and click on "view entries." Look for my caution sign entry and cast your vote. I'd really appreciate it. You can even vote once every day! Hooray!

Have a Happy Day!

~MJ

Thursday, January 3, 2013

New Year's Ice Box Cookies

Though we are past New Year's Eve, I promised I'd post this recipe and I'm finally getting around to it. The traditional New Year's Eve snack around my house growing up was ice box cookies and lime "frappe" to drink (lime sherbet blended with lemon-lime soda). I don't know about the rest of my siblings, but it just doesn't seem like New Year's Eve without that special treat combo.

I love that you can make the dough a day or so ahead. The dough needs to be refrigerated overnight and then you can slice off as many cookies as you want at a time. A full recipe will make approximately 32 cookies. I halved the recipe for my little family. Due to Buddy's tree nut allergy, we had to forgo putting walnuts in them this year. I prefer them with nuts, but they are still very good without. The end result is a light, crisp cookie (softer straight out of the oven) that you will eat way too many of.

New Year's Ice Box Cookies


Ingredients:
-1 lb. Butter or Margarine
-4 medium Eggs
-1 cup Sugar
-1 1/2 cups Brown Sugar
-2 tsp. Baking Soda
-3/4 tsp. Salt
-1 1/2 tsp. Cinnamon
-1 tsp. Vanilla
-5 cups Flour
-1 1/2 cups chopped Walnuts (optional)

Method:
Soften butter and cream together with sugar and brown sugar. Add eggs and vanilla. In a separate bowl mix flour, cinnamon, salt and baking soda together. Combine all ingredients together. Add nuts and mix well.

Shape into two loaves (about 3 inches wide) and roll each in wax paper. Refrigerate overnight.

When ready to bake, pre-heat oven to 400 degrees. Slice each cookie approximately 1/4 inch thick and place on a parchment lined cookie sheet. Bake for 12 to 15 minutes. The longer they bake, the more crisp they will be. I prefer them a little on the softer side.

Enjoy!

In case you were wondering, yes we also had some frappe! We used to call it pureed frogs legs. Buddy is carrying on that tradition.
Have a Happy Day!

~MJ


Thursday, December 27, 2012

Our Christmas

I have been trying to write this blog post about our Christmas for two consecutive nights, but unfortunately, every time I sit down to do it, I end up wrapping myself in my new cuddly blanket and before I know it, I've fallen asleep. So, I guess I'll finally try and sum things up while the kids are down for their naps.

Well, Christmas exploded at our house. I'd like to say that we spent yesterday cleaning up, but with one child down with a stomach bug we decided that we didn't mind looking at the mess for at least one...or two...more days.
Our holiday celebrations were very successful. We always start out with dinner at my parents' house on Christmas Eve. Following dinner, my family likes to put on a musical program. (D has mixed feelings about that portion of the evening.)
Buddy and Jellybean joined their cousins in singing a lively rendition of Jingle Bells. Buddy, to my amazement, actually belted it out. Jellybean decided that she was more fascinated by the jingle bells that my sister provided for the kids to shake.
At the end of the program, the children always participate in a live nativity. Jellybean was a beautiful angel.
Buddy had pretty well had it.
On Christmas morning, the kids were excited to find that Santa had brought them just what they asked for. They were mostly surprised because I think they had forgotten that he was even coming.
A doll house for Jellybean and a bat cave for Buddy. (Is the bat cave just a masculine version of a doll house?)
They have been pleased with their gifts and have been playing non-stop since Christmas morning. Buddy has a whole new excuse for why he doesn't have time to eat or use the bathroom. "I'm not done playing my game!" The "game" he hasn't finished seems to change every five minutes. I'm glad that his stomach bug was so short lived, but it didn't put much of a crimp in his new toy enjoyment.
We finished our Christmas celebrations with a lunch at my in-laws house. The food was wonderful, of course, but nothing beats spending time chatting with family.
D has taken the week off from work, so we've been really enjoying just being home. I was a little annoyed when I realized this morning that I actually had to do some house work during the vacation. What's up with that?

I hope you are having a fantastic holiday as well.  Have a Happy Day!

~MJ

Monday, December 24, 2012

Merry Christmas!

Wishing you a very merry Christmas!
Had to capture Jellybean's Christmas dress after our Sunday Christmas program.
Buddy and his "buddies" (Penguin, Wolfie, Jehoshaphat & Panda). A very common sight around the house. 
I've decided that my kids are the perfect age for Christmas. Too young for the excitement to mess up their sleep, but old enough that they were able to write Christmas lists and have enjoyed having an elf around the house. The elf wrote them a note this morning informing them that they were on the "good list." Buddy exclaimed, "I didn't know I'd be on the good list!"
I'm so excited to see their faces on Christmas morning when they discover that Santa brought them exactly what they asked for. (So glad that they were highly influenced by my suggestions for their Christmas lists. That's another reason that they are the perfect age.)

Have a Happy Day and a Magical Holiday!

~MJ

Thursday, December 20, 2012

Lemon Pound Cake

We are in full "holidrama" mode over here. This may be the first year that I wondered why I bother with half of the things that I've found so important previous years (i.e. Christmas cards, neighbor gifts..etc.) I look at the list of things that still need to be done and I have to remind myself to take it a day at a time.  I've already resigned myself to the fact that the gifts I was supposed to ship to my friends in time for Christmas, will just not make it before Christmas. (sorry friends) Also, I haven't wrapped a single gift and am starting to regret the number of gifts purchased just because I don't want to wrap them.
Today, I felt like I was making some headway on my to-do list, however. I managed to actually mail those totally unnecessary Christmas cards and I did some totally unnecessary baking for our neighbors. Growing up, the traditional baked good for the neighbors was lemon pound cake. I thought I'd revive the tradition for our new neighborhood. Really, I'm just trying to make my mother proud.
Once the pound cakes were cool, I wrapped them up and brought Jellybean along to deliver them. My across the street neighbor never fails to look suspicious when I come over to deliver a small gift. Today, he looked at me in silence for a moment and then asked, "Oh, from across the street?" Uh, yeah, we've been here for more than a year, I was really hoping you'd recognize me by now...


Lemon Pound Cake:

Makes 2 standard loaves or 5 mini loaves (5.5x3x2)

Ingredients:
2 sticks butter (softened)
2 1/2 cups sugar
6 eggs
3 cups flour
1/4 tsp. baking soda
1/2 tsp. salt
1 cup sour cream
1 tsp. vanilla
1 tsp. lemon extract

Method:
Pre-heat oven to 350 degrees F. Cream together butter and sugar. In a separate bowl, mix flour, baking soda and salt. Alternate adding eggs (2 at a time) and flour mixture to creamed butter. Mix in sour cream, vanilla and lemon extract.

Line loaf pans with parchment and grease well. Fill each loaf pan half full.

Bake standard loaves at 350 degrees F for 1 hour.

Bake mini loaf pans at 350 degrees F for 40-45 minutes.

Loaves are done when a toothpick comes out clean and the tops have a nice light golden color.

These cakes smell delicious right out of the oven, but will develop more flavor as they cool.

Enjoy!

Have a Happy Day!

~MJ

Tuesday, December 11, 2012

Winter Porch Decor Part 2

I'm still adding some decorative touches all around my house. My front porch has been looking pretty bare, so I thought it would be nice to add more greenery.  I had already created an arrangement using a large planter:
So, I decided to continue on with that theme.  I found some great pine cones at Hobby Lobby, then later found some that were equally as nice at a local garden store for a fraction of the price. Unfortunately, I had already purchased the pine cones from Hobby Lobby. I guess there's always next year, if I find that I need more. I also borrowed a few more pine boughs from my neighbor's tree (thanks neighbor).
A few large, red ornaments were the finishing touch. (look you can see my reflection in one of them) I used some floral wire to wire it all together. We get some unbelievable wind, so I also wired the arrangement to the bench. Just a simple, but lovely little touch. It doesn't take much to make me feel proud of myself.

Have a Happy Day!

~MJ

Thursday, December 6, 2012

Another Holiday Wreath

You may be wondering if I spent any time with my children this week. I'm pretty sure that's who I spent the majority of my time with, though to look at this blog this week, you may not know it.

I've just been in the mood to make things lately and have felt the need to take pictures and share (of course). So, here's the last project of the week. A really simple holiday wreath; completed during nap time yesterday. I had a grape vine wreath that has been sitting around since last year just beckoning to me. I also had a bag of holiday "doo-dads"(pine cones, small shiny balls and cinnamon sticks) that has been sitting around. I purchased it on sale last year as well. So, I sat down with my trusty glue gun and went to work.
This sweet little wreath has found its home on my mantel. As an added bonus, the cinnamon sticks still have some scent left. Weird how a quick project like this can lend such a sense of accomplishment. It's the little things I suppose.

Have a Happy Day!

~MJ

Sharing on:

Tuesday, December 4, 2012

Nap Time Craft: Felt Shingle Tree

I saw a great tutorial for this cute Christmas craft on Pinterest and lamented to D the fact that Hobby Lobby isn't open until late at night. I really wanted to run out and buy the materials right then, only it was 10 PM on a Sunday night. So, I had to do the sensible thing and make the trip on Monday morning with Jellybean. I spent nap time working on my little tree. It is now sitting on my mantle.
I had needed something tall and it fits the bill perfectly, plus it was very easy to put together. Cutting the felt circles was a bit time consuming, but other than that it was as easy as can be.  Definitely worth the effort. I used 4.5 sheets of craft felt for my 18" tree. Also, I traced the end of a paper towel tube for my circles.

You can find the full tutorial at Scissor Variations

Have a Happy Day!

~MJ

Sharing on:

Monday, December 3, 2012

Squash Pie

I've had a goal this year to learn how to make some of the traditional holiday foods that I grew up with. I started off around Thanksgiving by making the rolls, fruit salad and apple pie that I love this time of year. I was a bit too tired to continue and make the last dish on my list: Squash pie.  I had frozen an extra pie crust for the purpose and finally got around to baking my pie this last weekend.

The end result? Delicious.

Many people are confused about squash pie. It's very similar to pumpkin, but in my opinion, worlds better. It is made with fresh banana squash which lends a nice texture and a much more mild and pleasant flavor than that of pumpkin. The majority of pumpkin pies I've had use canned pumpkin in the recipe. This often makes the pie too sweet and yet can't cover up the strong, "pumpkiny" after taste. I'm just not a fan.  My husband still prefers pumpkin (I guess it's what you grow up with), so I've promised to try one out next year, but this year I'm sticking with my favorite.  It helps that the kids have loved it.

Squash Pie

1 1/2 Cups Banana Squash (Steamed or baked until tender then mashed)
3/4 Cup Sugar
1/8 teaspoon Salt
2 Eggs (lightly beaten)
1 Tablespoon Melted Butter
1 Cup Rich Milk (Canned Evaporated Milk like Carnation)
1/2 teaspoon Cinnamon
1/2 teaspoon Nutmeg
1/4 teaspoon Allspice

1 pie shell (best pie crust recipe)

Pre-heat oven to 425 degrees F. Mix spices into sugar. Place all ingredients in a blender. Blend well. Fill unbaked shell (may be very full). If using frozen shells, make sure that they are well thawed before filling. Cover edge of shell with foil or an edge guard to protect from burning.

Bake at 425 degrees for 20 minutes. Reduce heat to 375 degrees and bake for 25-35 minutes until an inserted knife comes out clean.  

I've found that allowing it to rest for a day helps the flavor develop. So, make it a day ahead. Top with fresh whipped cream and enjoy!

Have a Happy Day!


Friday, November 23, 2012

All-American Apple Pie & Crust Recipe

I hope your Thanksgiving celebrations were a success. My family enjoyed the day very much. Black Friday is a little too much for me, so I'll be staying firmly at home today.
As promised, I wanted to share my family's apple pie recipe. It's a personal triumph for me that I tackled this recipe. It is one of those recipes that is strongly associated with my family's Thanksgivings and I was so pleased that it turned out just as it should. We brought my pie to D's family for the celebration yesterday, but fortunately, they aren't as in to fruit pies (and some are wary of "foreign kitchens") So, I was able to get my wish of having apple pie for breakfast today. Hooray!
In my opinion, this is a perfect apple pie.  Others I have tried fail in two areas. First, the crust is a problem. Most crusts are too dense or leave a weird film on the roof of your mouth. Second, the apples. Many recipes don't demand a tart baking apple. The end result is just too sweet and often mushy. What could be worse than a pie that is too sweet, mushy and leaves a film on the roof of your mouth? I guess a lot of people like that...
This recipe fixes all of those issues. The end result is a pie that is totally balanced between sweet and tart, apples that have a good bite to them and a crust that is tender and flaky. I hope you'll enjoy it as much as my family.
All-American Apple Pie

6-7 tart baking apples (6 cups) We use Granny Smith exclusively.
1 cup sugar (slightly rounded)
3 Tablespoons all-purpose flour
3/4 teaspoon cinnamon
Dash Nutmeg
Dash Salt

**1 Recipe Pie Crust (double-crust)
2 Tablespoons butter

Pare apples & slice thin (about 1/4 inch). Combine sugar, flour, spices, & salt; mix with apples.
Line 9 -inch pie plate with pastry; fill with apple mixture & dot with butter. Try to arrange the apples so that as they bake down, there won't be any holes created. Adjust top crust. Use a small amount of water to help seal bottom crust to top crust. Flute the edge and sprinkle with sugar, "for sparkle." With a sharp knife, slice several venting holes in the top of crust. Gently fold a strip of foil or pie tape around rim of crust, covering fluted edge. (This keeps juices in pie, guards against boil-over in oven and protects edge from over-browning.) Adjust oven rack to lower middle. Bake in hot oven, 425 degrees for 55-60 minutes or until top (and bottom) is brown* and apples are done. Place a sheet of foil on a lower rack if possible to catch any boil-over about 30 mins into baking.

*Browning the bottom of the crust can be tricky and depend on your oven. Slight adjustment in temperature, and location of pie may be necessary. The above settings worked for my gas oven, but a temperature of 400 degrees may be sufficient for an electric (exposed element) oven.

**Here's our favorite crust recipe. This is possibly the best crust there is. It is light, flaky yet tender and complements most pies very well.
Best Pie Crust Recipe
(yields 4 crusts)

3 cups flour
1 1/2 teaspoons salt
1 1/2 cups cold Crisco
   --Cut in crisco until pea sized
1/2-3/4 cups water (cold)
   --Sprinkle water into flour and fluff with fork until dough comes together into a damp ball (not wet). Press into a ball. Flour hands and divide into 4 small balls.

Roll out on a floured board to 1/8" thickness. Make sure to flour pin and board after each pass. Try not to over-work dough. Use crusts immediately or freeze with parchment in between crusts.

For ice-box pies bake at 400 degrees for 8-10 mins. Cool then fill.
For above apple pie, bake after filled.

If frozen: thaw well on counter before baking. (1 to 2 hours)
Enjoy and Have a Happy Day!

~MJ