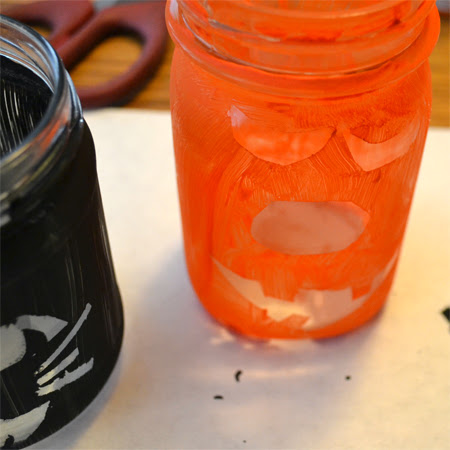
My awesome sister gives the best birthday presents. This year she gave me a bunch of jars, some orange paint, a roll of masking tape, foam brushes and some flameless candles. She also gave me the instructions for a fun halloween jack-o-lantern craft to do with my kids.
I'm always amazed by the creativity of my children. I broke out the materials to make "jar-o-lanterns" and Buddy asked for green paint because he wanted to make an ugly-doll lantern.
Jellybean asked for purple (but she was sadly out of luck.) She decided to stick with the jack-o-lantern theme since orange is her favorite color. She was very specific about the shapes she wanted for the face. Inspired by Buddy's thinking, I went with black paint for a cat lantern.
A couple of tips on this cute craft: First, I found that putting the paint on thickly and evenly does make the end result nicer. Not always possible when small children are doing the painting though. Also, be very careful when peeling up the masking tape. The glass jar is very smooth, so the paint has a tendency of coming up with the tape.
They are so cute on my table with the lights inside. Both of the kids were thrilled with their lanterns.
Have a Happy Day!
~MJ
Showing posts with label Halloween. Show all posts
Tuesday, October 15, 2013
Thursday, November 1, 2012
Halloween 2012
I hope everyone had a fantastic Halloween. We did. The kids went to bed completely sugared up and dreaming of their candy bags. I got to enjoy the traditional glazed donut (or two) and a glass of spiced apple cider, so my evening was complete.
Buddy got to wear a costume to school Halloween morning. He was excited, but disappointed to find out that he couldn't wear his Spiderman mask to school. So, we recycled his costume from last year:
Later, after a costume change, we were ready for Trick or Treating.
Jellybean put on her owl costume (you can see pictures of it here). She was an adorable owl, but her little arms got a bit tired after a long day of wing flapping. Buddy donned his Spiderman costume. I think I'll be sad when his love of Spiderman ends. He had the same costume last year and we had to move up to the next size this year. My personal opinion is that there is nothing better than little boys who love super heroes.
We've truly hit the best months of the year. Now it's time to put away the Halloween decor and start planning for Thanksgiving. Hooray!
Have a Happy Day!
~MJ
Buddy got to wear a costume to school Halloween morning. He was excited, but disappointed to find out that he couldn't wear his Spiderman mask to school. So, we recycled his costume from last year:
Later, after a costume change, we were ready for Trick or Treating.
Jellybean put on her owl costume (you can see pictures of it here). She was an adorable owl, but her little arms got a bit tired after a long day of wing flapping. Buddy donned his Spiderman costume. I think I'll be sad when his love of Spiderman ends. He had the same costume last year and we had to move up to the next size this year. My personal opinion is that there is nothing better than little boys who love super heroes.
We've truly hit the best months of the year. Now it's time to put away the Halloween decor and start planning for Thanksgiving. Hooray!
Have a Happy Day!
~MJ
Labels:
costume,
Halloween,
owl,
spiderman,
super hero,
trick or treating
Wednesday, October 31, 2012
Halloween Craft: Salt Dough Ghosts
For my birthday, last month, my awesome sister gave me all the ingredients to make some salt dough. With it she printed out this great idea from Family Fun for salt dough ghosts. I thought it would be a fun craft to do with my children on the day before Halloween.
It was a fun craft, unfortunately, I was the only one into actually making the ghosts. Buddy decided that he wasn't interested in salt dough and Jellybean decided to work on her own projects. This included smashing two of my already created ghosts... Anyway, I had fun, Jellybean kept busy and I like my little "ghosties."
Here they are being created:
Jellybean working on her own project with some Halloween cookie cutters:
And then the ghosts after their short stint in the microwave, cooled and faces added:
I don't know how these will hold up, but they will be adorable in my Halloween mantel next year if they are still in one piece. I love the additional craft idea my sister gave me for some spooky paper bag trees. Would be so cute with the ghosts in a Halloween table display.
If you are looking for a ridiculously easy Halloween craft today, this might be the ticket.
Have a Happy Day!
~MJ
It was a fun craft, unfortunately, I was the only one into actually making the ghosts. Buddy decided that he wasn't interested in salt dough and Jellybean decided to work on her own projects. This included smashing two of my already created ghosts... Anyway, I had fun, Jellybean kept busy and I like my little "ghosties."
Here they are being created:
Jellybean working on her own project with some Halloween cookie cutters:
And then the ghosts after their short stint in the microwave, cooled and faces added:
![]() |
| While alive, two of these ghosts were sumo wrestlers. Can't you tell? |
If you are looking for a ridiculously easy Halloween craft today, this might be the ticket.
Have a Happy Day!
~MJ
Sharing on:
Labels:
Autumn,
craft,
decorating,
Fall,
ghosts,
Halloween,
preschool,
Salt dough,
table,
toddlers
Tuesday, October 30, 2012
Wings- Halloween Costume Part 2
A little bit ago, I posted about the beginnings of my daughter's owl costume. Part 1 was the owl hat. It took me a while to get around to part 2, but I finally managed it. Wings! I pulled my inspiration from here (one of my favorite blogs). That link will take you to some other tutorials for this fun project.
I will say that while sewing the wings probably would have been the best method, I just could never find the time nor the gumption to sit down at my machine, so I pulled out my magic hot-glue gun and had at it. It seems to have done the trick with a whole lot less pinning.
The good news is that my little owl loves her wings! Plus, Iaccidentally made them just a little big, so she'll have plenty of time to grow into them. I made the top binding long so that I could tie it to her wrists, but because the wings are a bit large, she is just holding on to the ties for now. I'll probably attach a small loop of elastic that will slip over her thumbs until her arms are a little longer.
I'll be honest, I'm 14 weeks pregnant. I'm tired and I'm sick, so it makes me really proud to have actually accomplished this project. I'm hoping she'll get a lot of use out of her wings.
Have a Happy Day!
~MJ
I will say that while sewing the wings probably would have been the best method, I just could never find the time nor the gumption to sit down at my machine, so I pulled out my magic hot-glue gun and had at it. It seems to have done the trick with a whole lot less pinning.
The good news is that my little owl loves her wings! Plus, I
I'll be honest, I'm 14 weeks pregnant. I'm tired and I'm sick, so it makes me really proud to have actually accomplished this project. I'm hoping she'll get a lot of use out of her wings.
Have a Happy Day!
~MJ
Sharing on:
Monday, October 29, 2012
First Snow Day
The day after the first coat day came the first snow day of the season. The snow has been slowly melting all weekend, but I had to share some of our snow fun from last week.
After the kids had their fun trying to pelt me with snowballs, Buddy and Jellybean decided to build a snow "ghost." It just seemed appropriate for Halloween.
They were pretty proud of their handiwork. (Note that Jellybean does not have matching gloves. I emptied the entire contents of our coat closet looking for the snow gear and I could not find any gloves that matched! I think we'll have to remedy that for the next snow day.)
Have a Happy Day!
~MJ
After the kids had their fun trying to pelt me with snowballs, Buddy and Jellybean decided to build a snow "ghost." It just seemed appropriate for Halloween.
They were pretty proud of their handiwork. (Note that Jellybean does not have matching gloves. I emptied the entire contents of our coat closet looking for the snow gear and I could not find any gloves that matched! I think we'll have to remedy that for the next snow day.)
Have a Happy Day!
~MJ
Wednesday, October 24, 2012
Simple Craft: Halloween Silhouettes
With 7 days left before the holiday, I'm still making some additions to my Halloween decor. I've been wanting to add a little more decoration to our mantel, so I thought I'd create some Halloween silhouettes. It turned out to be a really simple and fun craft. It was also a great project to do during nap time.
Materials:
Glass frames (I found mine for $5 a piece at Michael's)
Textured fabric like burlap or cross stitching material.
Hot glue gun
Sharpie
Printed image to copy for the silhouette.
I found a couple of images online that I liked and printed them off. There are tons of Halloween silhouettes available online.
I took the glass out of my frames, positioned it over the silhouette and then just copied the image straight to the glass using my sharpie.
When I was done copying the image, I hot glued the fabric to the backing in the frame, then laid the glass on top of the fabric. At that point, I could see if there were any spots I had missed and I filled them in.
I actually left the sharpied image facing out. It gives the impression of it floating away from the background a bit.
I really like the way they turned out. They are super simple, but give a fun Halloween flair to the mantel.
It will be fun to bring them out again year after year.
Have a Happy Day!
~MJ
Materials:
Glass frames (I found mine for $5 a piece at Michael's)
Textured fabric like burlap or cross stitching material.
Hot glue gun
Sharpie
Printed image to copy for the silhouette.
I found a couple of images online that I liked and printed them off. There are tons of Halloween silhouettes available online.
I took the glass out of my frames, positioned it over the silhouette and then just copied the image straight to the glass using my sharpie.
When I was done copying the image, I hot glued the fabric to the backing in the frame, then laid the glass on top of the fabric. At that point, I could see if there were any spots I had missed and I filled them in.
I actually left the sharpied image facing out. It gives the impression of it floating away from the background a bit.
I really like the way they turned out. They are super simple, but give a fun Halloween flair to the mantel.
It will be fun to bring them out again year after year.
Have a Happy Day!
~MJ
Tuesday, October 16, 2012
Barnyard Boo
My kids and I took a trip to Farm Country for the annual Barnyard Boo this last week. We thought opening day would be majorly crowded. It turned out that we were first in line.
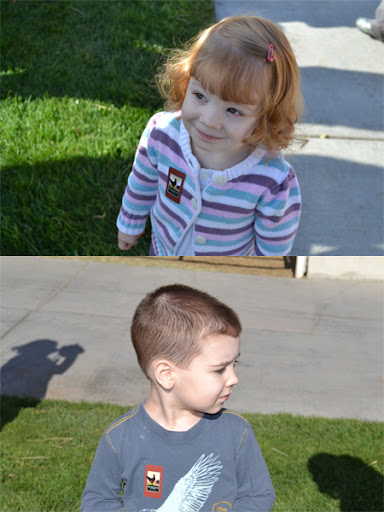
Here's Buddy and Jellybean, don't they look excited?
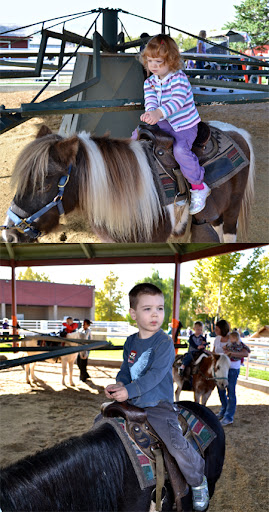
We got the pony rides out of the way at the beginning. Look at my cowgirl and cowboy:
We were at a barnyard, there were a lot of animals to look at, but there were also tons of games set up for the kids. So, the poor animals didn't get much love. Buddy and Jellybean enjoyed a game of croquet and an obstacle course instead.
My sister-in-law joined us with her two girls. Buddy's cousin, A, is his best friend. We enjoyed some more games and a horse-drawn cart ride with them.
Then we decided it was time to put the kids in jail:
It was a good time, one that Buddy has been waiting all year for. Looks like we'll be first in line next year as well.
Have a Happy Day!
~MJ
Here's Buddy and Jellybean, don't they look excited?
We got the pony rides out of the way at the beginning. Look at my cowgirl and cowboy:
![]() |
| Jellybean is riding Chief and Buddy is riding Erica. They were good ponies. This was the first time in a saddle for both of my kids. They were a bit nervous about it. |
![]() |
| They both had fantastic technique (we had to let all of the other kids play through while they figured things out). |
![]() |
| The hurdles were a bit tricky, but look at that form. |
Then we decided it was time to put the kids in jail:
![]() |
| Only A was properly contrite. |
Have a Happy Day!
~MJ
Labels:
activities,
animals,
Autumn,
Barnyard Boo,
Fall,
family,
Farm Country,
fun,
Halloween,
outing,
pony ride,
preschool,
toddler
Monday, October 15, 2012
Painting Spider Webs
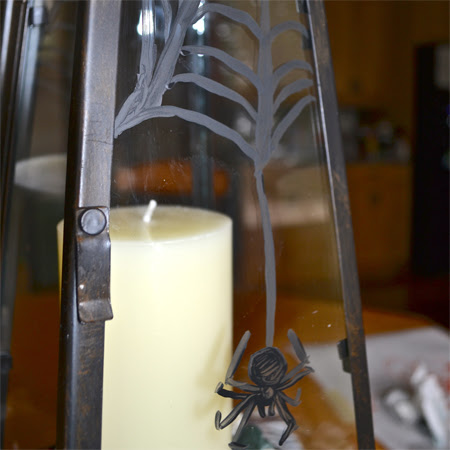
I've seen some great glass painting projects on the web lately. After a little research on how it is done, I decided that I wanted to give a spooky update to the lantern I bought last Spring. I was going to be more ambitious and do our front windows, but I'm afraid that will have to wait until next year.
My poor little air plant bit the dust a few weeks ago. Turns out, that if you go a couple of days too long and forget to water it, it will shrivel up and die. Sad.
First, I cleaned the glass on the lantern. Then I got out some black, water-based, acrylic paint and a thin Golden Taklon brush and set to work. Half way through my first web, I decided that I didn't like how it was going. So, I just used some glass cleaner and wiped the paint right off of the glass. Apparently, when the season is over, all that I'll need to do is soak the paint with water and then use a credit card to scrape it from the glass. I hope it works as well as it is supposed to.
It was a fun addition to our Halloween decor. I'm almost thinking of going overboard and painting our mirrors as well...
Have a Happy Day!
~MJ
My poor little air plant bit the dust a few weeks ago. Turns out, that if you go a couple of days too long and forget to water it, it will shrivel up and die. Sad.
First, I cleaned the glass on the lantern. Then I got out some black, water-based, acrylic paint and a thin Golden Taklon brush and set to work. Half way through my first web, I decided that I didn't like how it was going. So, I just used some glass cleaner and wiped the paint right off of the glass. Apparently, when the season is over, all that I'll need to do is soak the paint with water and then use a credit card to scrape it from the glass. I hope it works as well as it is supposed to.
It was a fun addition to our Halloween decor. I'm almost thinking of going overboard and painting our mirrors as well...
Have a Happy Day!
~MJ
Sharing On:
Labels:
Autumn,
decor,
decorating,
Fall,
glass,
Halloween,
painting,
Spider webs
Thursday, October 11, 2012
Three Non-Spooky Halloween Book Picks
My son is obsessed with Halloween. It is his very favorite holiday. He loves spooky books, but those aren't always my speed or his sister's speed. Luckily, we have managed to find a few favorites that everyone can appreciate. Here are my top three non-spooky Halloween book picks:
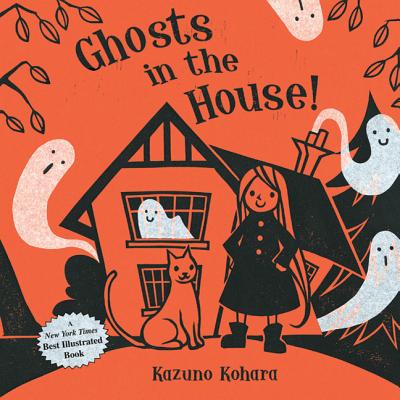
1. Ghosts in the House by Kazuno Kohara
The ghosts that live in this haunted house are easily tamed by the little witch that moves in. She makes quick work and uses these happy little ghosts for her own purposes. Ghosts make great drapes by the way. The illustrations really set this cute, simple story line apart. The dramatic orange, black and white drawings are wonderful. It is a great read-aloud and both of my kids (2 1/2 and 4 1/2) have requested it over and over again.
2. H is for Haunted House by Tanya Lee Stone
A sweet alphabet book with a simple rhyme and cute illustrations. I love how it uses potentially scary elements (neighbors dressed as scary things), but manages to make them light and fun. The costumes, trick-or-treating and the school party are all happy. This is a nice compromise for my kids. Buddy has preferred Y is for Yowl (another alphabet book, but decidedly scarier). Jellybean and I enjoy this one a bit more (I like reading it aloud a lot more) and Buddy still loves the alphabet element.
3. The Skeleton in the Closet by Alice Schertle
This is probably our all-time favorite non-spooky Halloween book. We read it all year round. The story is done beautifully in rhyme and makes a perfect read-aloud. The little boy in the story hears a knock at the door and discovers a skeleton has come to visit. He worries that the skeleton has sinister intentions, but then discovers that he is just in need of some clothes. My kids love the moment when the skeleton is fully revealed: completely non-threatening and even a bit silly looking. The author does a great job of building the tension and then releasing it so that my kids are all giggles by the end. I have read this enough times that I have the entire book memorized, yet I still want to pull it out and read it again. The bad news is that this title is out of print. The good news is that there are used copies for sale out there. Definitely snatch one up (or a few for gifts). You won't be sorry.
Have a Happy Day!
~MJ
1. Ghosts in the House by Kazuno Kohara
The ghosts that live in this haunted house are easily tamed by the little witch that moves in. She makes quick work and uses these happy little ghosts for her own purposes. Ghosts make great drapes by the way. The illustrations really set this cute, simple story line apart. The dramatic orange, black and white drawings are wonderful. It is a great read-aloud and both of my kids (2 1/2 and 4 1/2) have requested it over and over again.
2. H is for Haunted House by Tanya Lee Stone
A sweet alphabet book with a simple rhyme and cute illustrations. I love how it uses potentially scary elements (neighbors dressed as scary things), but manages to make them light and fun. The costumes, trick-or-treating and the school party are all happy. This is a nice compromise for my kids. Buddy has preferred Y is for Yowl (another alphabet book, but decidedly scarier). Jellybean and I enjoy this one a bit more (I like reading it aloud a lot more) and Buddy still loves the alphabet element.
3. The Skeleton in the Closet by Alice Schertle
This is probably our all-time favorite non-spooky Halloween book. We read it all year round. The story is done beautifully in rhyme and makes a perfect read-aloud. The little boy in the story hears a knock at the door and discovers a skeleton has come to visit. He worries that the skeleton has sinister intentions, but then discovers that he is just in need of some clothes. My kids love the moment when the skeleton is fully revealed: completely non-threatening and even a bit silly looking. The author does a great job of building the tension and then releasing it so that my kids are all giggles by the end. I have read this enough times that I have the entire book memorized, yet I still want to pull it out and read it again. The bad news is that this title is out of print. The good news is that there are used copies for sale out there. Definitely snatch one up (or a few for gifts). You won't be sorry.
Have a Happy Day!
~MJ
Sharing on:
Tuesday, October 9, 2012
Sweet Halloween Treat: Ghosts in the Graveyard
Wow, two recipe posts in two days! My sister-in-law made the cutest Halloween treat for our Sunday family get-together, so I had to share. We were celebrating my nephew's birthday and it was so fun to have a sweet treat. She got the idea courtesy of Kraft and mustered her creativity. I do believe that the substitution of Milano cookies was pure genius. Didn't she do a great job?
My mother took one look at the dessert and called me over to take photos for the blog. (Thanks, Mom!) It is such a fun idea for a seasonal dessert. Plus, it's easy and delicious.
I'm pretty sure my nephew was happy about it, too:
Here's the link to the Kraft Ghosts in the Graveyard recipe.
Have a Happy Day!
~MJ
![]() |
| Buddy checking it out. |
I'm pretty sure my nephew was happy about it, too:
![]() |
| He was hamming it up during the birthday song. |
Have a Happy Day!
~MJ
Tuesday, October 2, 2012
Owl Hat- Halloween Costume Part 1
Well, it's October 2nd, so that means that it's time to get serious about the Halloween costume. I actually started Jellybean's costume at the beginning of last month, but have found excuse after excuse to put it off. It's funny how when you have a project that needs to get done, suddenly you have all kinds of inspiration for other projects that aren't nearly as pressing. Well, I can't put the costume off any more. It's time to buckle down and get it done.
Jellybean wants to be an owl. More specifically, a princess owl. Yesterday, I started on the mask portion of the costume.
I started with a paper plate and some felt. I sketched out an acceptable owl mask shape, cut it out and then started on the eye decorations.
Some feathers, the felt and some hot glue took it the rest of the way. Jellybean helped me pick out the feathers. Just so you know, Buddy doesn't agree with the choice of pink feathers. I measured Jellybean's head and attached a felt covered elastic band to the mask. When it was finished, she was really excited to put it on.
She hated it. Apparently, it hurt her nose and her eyes. I think she just didn't like having something on her face. Her solution:
Thus, the owl hat was born. I just added some eyes to the mask holes. I didn't fully attach them, just in case she changes her mind...
She loves it so much more now and didn't want to take it off.
Next up? Wings!
Have a Happy Day!
~MJ
Jellybean wants to be an owl. More specifically, a princess owl. Yesterday, I started on the mask portion of the costume.
I started with a paper plate and some felt. I sketched out an acceptable owl mask shape, cut it out and then started on the eye decorations.
Some feathers, the felt and some hot glue took it the rest of the way. Jellybean helped me pick out the feathers. Just so you know, Buddy doesn't agree with the choice of pink feathers. I measured Jellybean's head and attached a felt covered elastic band to the mask. When it was finished, she was really excited to put it on.
She hated it. Apparently, it hurt her nose and her eyes. I think she just didn't like having something on her face. Her solution:
Thus, the owl hat was born. I just added some eyes to the mask holes. I didn't fully attach them, just in case she changes her mind...
She loves it so much more now and didn't want to take it off.
Next up? Wings!
Have a Happy Day!
~MJ
Sharing On:
Tip Junkie: Tip Me Tuesday
Artsy Play Wednesday
Show Off Your Stuff
Show and Share Saturday
Crafty Mom Share
Artsy Play Wednesday
Show Off Your Stuff
Show and Share Saturday
Crafty Mom Share
Monday, September 17, 2012
"Stain Glass" Leaves and Pumpkins
It's been a little while since I've done a formal art activity with the kids. With Buddy starting school, I've felt a bit at loose ends and haven't been very good at planning. I decided to change that today. I saw this project somewhere on the internets last Fall and have been meaning to do it ever since. Now that Fall is nearly here, I keep seeing it pop up here and there on other blogs, so I decided to get the kids busy today and make some "stain glass" leaves. Buddy, being obsessed with Halloween, decided that he wanted to make "stain glass" jack-o-lanterns instead.
Materials needed:
-Clear contact paper
-Tissue paper
-Construction paper
-Scissors
-Masking tape
-Pen
We started by ripping up a lot of tissue paper in varying shades. I let the kids choose which colors they wanted to use and we went to town on it.
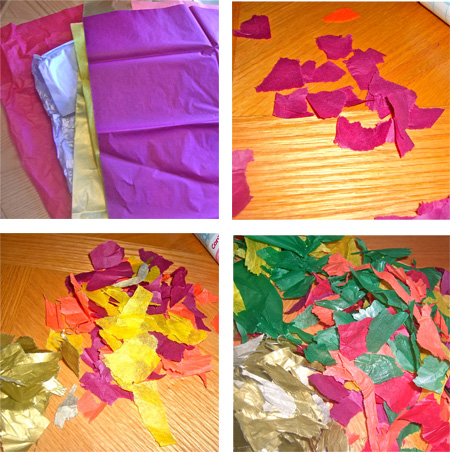
It was not hard to convince the kids to rip up paper. Jellybean could hardly contain her glee, "Mama, I'm making a mess!"
Once the kids were done ripping up the paper, I sent them off to play for a little while. I sketched out a maple leaf on some scratch paper and then copied it onto the back of the contact paper a couple of times. Then, I also sketched out a couple of simple pumpkin shapes.
I cut those out, peeled off the backing and placed them sticky side up in work stations for the kids. I used just a little bit of masking tape to secure them in place.
Materials needed:
-Clear contact paper
-Tissue paper
-Construction paper
-Scissors
-Masking tape
-Pen
We started by ripping up a lot of tissue paper in varying shades. I let the kids choose which colors they wanted to use and we went to town on it.
![]() |
| Torn up tissue paper pile got larger and larger. |
![]() |
| Jellybean was pretty proud of the mess she was making. |
Once the kids were done ripping up the paper, I sent them off to play for a little while. I sketched out a maple leaf on some scratch paper and then copied it onto the back of the contact paper a couple of times. Then, I also sketched out a couple of simple pumpkin shapes.
I cut those out, peeled off the backing and placed them sticky side up in work stations for the kids. I used just a little bit of masking tape to secure them in place.
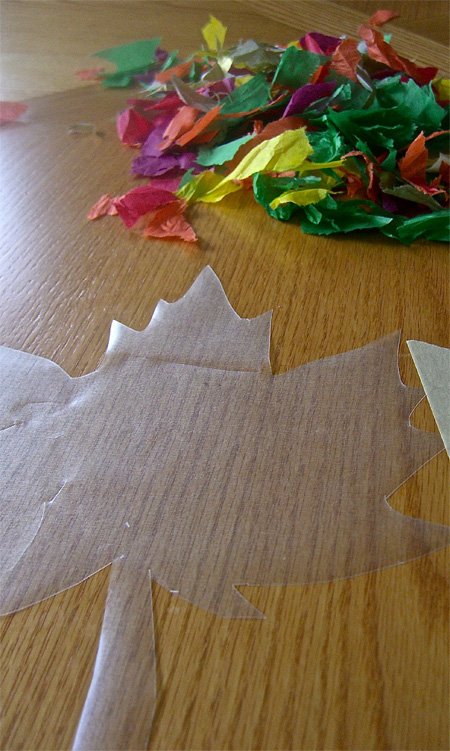
![]() |
| Contact paper maple leaf ready to go. |
Then I cut out a few jack-o-lantern eyes, noses and mouth shapes for Buddy's pumpkins.
I called the kids over and they started to cover the contact paper with the torn-up tissue and face shapes for the pumpkins.
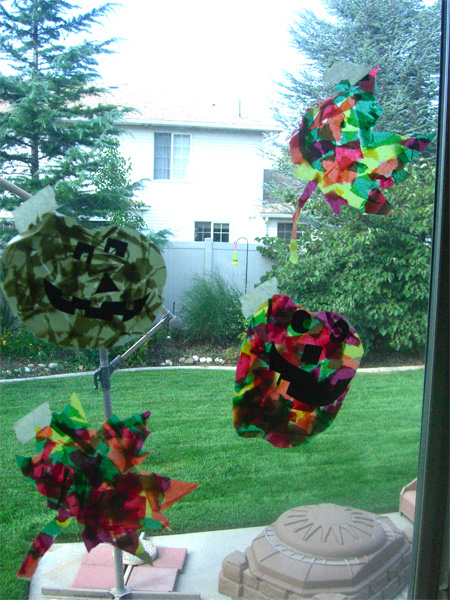
The kids had a really fun time plastering their shapes with color. Once the shapes were completely covered, I removed the masking tape and used my scissors to clean up any tissue that went out of the shape. We hung them up in the window to get the full effect. I think they turned out pretty cute.
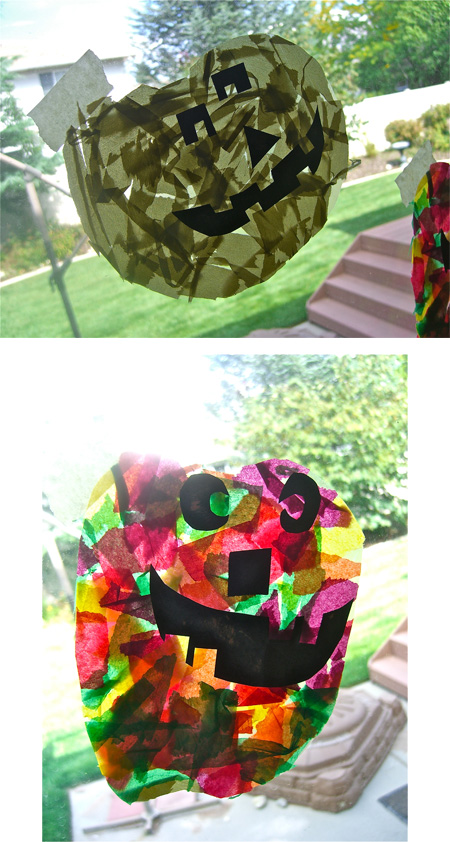
![]() |
| Stain Glass Jack-O-Lanterns. Buddy loves the gold one. |
![]() |
| Stain Glass Leaf. My photos don't quite catch how pretty these are in the window. The sun shining through really makes the colors pop. |
![]() |
| All of the shapes hung up over looking the back yard. Note our wasp trap, in the background, that is completely full. |
Definitely a fun afternoon project. We're really getting excited for Fall over here.
Have a Happy Day!
~MJ
Sharing On:
Labels:
Art,
Autumn,
diy,
Fall,
Halloween,
jack-o-lantern,
leaf,
preschool,
project,
pumpkin,
stain glass,
window
Subscribe to:
Posts (Atom)