Showing posts with label Children. Show all posts

Thursday, February 13, 2014

Happy Heart Day!

This year, for Valentine's, Buddy wanted to make something special for his classmates at school.  So, we pulled out the perler beads and got to work. We've been playing with the larger beads. I think they are way easier for small fingers to work with.
He designed the hearts himself and I ironed them and hot glued a pin to the back.
We mounted most of the pins inside some ready made cards that Buddy received in his Karate class. I'm torn about advertising with a valentine, but he really likes them and it was less work for me.  He's really excited to give his friends something that he designed. He even has one special heart for his favorite friend in class. What do you think? Better than candy?

Have a Happy Day and a Great Heart Day.

~MJ

Tuesday, February 19, 2013

Indoor Fun: Puff-Ball Air Cannon

While the weather is continuing to warm up some, we've still had days when it is too cold to go out or air quality is too poor.  So, we've had to get creative.  One our favorite indoor games is creating a puff-ball air cannon.  Grab some puff-balls, an old poster tube and a blow dryer.
Plug the blow dryer in and place it inside the bottom of the poster tube. Then load it up with puff-balls (not too many, or they'll get stuck).
Turn on the blow dryer (on the coldest setting) and wait for the fun.
Then do it over
and over again! Yeah, it's pretty fun.

Have a Happy Day!

~MJ

Thursday, December 13, 2012

Another Little Announcement

We went in for my 20 week ultrasound yesterday. Before we went in, we asked Jellybean and Buddy if they thought they'd be getting a little brother or a little sister. Buddy was dead set on it being a baby brother and Jellybean was dead set on it being a baby sister. Those two kids are pretty opinionated. Jellybean even stated that she wouldn't share her toys if it turned out to be a boy. We've had a lot of conversations about that and it's good that we did.

We found out today that we're having a BOY!

Fortunately, Jellybean is the type of girl that will be able to hold her own between two brothers.
Jellybean got to come with us to the ultrasound while Buddy went to preschool.  She snacked on her goldfish and nodded sagely as the doctor pointed out different parts of the baby's anatomy. Then she repeated technical words as if she'd also earned her medical degree. We may have over estimated her medical knowledge, however. When D asked her where her brain is and she answered, "I don't have a brain."

I don't think I'll ever get over how amazing that ultrasound is. The doctor even zoomed in so we could see the baby's mouth making sucking movements. He looks perfect.

I can hardly believe that we're halfway there! When we walked out of the hospital, D commented, "Now, the hard part begins."  I was a little confused as I'm pretty sure I'm currently doing "the hard part".  Then he stated, "Now we have to figure out the name."

Have a Happy Day!

~MJ

Thursday, November 29, 2012

Nativity Play

Growing up, my siblings and I had a white plastic nativity set that we could set up and play with during the Christmas season. For the last few years, I've been looking for a nativity set that my children could enjoy. The Little People set seems to be popular, but I just don't like the look of it. I guess I'm picky, but I've also had it in my head that I'd like to make the nativity set.  Two years ago, I purchased this nativity pattern from BuggaBugs on Etsy. The pattern is really well done, but I just haven't been able to find the time to actually complete it. Last year, the excuse was that I could not find flesh-toned felt.  This year I'm determined to make at least the baby Jesus, Mary and Joseph. I even ordered some felt from one of my favorite shops on Etsy, Giant Dwarf.
Isn't that adorable?
While Buddy was at preschool yesterday, Jellybean and I went to peruse the toy store. I noticed the Melissa and Doug nativity set was on sale and I liked the way it looked. So, I broke down and bought it.
The kids have already taken to it, setting it up and moving the figures around. I still plan on making the other set, but at least they have something to play with in the meantime.

Have a Happy Day!

~MJ

Friday, July 20, 2012

Random. Awesome. Friday.

I don't usually post on Friday.  This is my Pinterest/catch up on blogs day. I'm breaking from the usual routine because I have a few totally random tips that I wanted to share:

1. Bake Don't Boil Eggs:
I found this awesome idea on Pinterest, but it's really all thanks to Alton Brown from America's Test Kitchen.  Turns out that it is 20 times easier (at least for me) to hard cook an egg in the oven instead of boiling it on the stove.  Plus, less sulfur smell and the eggs come out perfectly every time.  I've been baking eggs weekly since I got this tip. 325 degree oven, 30 mins. Place in ice bath immediately for about 10 minutes. Peel eggs, put back in ice bath to completely cool. Keep in a sealed container in the fridge. I'm now able to enjoy deviled eggs any time I want. :)

2. Dryer Sheets on Water Stains:
My awesome sister in law gave me this great tip.  I was having trouble cleaning the glass surrounds on my shower.  I tried a ton of different options, this one took the cake. Turns out that a slightly damp dryer sheet is excellent for removing water stains on the glass.  Rub the glass well with the dryer sheet and then finish up with a slightly damp microfiber cloth and you'll have lovely clean glass that you can actually see through.

3. Engage, Embrace, Enjoy:
Nice little tip brought to you from the lovely people at Dove chocolate.  I eat an embarrassing amount of chocolate. So much actually that I've mostly stopped reading the little sayings inside of each wrapper.  Well, I read one today and found it particularly applicable to my current state of mind regarding my children.  I'm sure it had more to do with life in general, but I decided, as a mother, that this would be an excellent daily mantra.  I need to engage my children more, embrace them more and just simply enjoy them more. Words to live by and a tasty piece of chocolate to boot. Not bad.

Have a Happy Day!

~MJ

Tuesday, July 3, 2012

Fizzing Planet Art

Jellybean's complete planet with extra cheesy grin.
We had fun with a new rainy scorching day activity this last week.  This was inspired by an art project that I've seen several times floating around Pinterest.  The nice thing about this project is that all of the materials needed were already in my pantry.  
Buddy and Jellybean working on their creations.
The concept is simple: you fill a pie plate with baking soda.  Then you tint vinegar with food coloring.  We used some ramekins to hold our color. It's so fun to see the baking soda and vinegar fizz each time some color is added to the pan.  It's also fun because the color stays where you put it.
Adding more and more color. Jellybean started adding baking soda to her ramekins so that the entire thing would fizz.
Unfortunately, the one tool that would have made this more fun would have been an eye dropper.  Since I didn't have one available, I had the kids use straws to drip the vinegar into the baking soda. It works in theory, but in practice, this method is pretty frustrating for a 2 and 4 year old. So, I took away the straws and handed them each a spoon. That's when the art work took a serious turn.
Plates transforming into alien planets
Now they were adding a lot of color to the plate. The baking soda still provided some great fizz and added a base so that the color would somewhat stay where it was placed. Buddy started talking about his moster planet and the different monsters that live there. Jellybean was pleased with her pretty alien planet and enjoyed sampling the vinegar color (ick).
Buddy putting the final touches on his monster planet.
This is a great activity for a day when you can't be outside.  They spent a good 45 minutes to an hour on their fizzing planets.  Buddy is already excited to make another one. In fact, if I'd had more baking soda, we would have made more that day.


So, what are your favorite rainy/scorching hot day activities??  


Have a Happy Day!


~MJ

This post is participating in:
  Tip Junkie handmade projectsPhotobucket

Monday, June 18, 2012

Father's Day 5 Minute Craft

We just finished celebrating Father's Day in our home.  It was a nice day.  We got to spend time with my Dad, D's Dad and D's Grandfather. 
To celebrate the dad in this house, the kids helped me put together a little gift.
I had some scrap booking paper on hand, so I traced the kids' hands on some scrap paper and used that as a pattern for cutting out their prints in color.  Then I photoshopped a message and printed it out on some patterned paper.  After I glued on the hands, I slapped the entire thing in a frame and whallah!
If you are interested in the template for the message, here it is:
Best Dad Template for 8.5X10 Print
I got the inspiration for this project from this awesome blog: Roots & Wings Co.
You'll notice, that she did her lovely piece on a painted canvas with the hands actually going down, which may or may not add a little extra cuteness to the phrase, "hands down." Also note that their dad is apparently, "the World's Best" That's a pretty lofty claim. Sorry, D, I couldn't quite go there. heh.
This version seemed a little more, what's the word...work. I'm too lazy for canvases and paint. Especially if the project calls for a canvas and paint on the evening prior to Father's Day and the stores are already closed. I do wish I had placed the hands pointing down though, I totally missed that element.  I didn't even notice until D was unwrapping it.  He claims that it doesn't make a difference. I'll take his word for it.

I hope you all had a fantastic time celebrating the dads in your life.

Have a Happy Day!

~MJ

Thursday, June 7, 2012

Eye Spy Discovery Bottle

Buddy came home from church on Sunday with a little discovery bottle filled with treasures for him to look at it. It was his "eye spy." He was smitten with it and carried it everywhere. He even carried it to the grocery store where he promptly left it in the car cart we were using.  I didn't notice that he didn't have it with him and he didn't notice either until we got home.  He was devastated.

So, (in order to stop the sobbing) we decided to make our own... 
We went on an expedition to Hobby Lobby and picked out a few little things to go in our brand new eye spy bottles. Buddy was especially enthusiastic about the ABC beads we found.  I gathered a few more items around the house and then I let Buddy and Jellybean pick what they wanted in their bottles. After they had put in what they wanted, I poured in a generous amount of corn syrup and glitter.
In retrospect, we should have used smaller bottles. I also should have added more glitter. The glitter looks really cool throughout the corn syrup. All in all, the kids are happy with their bottles. Buddy reminds me daily that he is sad he lost his eye spy, but he likes that his new one has ALL of the letters.
To add a little personality and to secure the cap on the bottle, I glued on a bit of ribbon and felt.  With that much corn syrup in there, I wanted to make sure the cap was on tight.

Here's a link to an entire page of discovery bottle ideas.  There are a ton of great ones.
Discovery Bottle Ideas

Have a Happy Day!

~MJ

This post is participating in:
 Photobucket

Tuesday, June 5, 2012

Quiet Activity Idea: Handkerchief Folding

When I was a little girl, my mom would bring a simple white handkerchief to church and would fold it into a baby cradle in order to keep me entertained.  I loved it and would request it often.  As a child, it seemed like magic. Recently, I started carrying a bandana in my church bag and have been experimenting with some different ways to fold it.  Jellybean likes these handkerchief tricks as much as I did all those years ago.  It's a fantastic quiet activity for church or the doctor's office.  Here are two folding ideas that we've been enjoying.

The Bandana Bunny:
Start with a flat bandana and knot the top two corners. Bring the corners together and tie a big knot to create the bunny head and ears.
Knot the remaining corners into two little arms and bring the knot up in the back to make a little bunny tail.

Handkerchief Baby Cradle:
Fold handkerchief into a triangle. Roll each corner to the center, then fold in half. Take corner on very top and fold out and around to create the cradle.  Look, they're twins!
Jellybean likes to hold the cradle by each corner and rock it while singing, "Rock a bye, rock a bye."

Throw a bandana or a handkerchief in your bag and experiment with some folding of your own.  Here are a couple more ideas that I found out on the web.

Handkerchief Doll
Handkerchief Mouse (I couldn't figure this one out. I'm special like that, so maybe you can.)

Have a Happy Day!

~MJ

This post is participating in:
 Today's Creative BlogTip Junkie handmade projectsPhotobucket

Monday, May 14, 2012

Mother's Day 2012- Hand Print Pots

I had a wonderful Mother's Day.  I got to sleep in an entire extra hour.  Imagine my surprise when at 6:40AM my daughter began calling for me and D sat up in bed and asked if he should go get her.  Awesome.  D and my sweet children picked me out some beautiful roses and some delicious chocolate truffles as well.  It was a very enjoyable day indeed.  I felt appreciated and I was also reminded about how much I enjoy being a mom to my two amazing children.

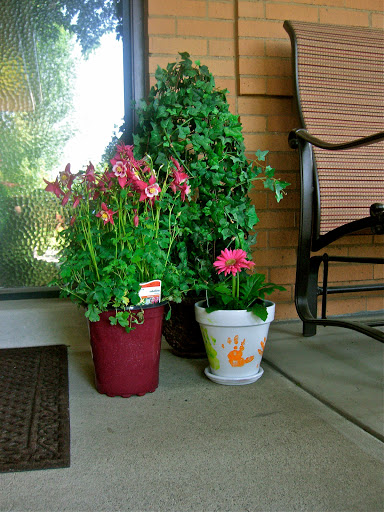
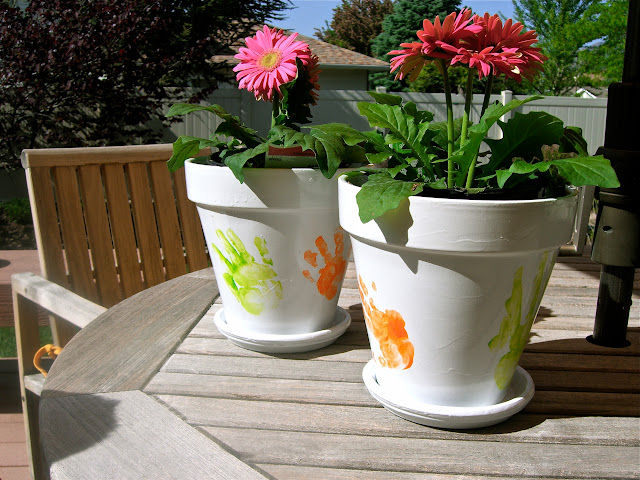
We wanted to give a small gift to my mother, D's mother and D's grandmother so that they'd know we were thinking about them on this special day.  I love to remember my children's little hand prints and you can't go wrong with something for the garden or front porch in our family.  I came up with some hand print flower pots.

They aren't anything spectacular, but I think they turned out cute.
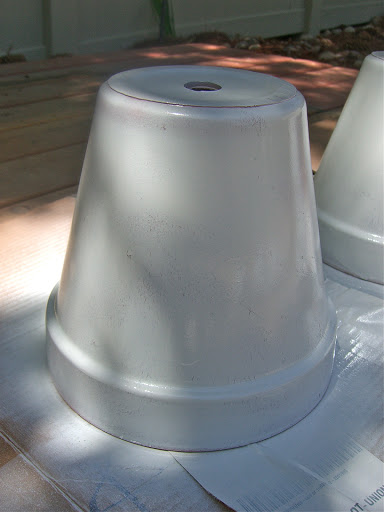
I started with some terra cotta pots and spray painted them white.  Two coats, inside and out.
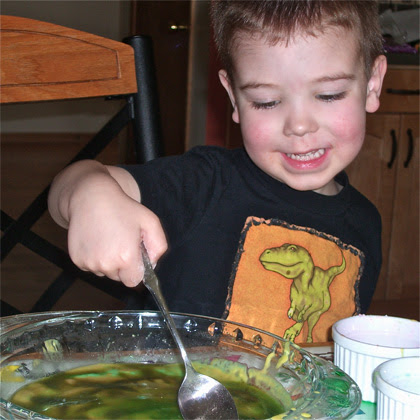
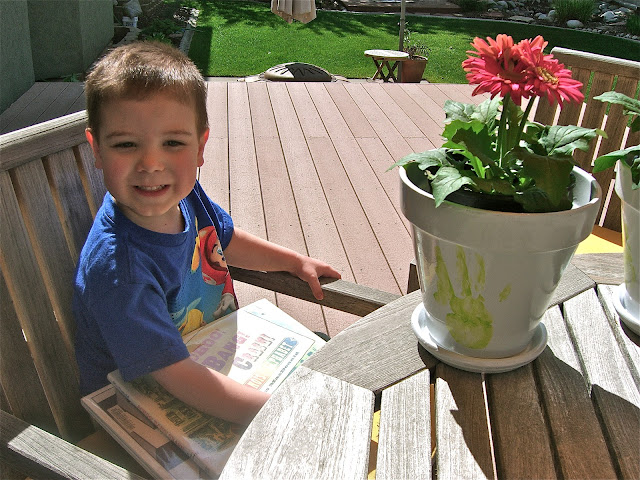
The next day, we had some fun with finger paint. This was a group effort. The kids were mostly cooperative.
After the hand prints dried, I sprayed them with two coats of clear, protective sealer.  I was especially careful to coat the inside.  The idea is to keep the moisture from seeping through the inside of the pot and peeling the paint on the outside.  I'm no expert, so hopefully, these will last a while.  
I used a sharpie to write the kids' names and the date on the inside of the pot.  I was really surprised when the letters ran a little when I was spraying them with the sealant.  I'm not sure what else I could have used though. It still turned out okay.
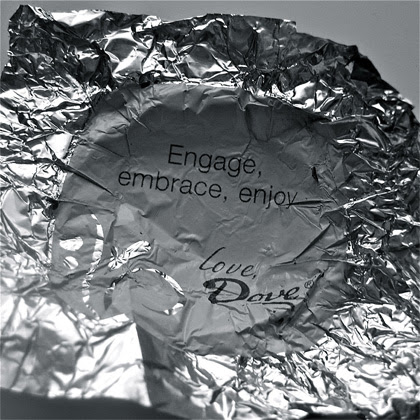
D and I giggled over one of the Mother's Day advertisements that we saw while we were out on errands over the weekend.
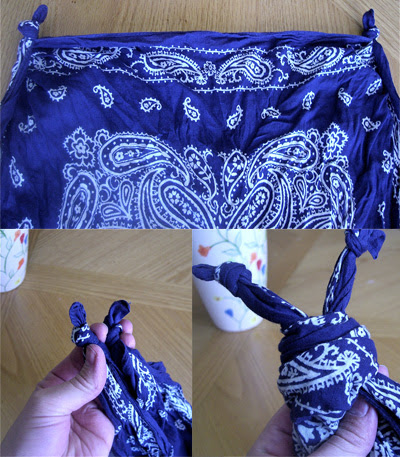
We started conjecturing over what "Love Chocolate" could be and if they sanitize their counters after they make it. I'm not sure I really want to know. heh.  Now I hope there's no one out there making fun of all the grammatical errors on this blog...

Have a Happy Day!

~MJ


This post is participating in:
 Tip Junkie handmade projectsToday's Creative BlogPhotobucket