I don't usually post on Friday. This is my Pinterest/catch up on blogs day. I'm breaking from the usual routine because I have a few totally random tips that I wanted to share:
1. Bake Don't Boil Eggs:
I found this awesome idea on
Pinterest, but it's really all thanks to Alton Brown from America's Test Kitchen. Turns out that it is 20 times easier (at least for me) to hard cook an egg in the oven instead of boiling it on the stove. Plus, less sulfur smell and the eggs come out perfectly every time. I've been baking eggs weekly since I got this tip. 325 degree oven, 30 mins. Place in ice bath immediately for about 10 minutes. Peel eggs, put back in ice bath to completely cool. Keep in a sealed container in the fridge. I'm now able to enjoy deviled eggs any time I want. :)
2. Dryer Sheets on Water Stains:
My awesome sister in law gave me this great tip. I was having trouble cleaning the glass surrounds on my shower. I tried a ton of different options, this one took the cake. Turns out that a slightly damp dryer sheet is excellent for removing water stains on the glass. Rub the glass well with the dryer sheet and then finish up with a slightly damp microfiber cloth and you'll have lovely clean glass that you can actually see through.
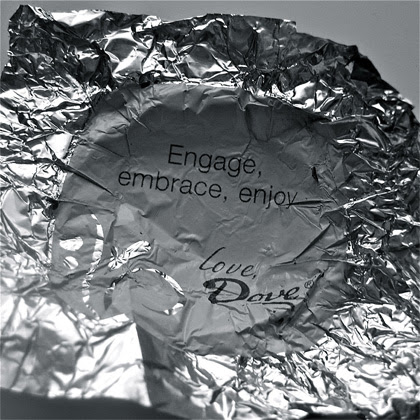
3. Engage, Embrace, Enjoy:
Nice little tip brought to you from the lovely people at Dove chocolate. I eat an embarrassing amount of chocolate. So much actually that I've mostly stopped reading the little sayings inside of each wrapper. Well, I read one today and found it particularly applicable to my current state of mind regarding my children. I'm sure it had more to do with life in general, but I decided, as a mother, that this would be an excellent daily mantra. I need to engage my children more, embrace them more and just simply enjoy them more. Words to live by and a tasty piece of chocolate to boot. Not bad.
Have a Happy Day!
~MJ